
For a brief overview of the Anewgo Lead Registration service, please go here.
Step-By-Step Instructions
For details of using Zapier with Lasso, see step 14.
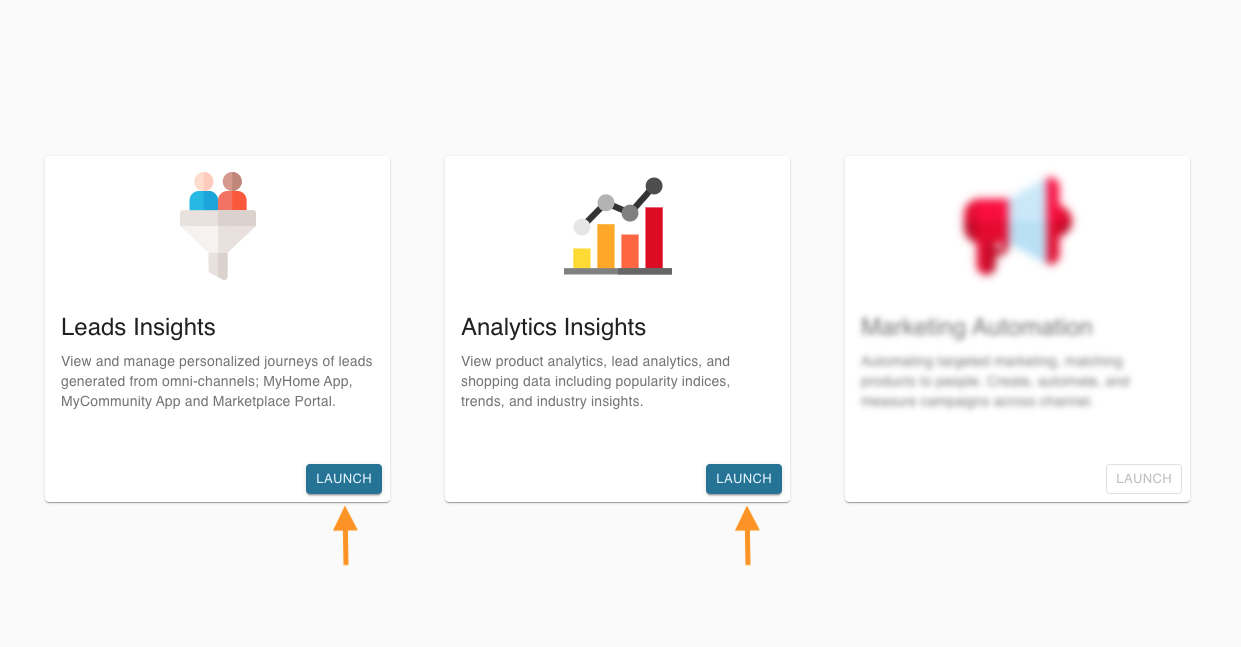
- Log into your Anewgo Insights Account. Click “Launch” on either Leads Insights or Analytics Insights (either one will take you where you need to go).
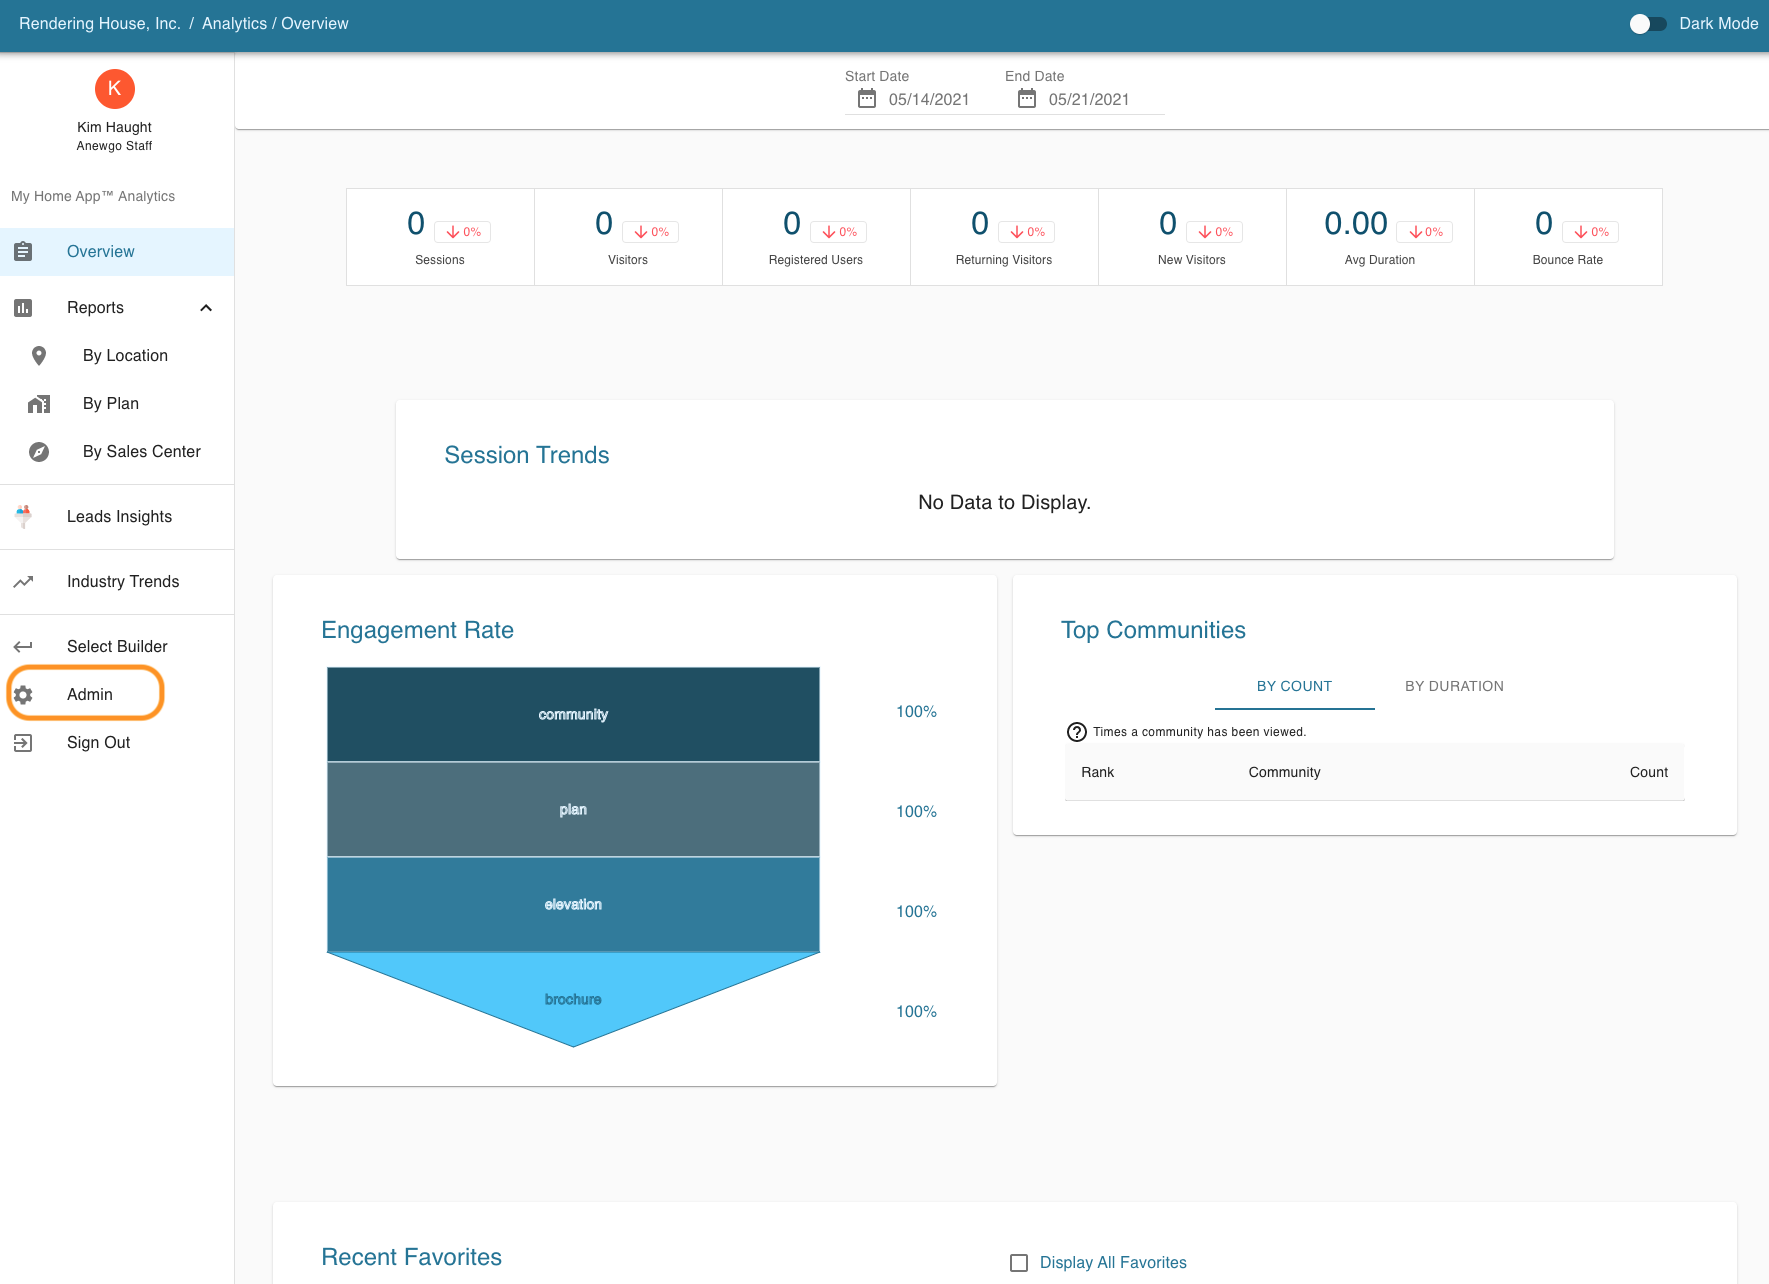
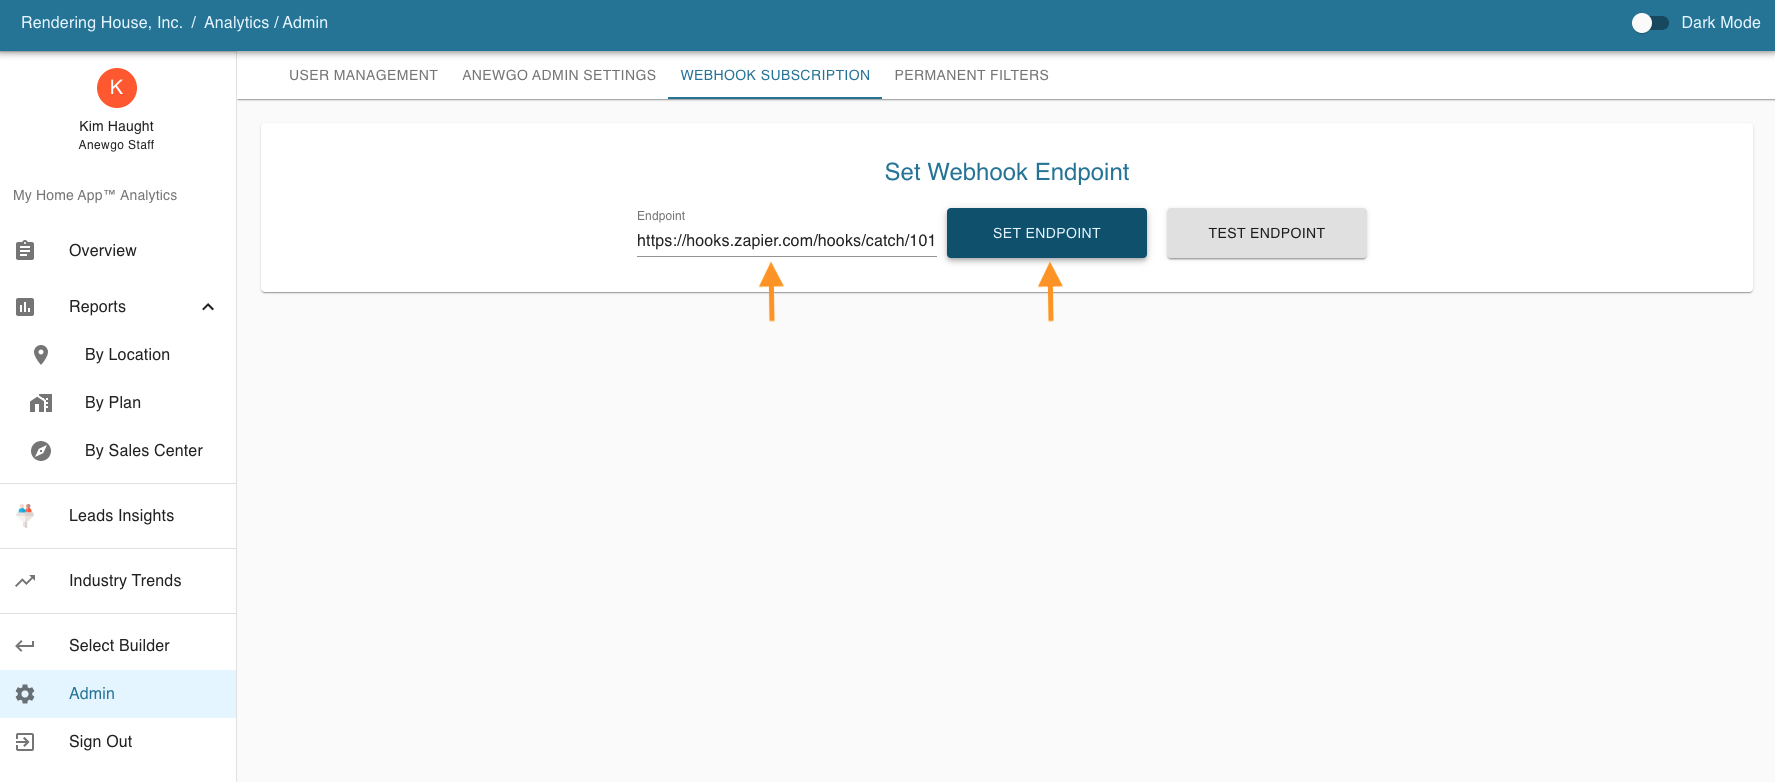
2. Find “Admin” on the left hand menu and click it.
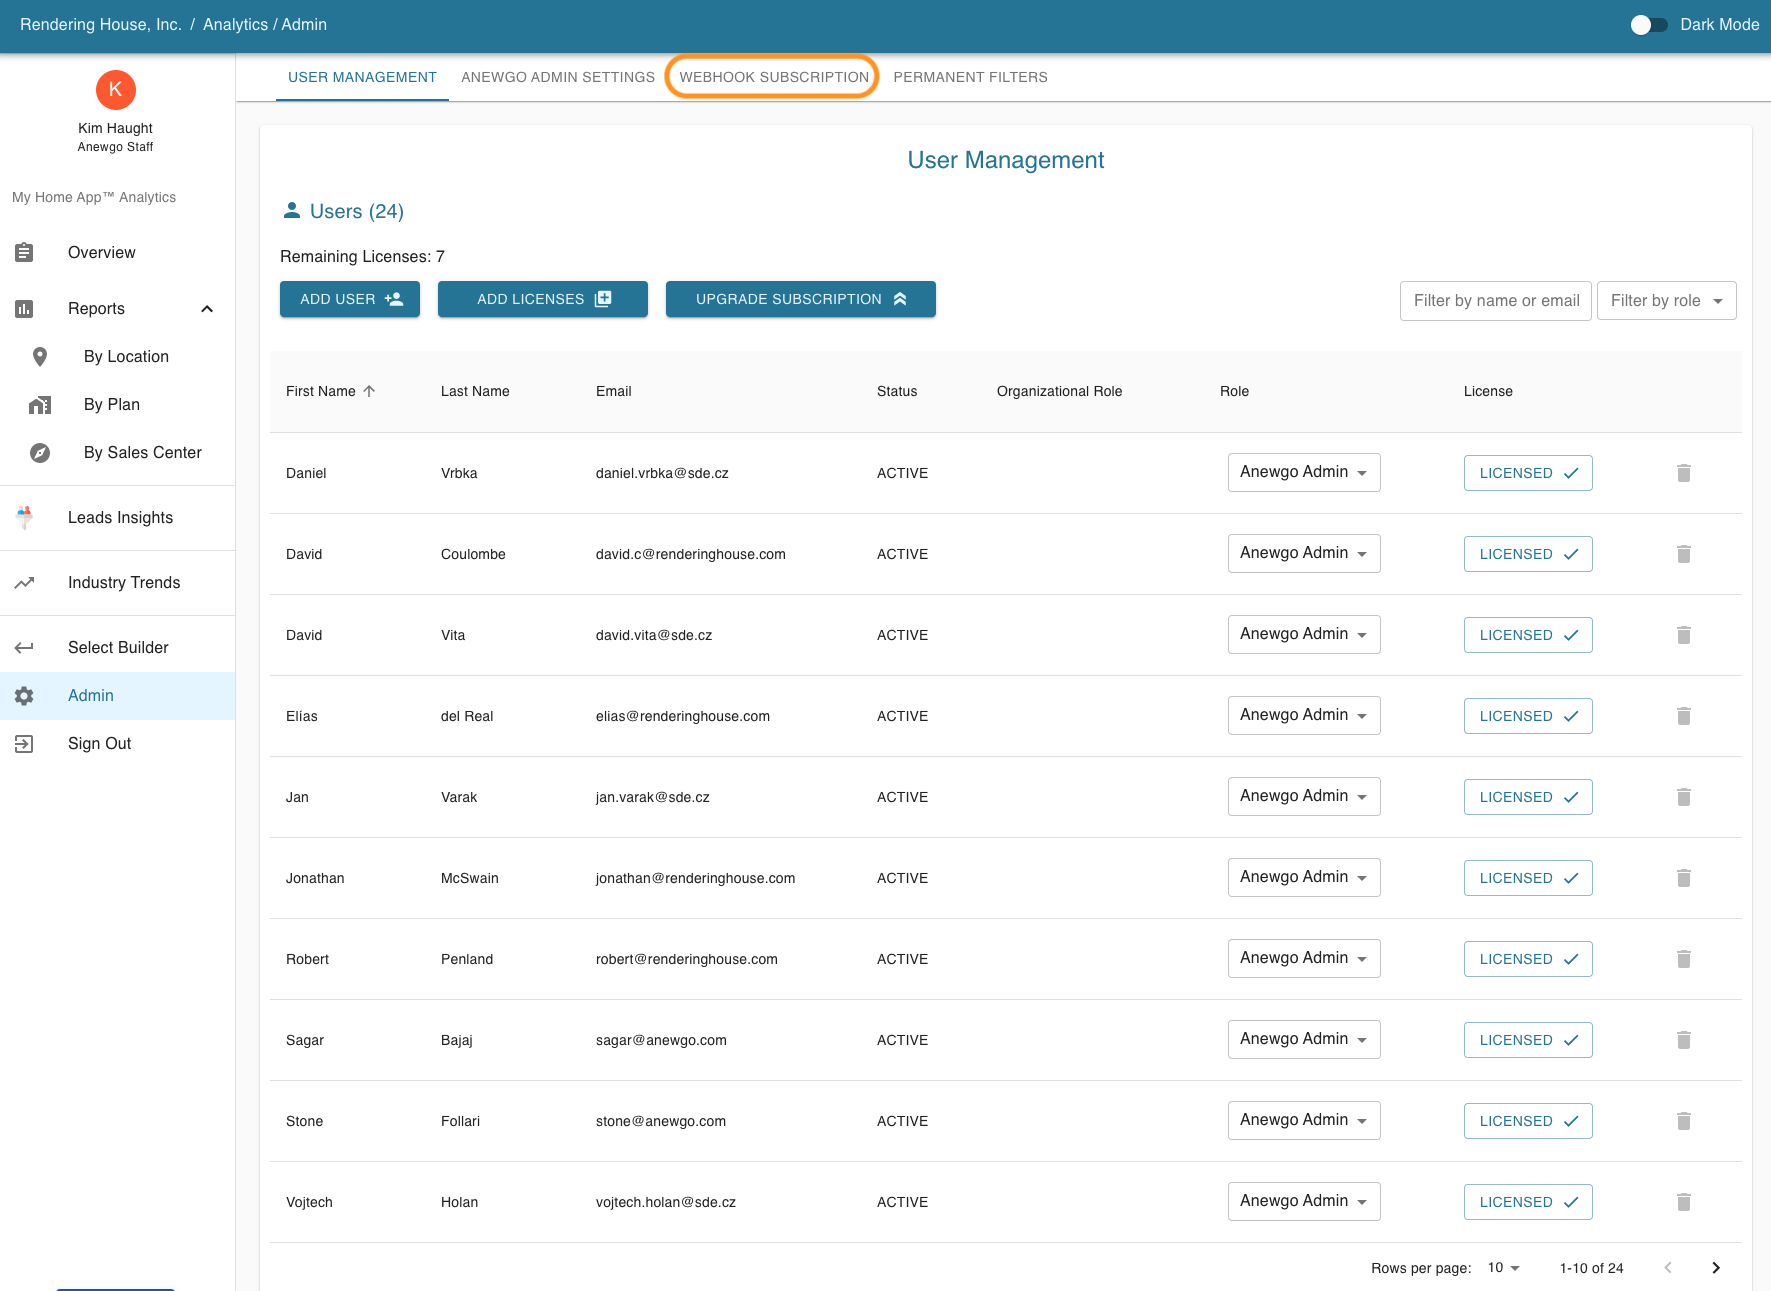
3. Then click “Webhook Subscription”
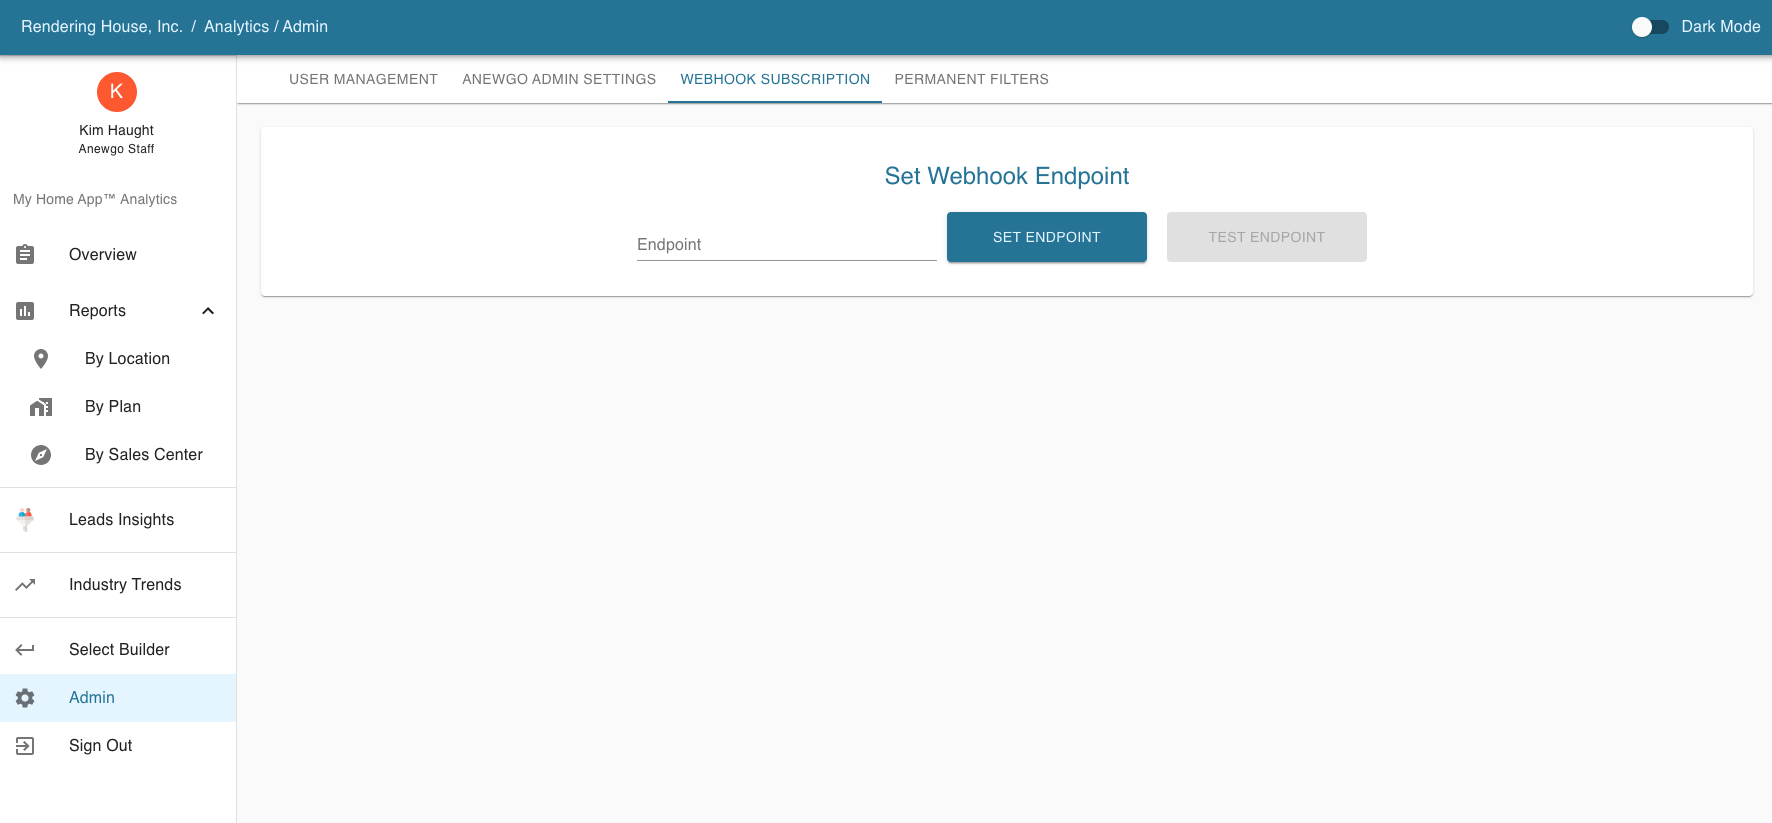
4. This is where you will enter the Webhook URL.
5. Set up your Webhook URL – in this example, we will use Zapier. Go to Zapier and click “Make a Zap”

6. Edit the name of your Zap in the upper left. Then to set up the Trigger, click “Webhook”
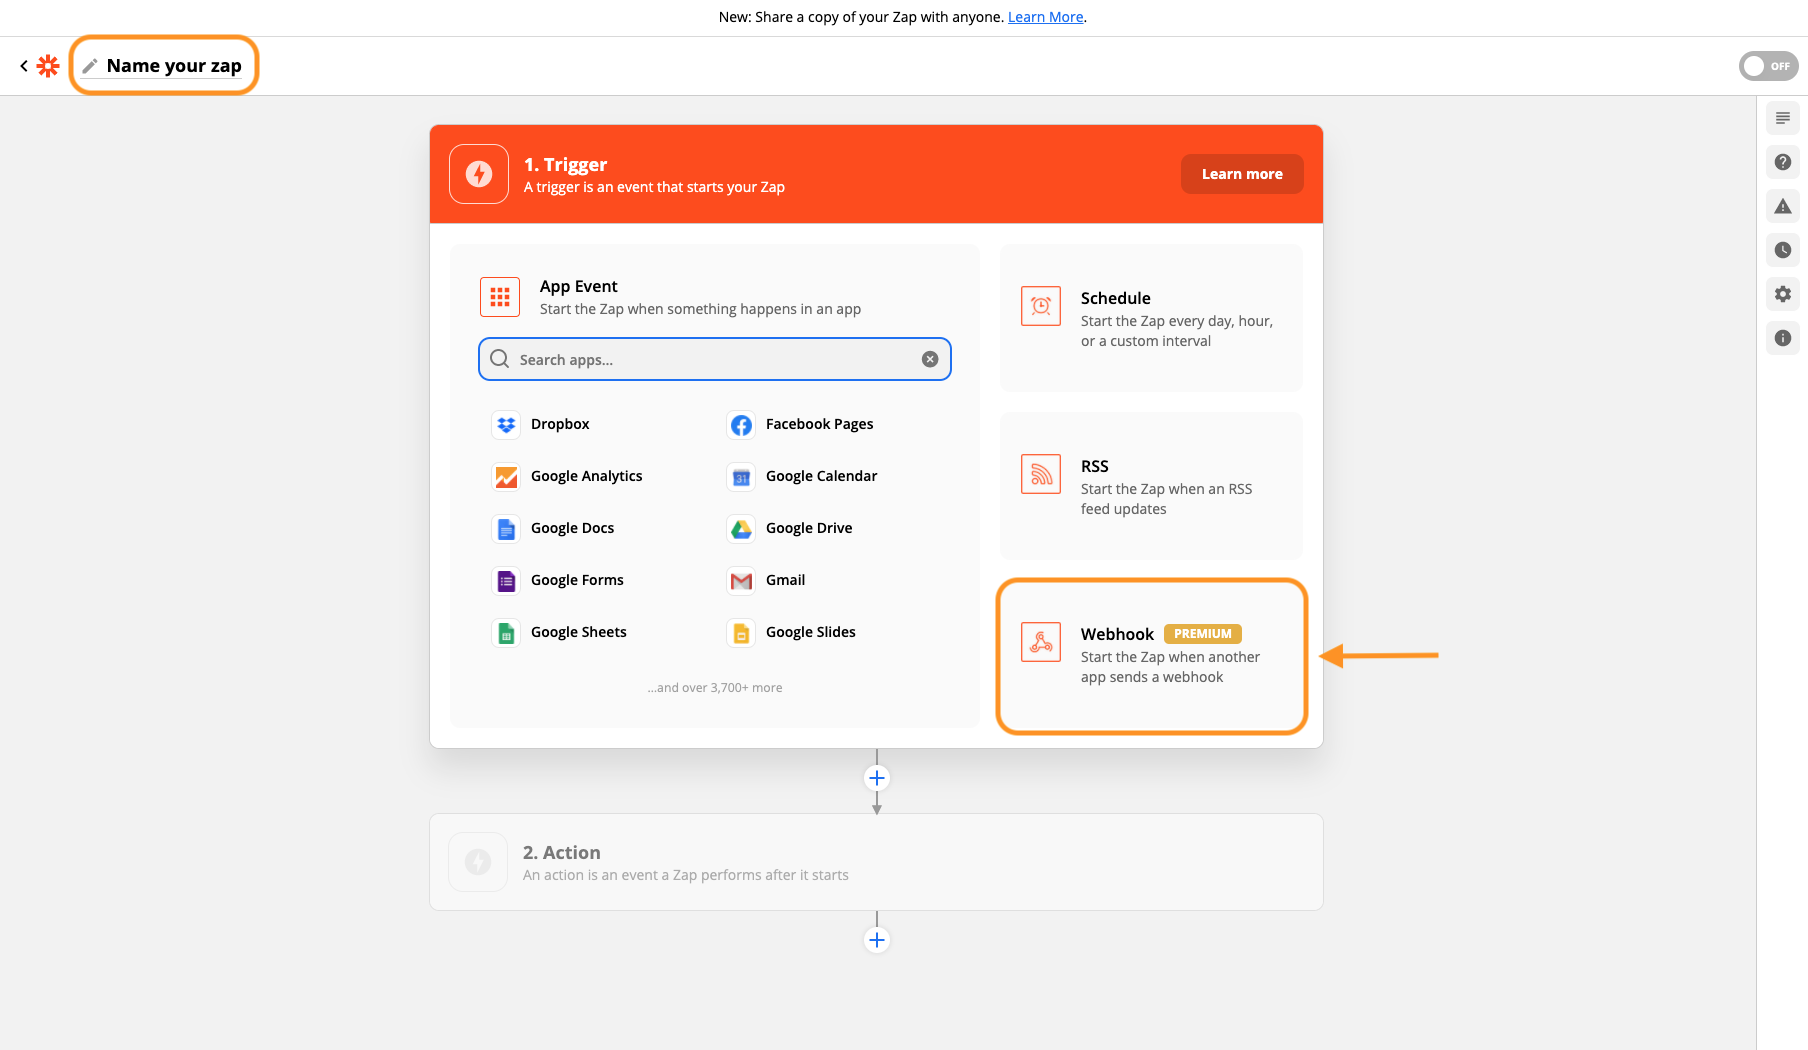
7. Under “Trigger Event” select “Catch Hook”

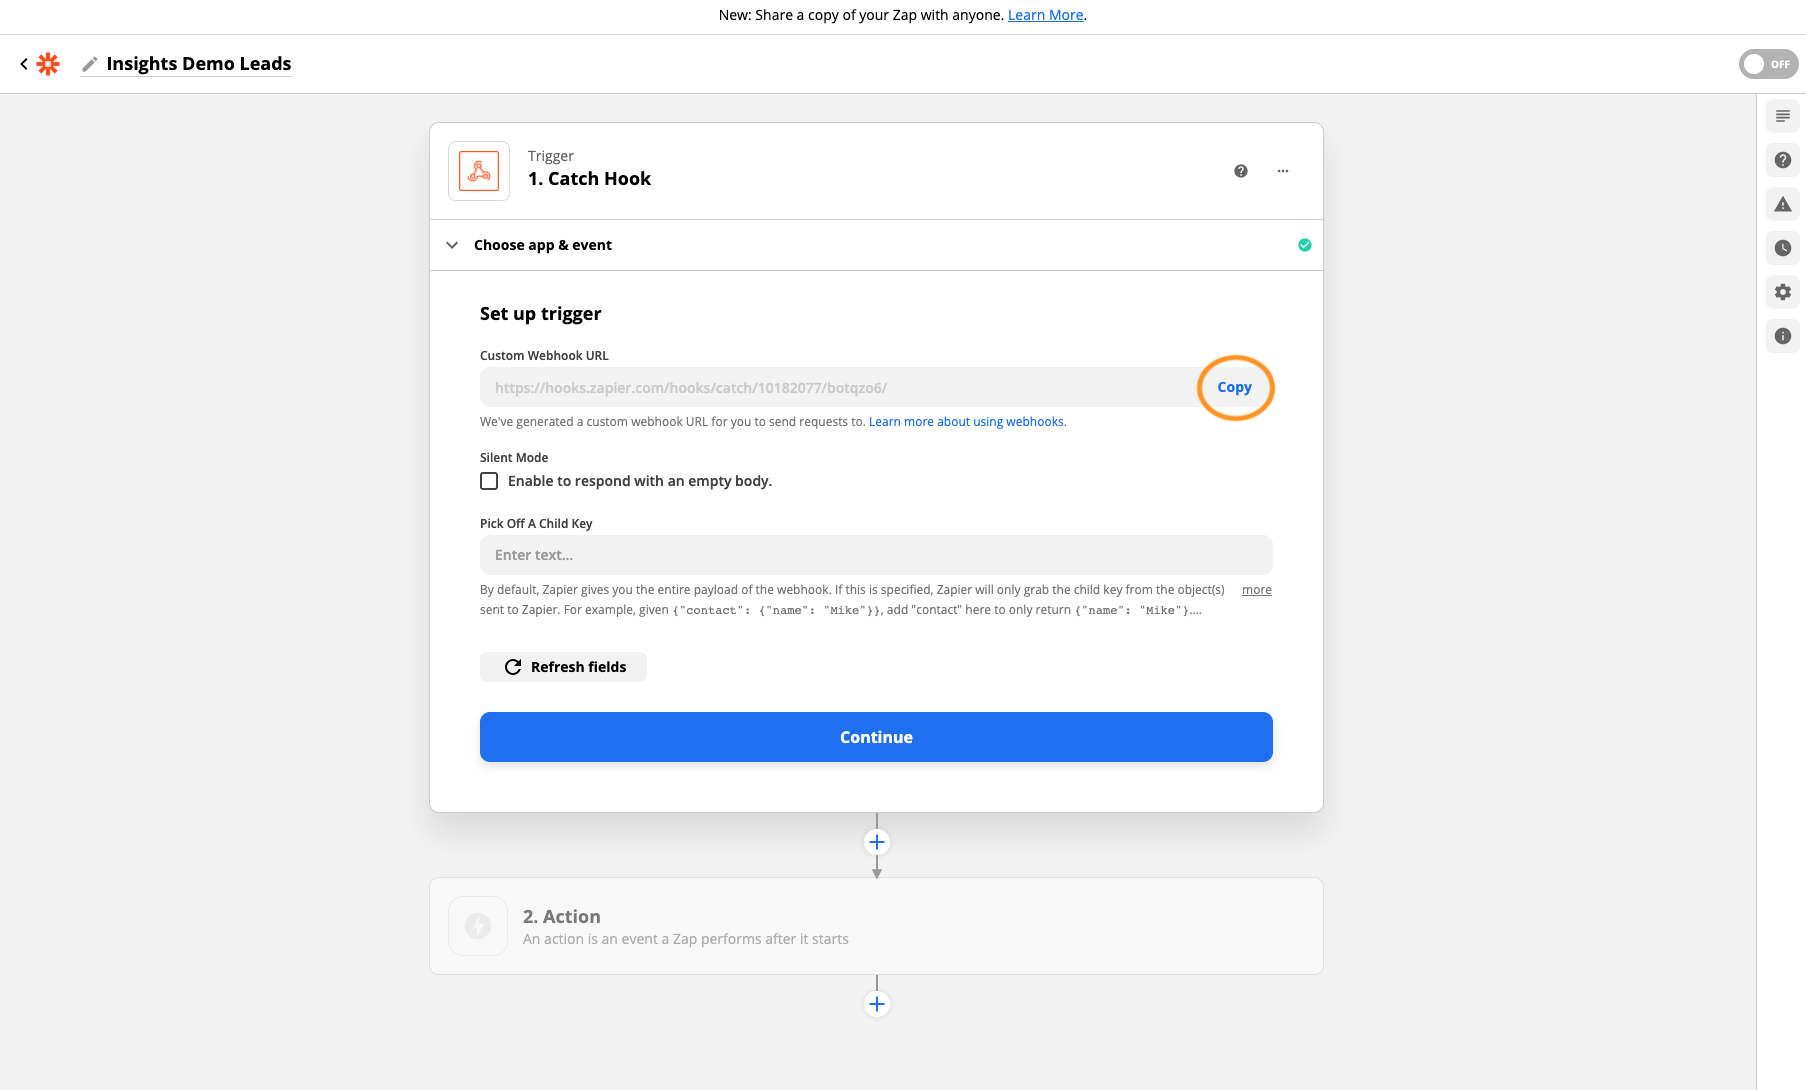
8. Click “Continue”

9. This will set up your Custom Webhook URL. Click “Copy”
10. Go back to your Anewgo Insights Dashboard and paste the link into the Webhook Subscription field. Click “Set Endpoint”
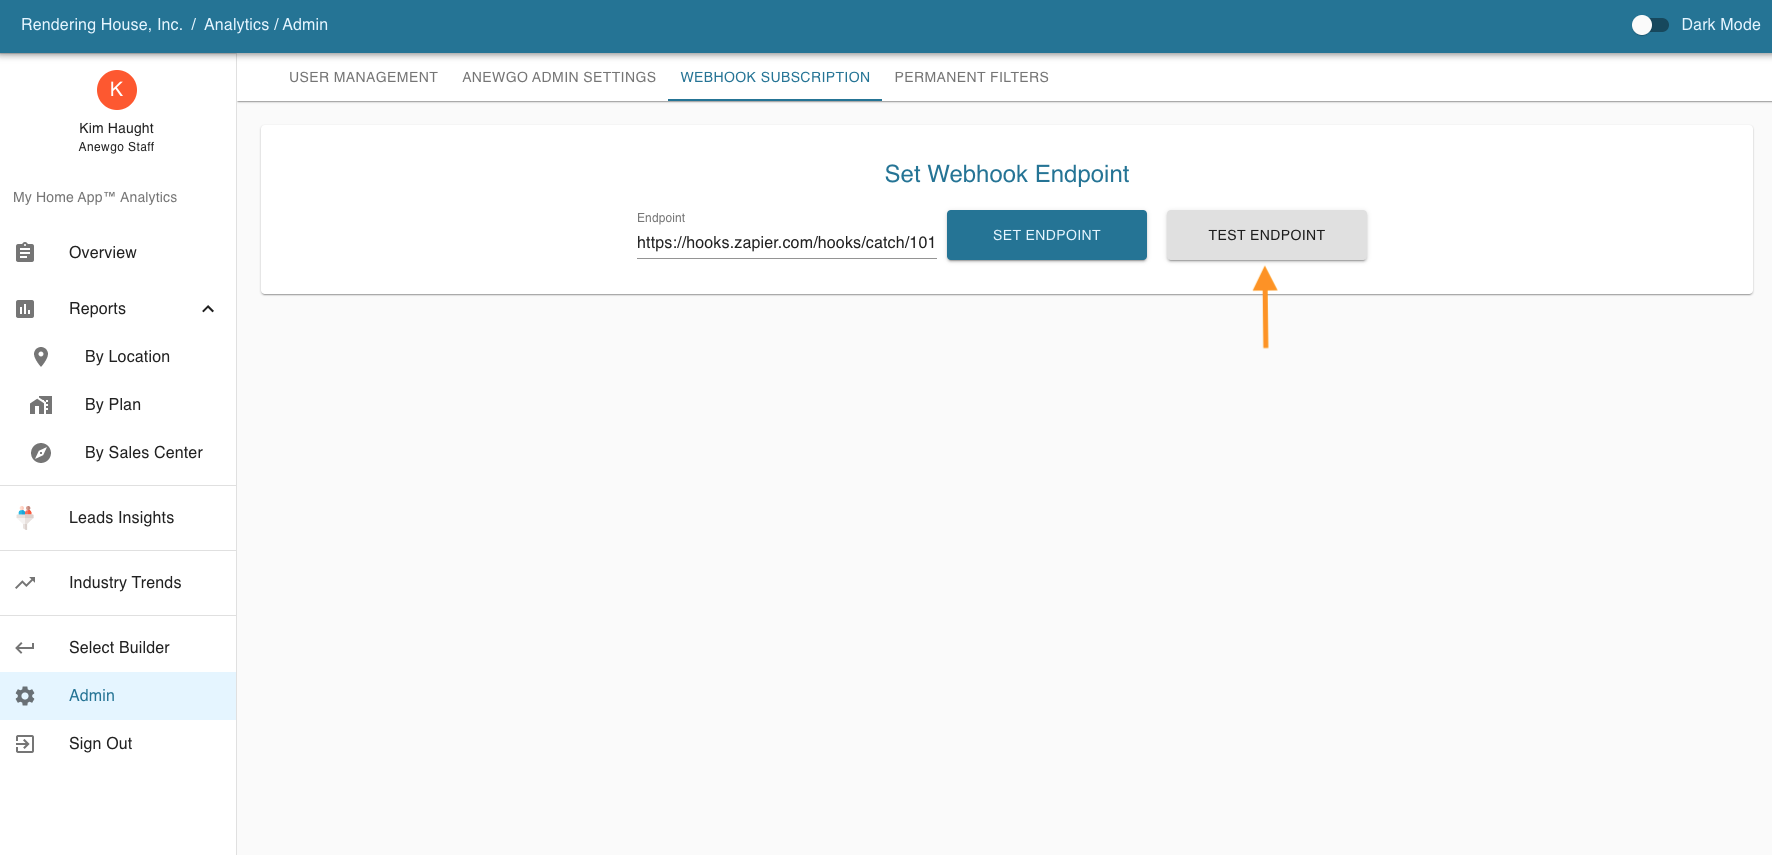
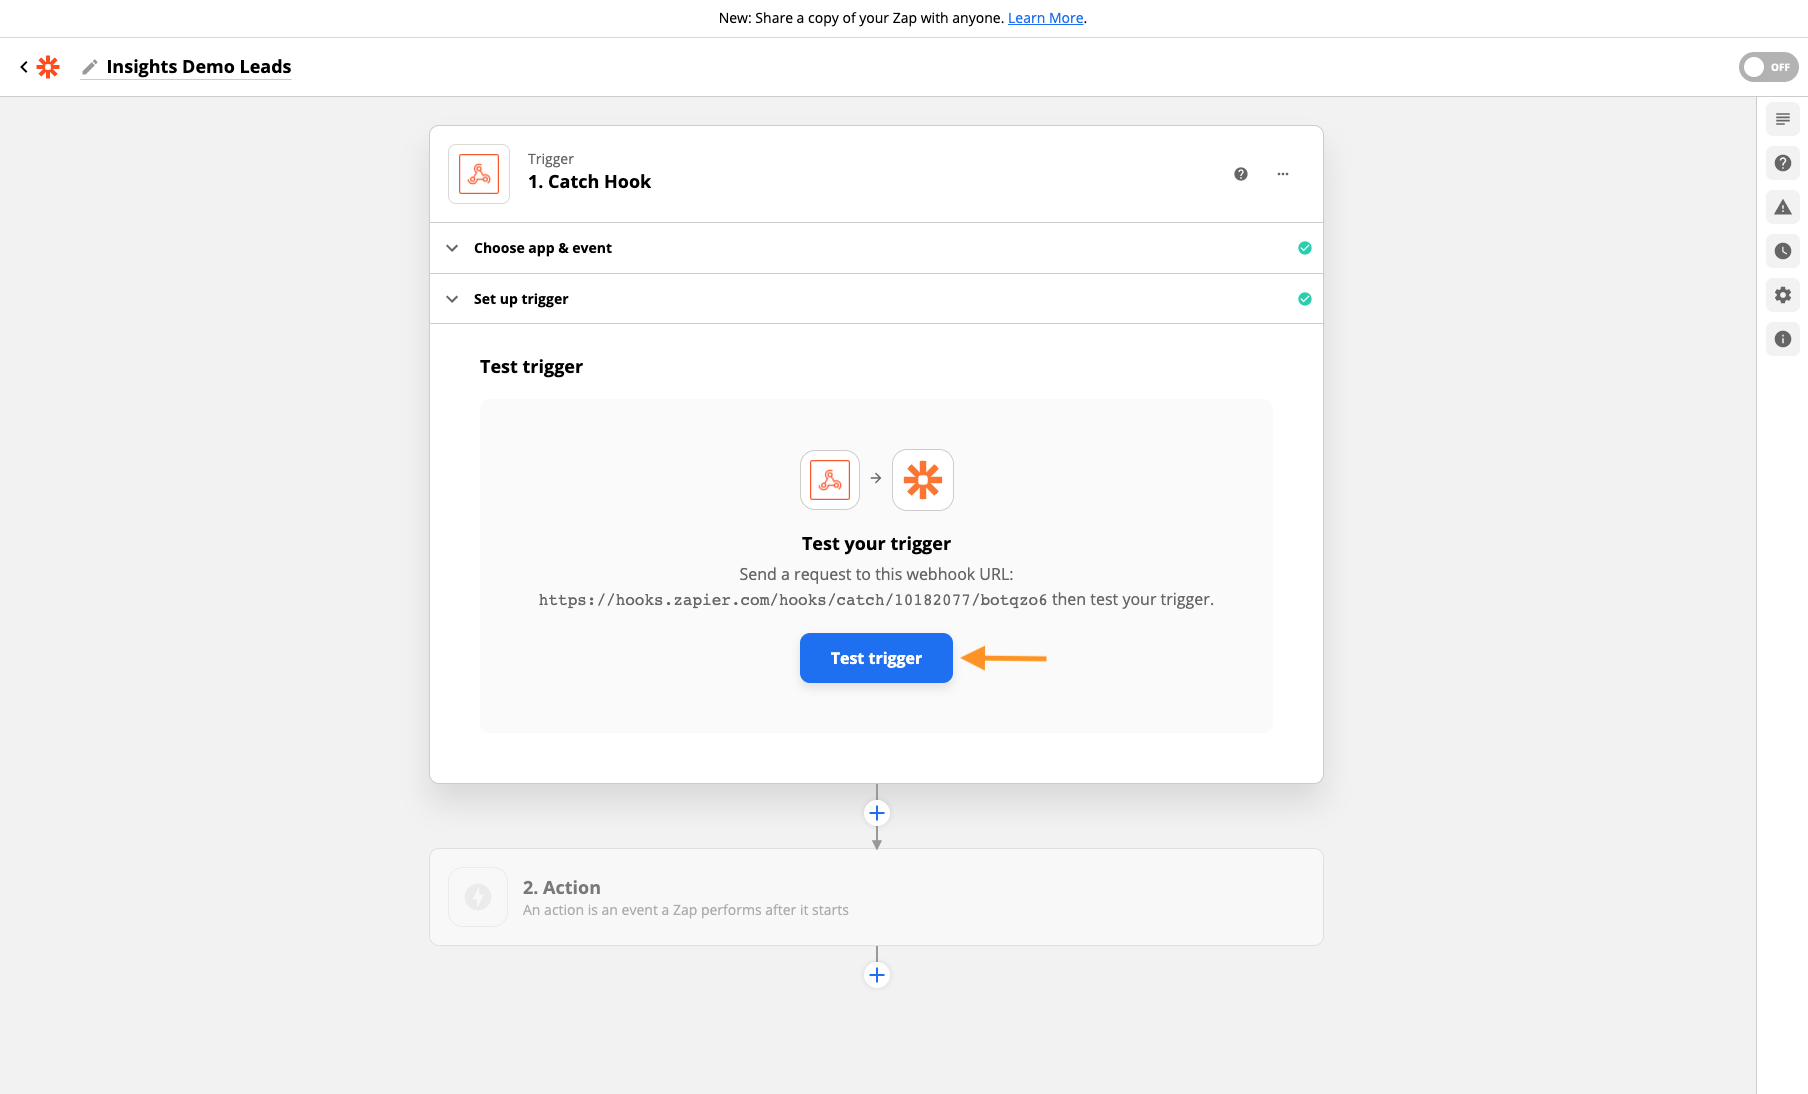
11. To make sure the Webhook is working correctly, click “Test Endpoint”
12. Go back to Zapier. After you copied the Webhook URL, you click Continue to get to the Test Trigger section. Click “Test Trigger”
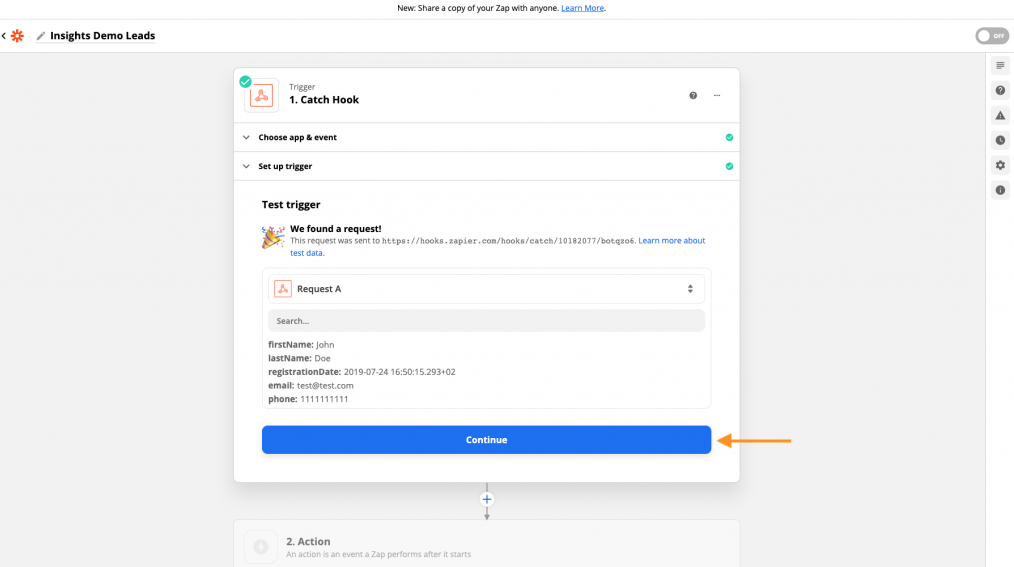
13. Zapier will show a confirmation that the Webhook worked! Click “Continue”
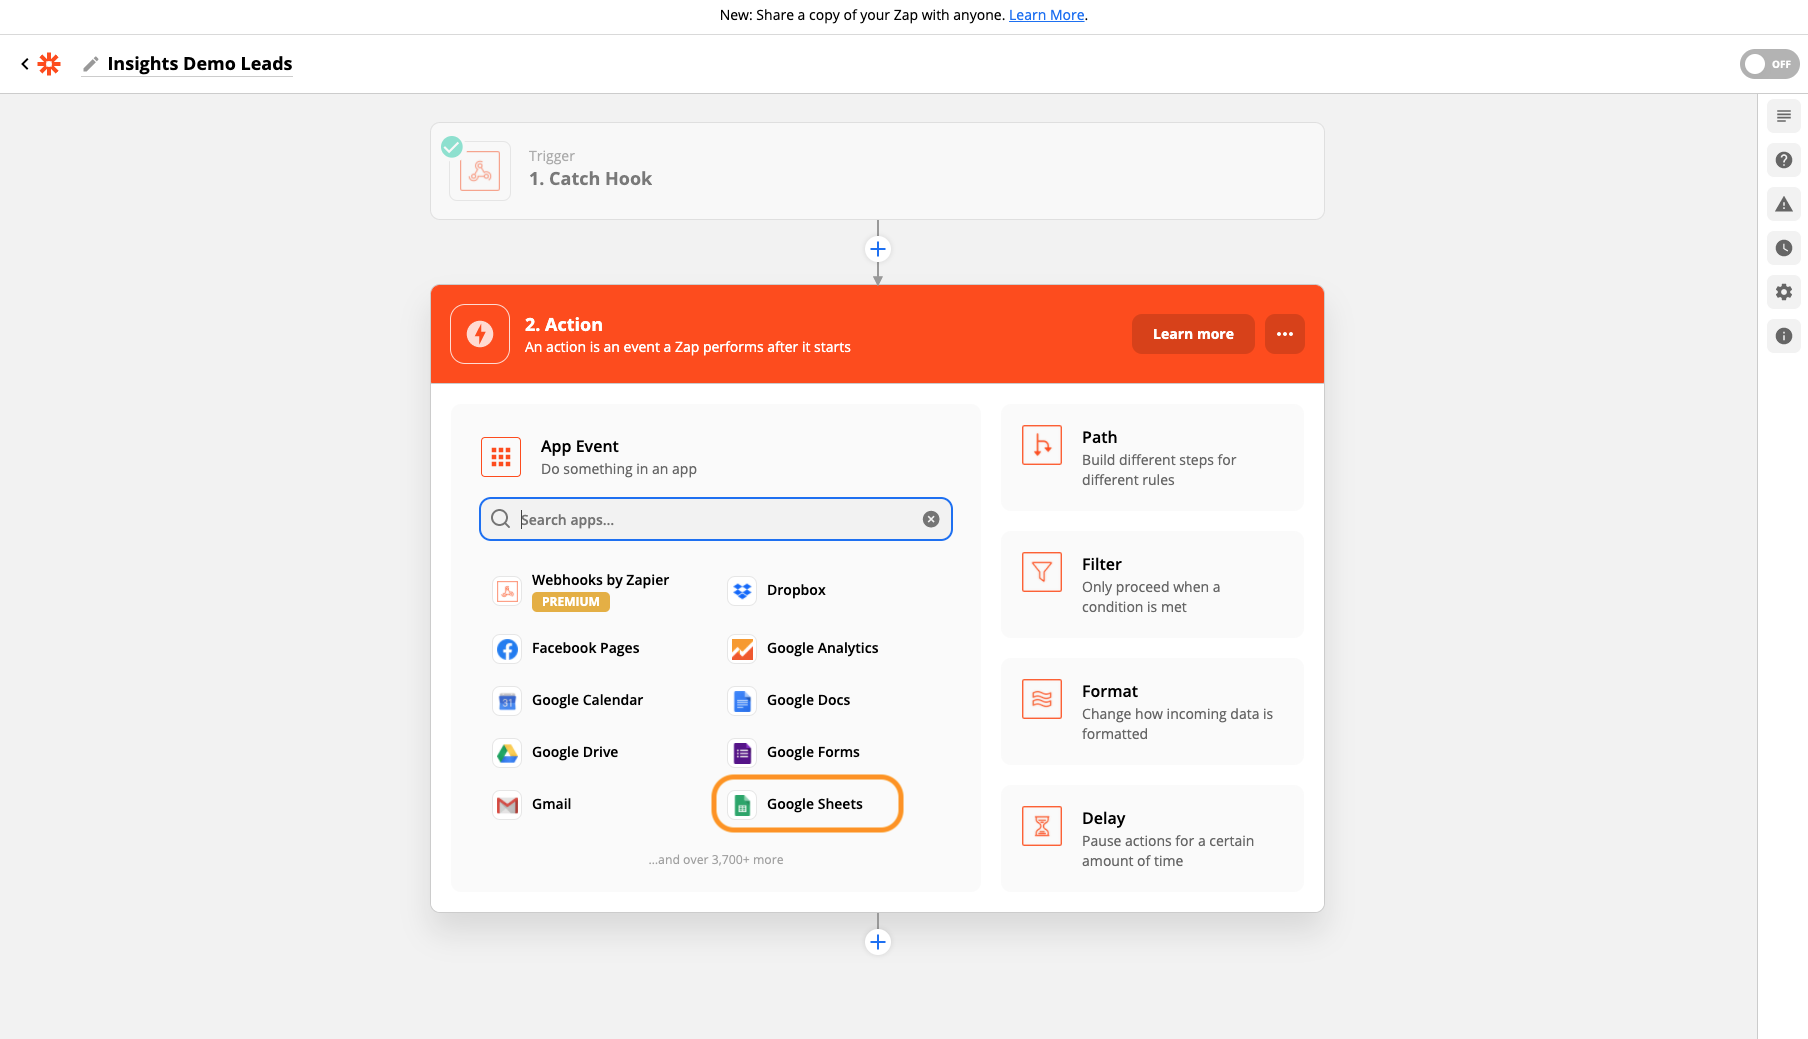
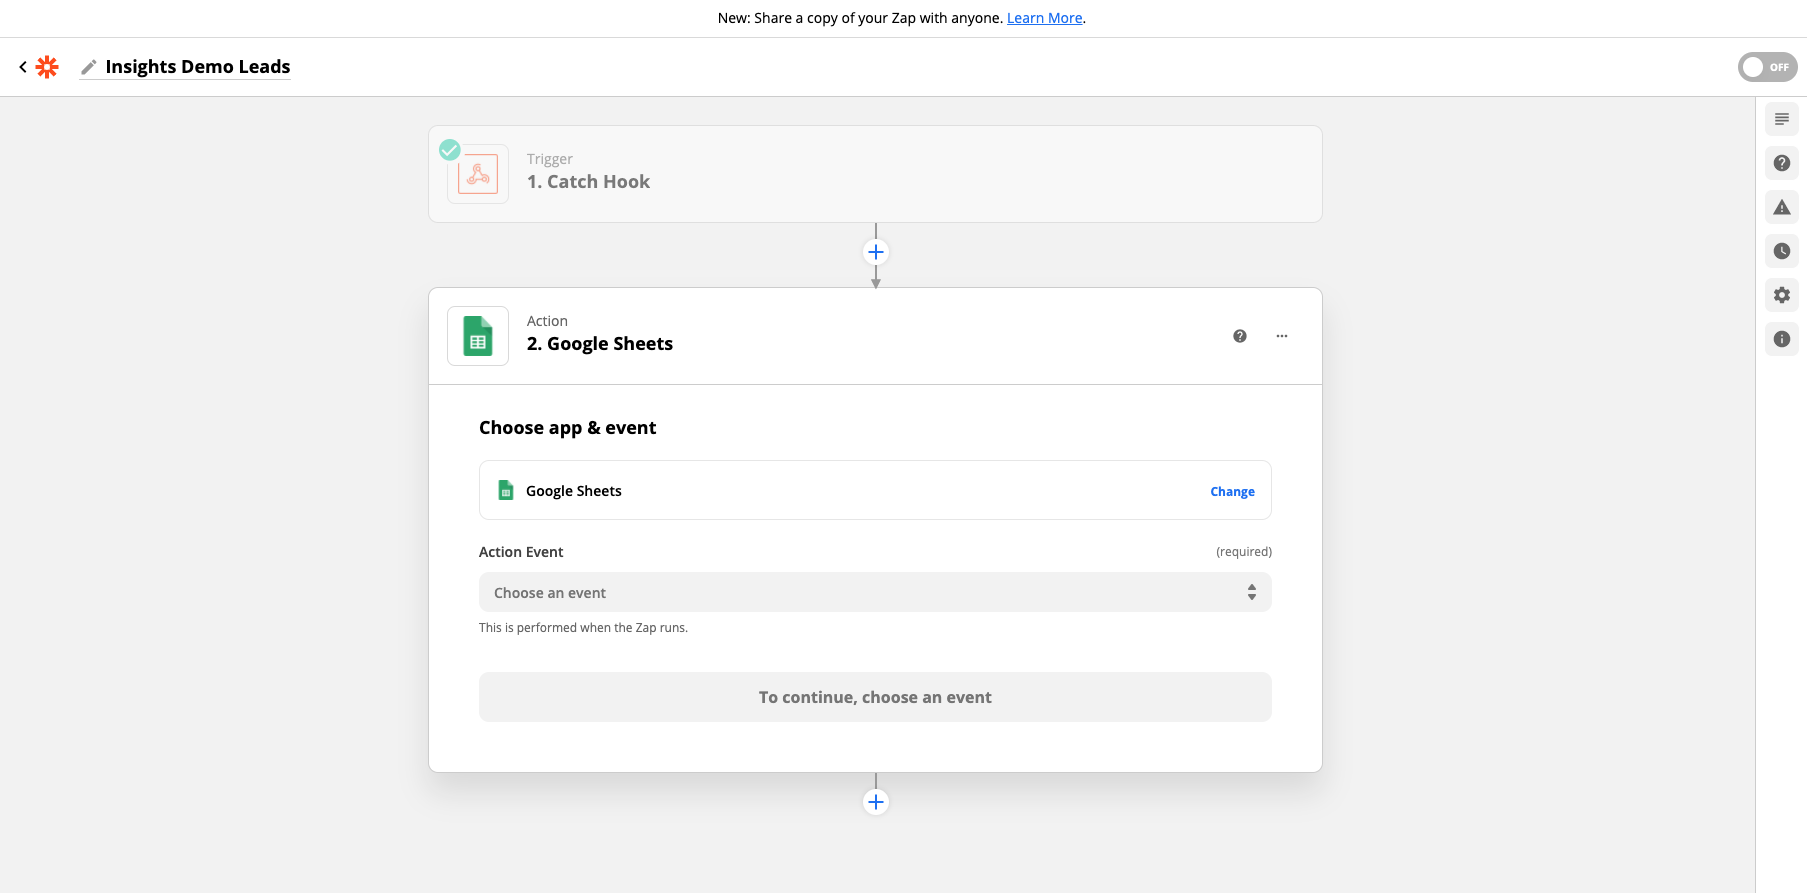
14. Now you can link the data to your CRM or wherever you want to collect this data. We will use Google Sheets for this example. Be sure to have a Google Sheet already set up for the data to feed to with the fields you would like to track. Select “Google Sheets” on Zapier.

*For our builders using Lasso as their CRM
Click here to see how to set up Zapier with Lasso.
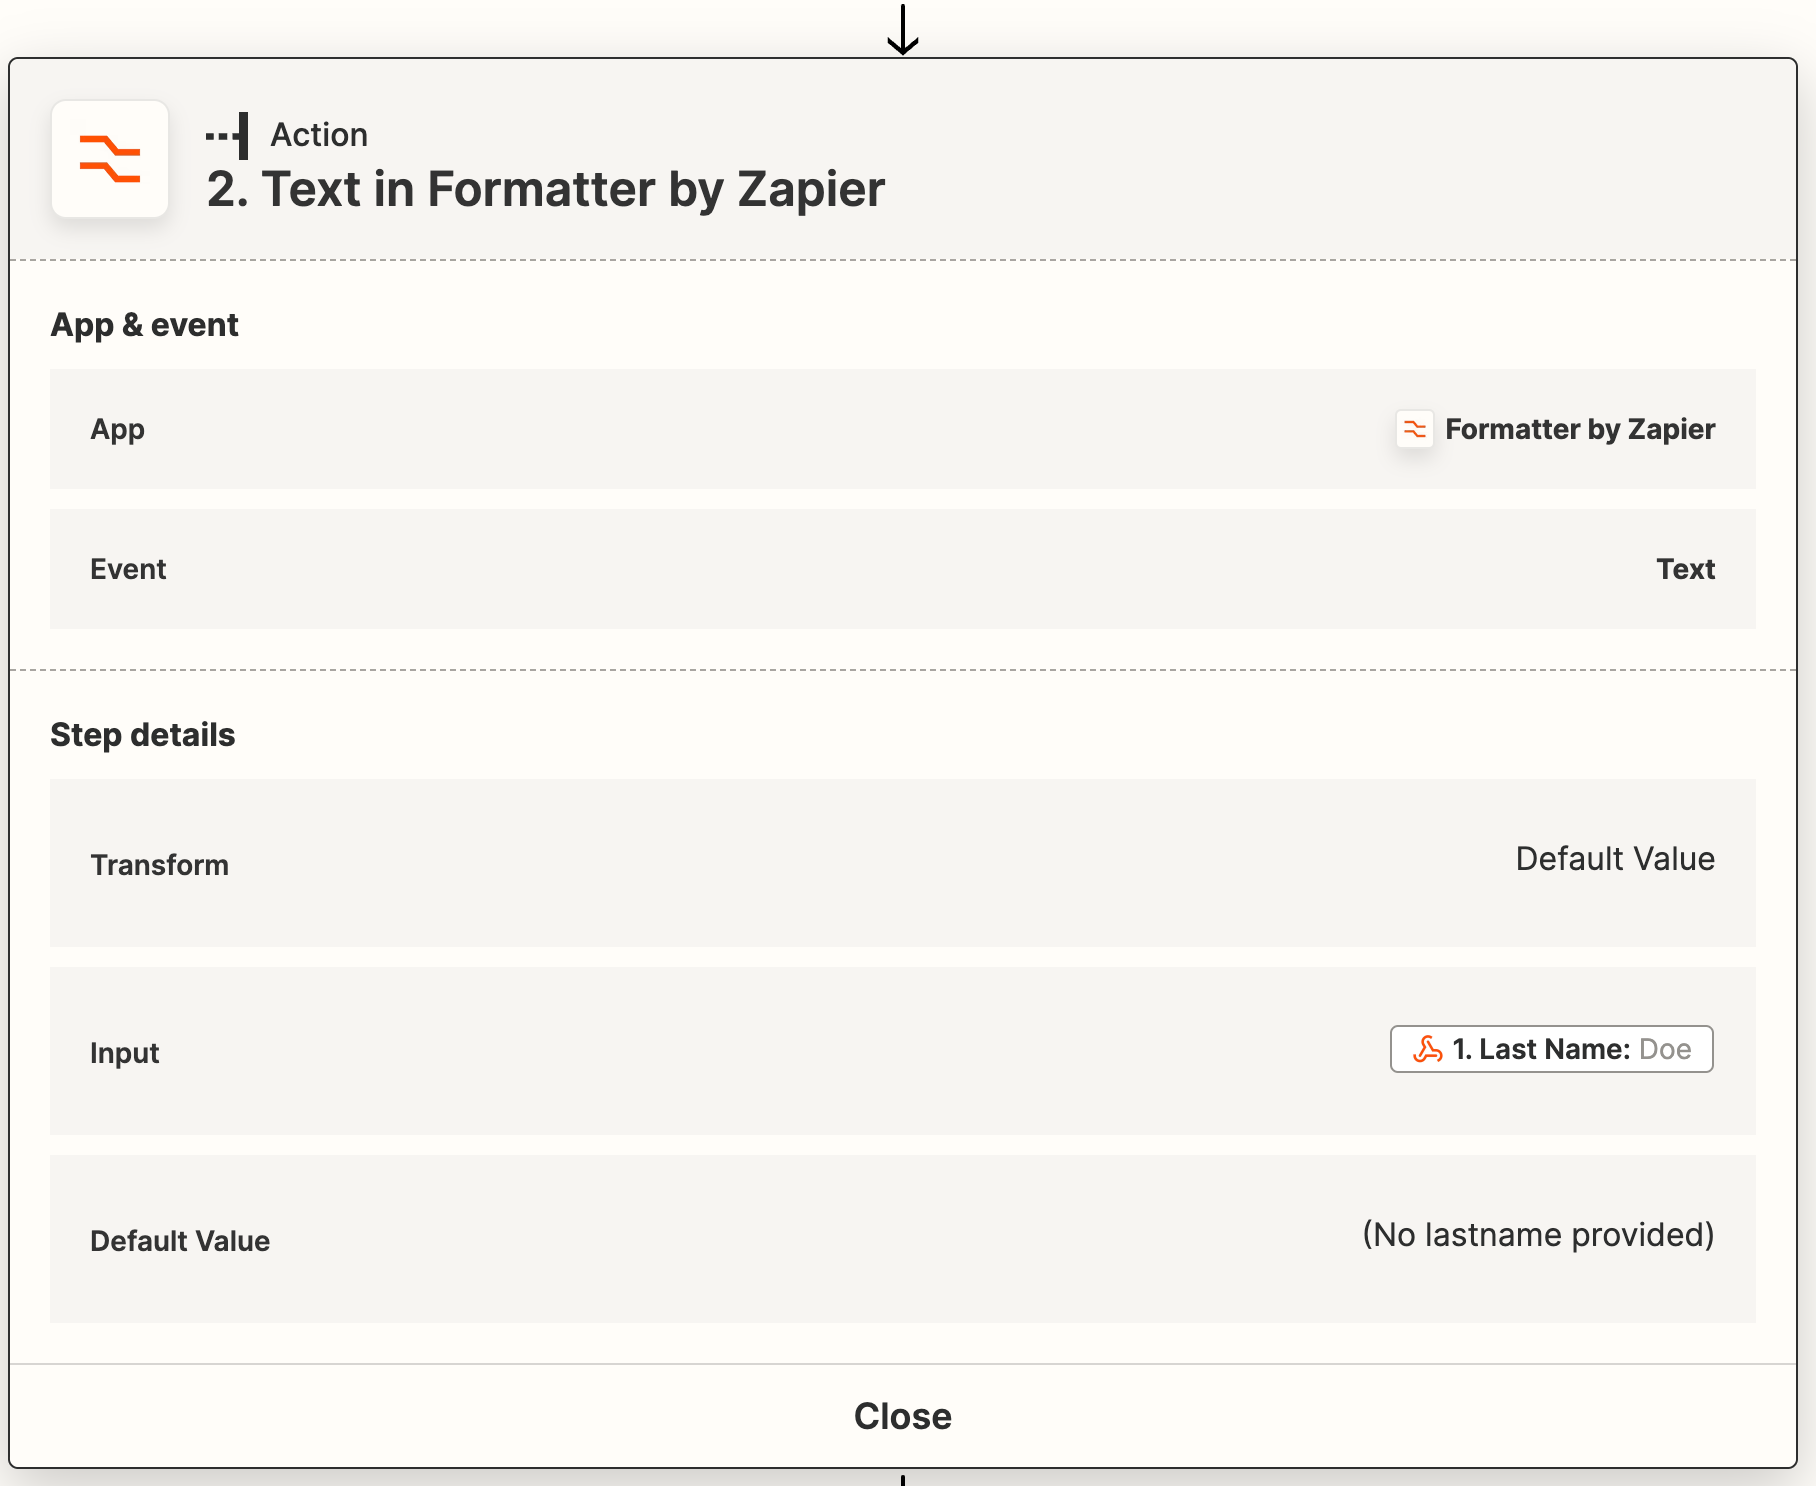
FYI: By default, the webhook will parse names into first and last name. However with a 3 word name the entire text string will be entered the first name and “null” will be entered as the last name.
Pro-tip: Add a Zapier Text In Formatter to prevent sending null lastname values to Lasso. In this example, a null last name will be replaced with ‘(No lastname provided’):
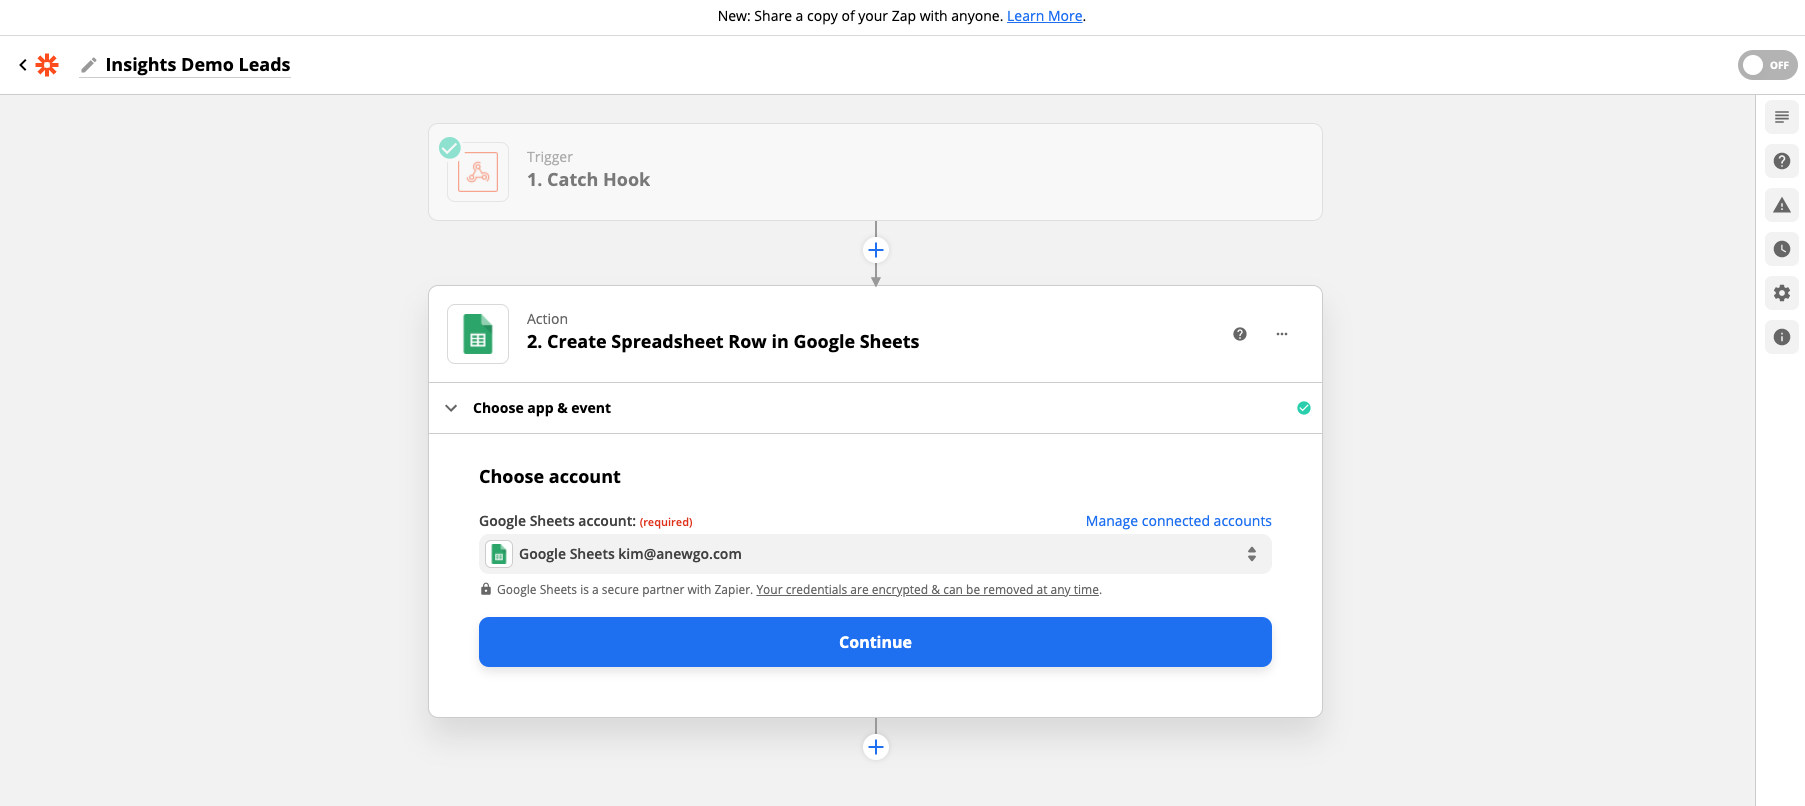
15. Fill in all of the information to point the data to the correct Google account, sheet, tab, etc.
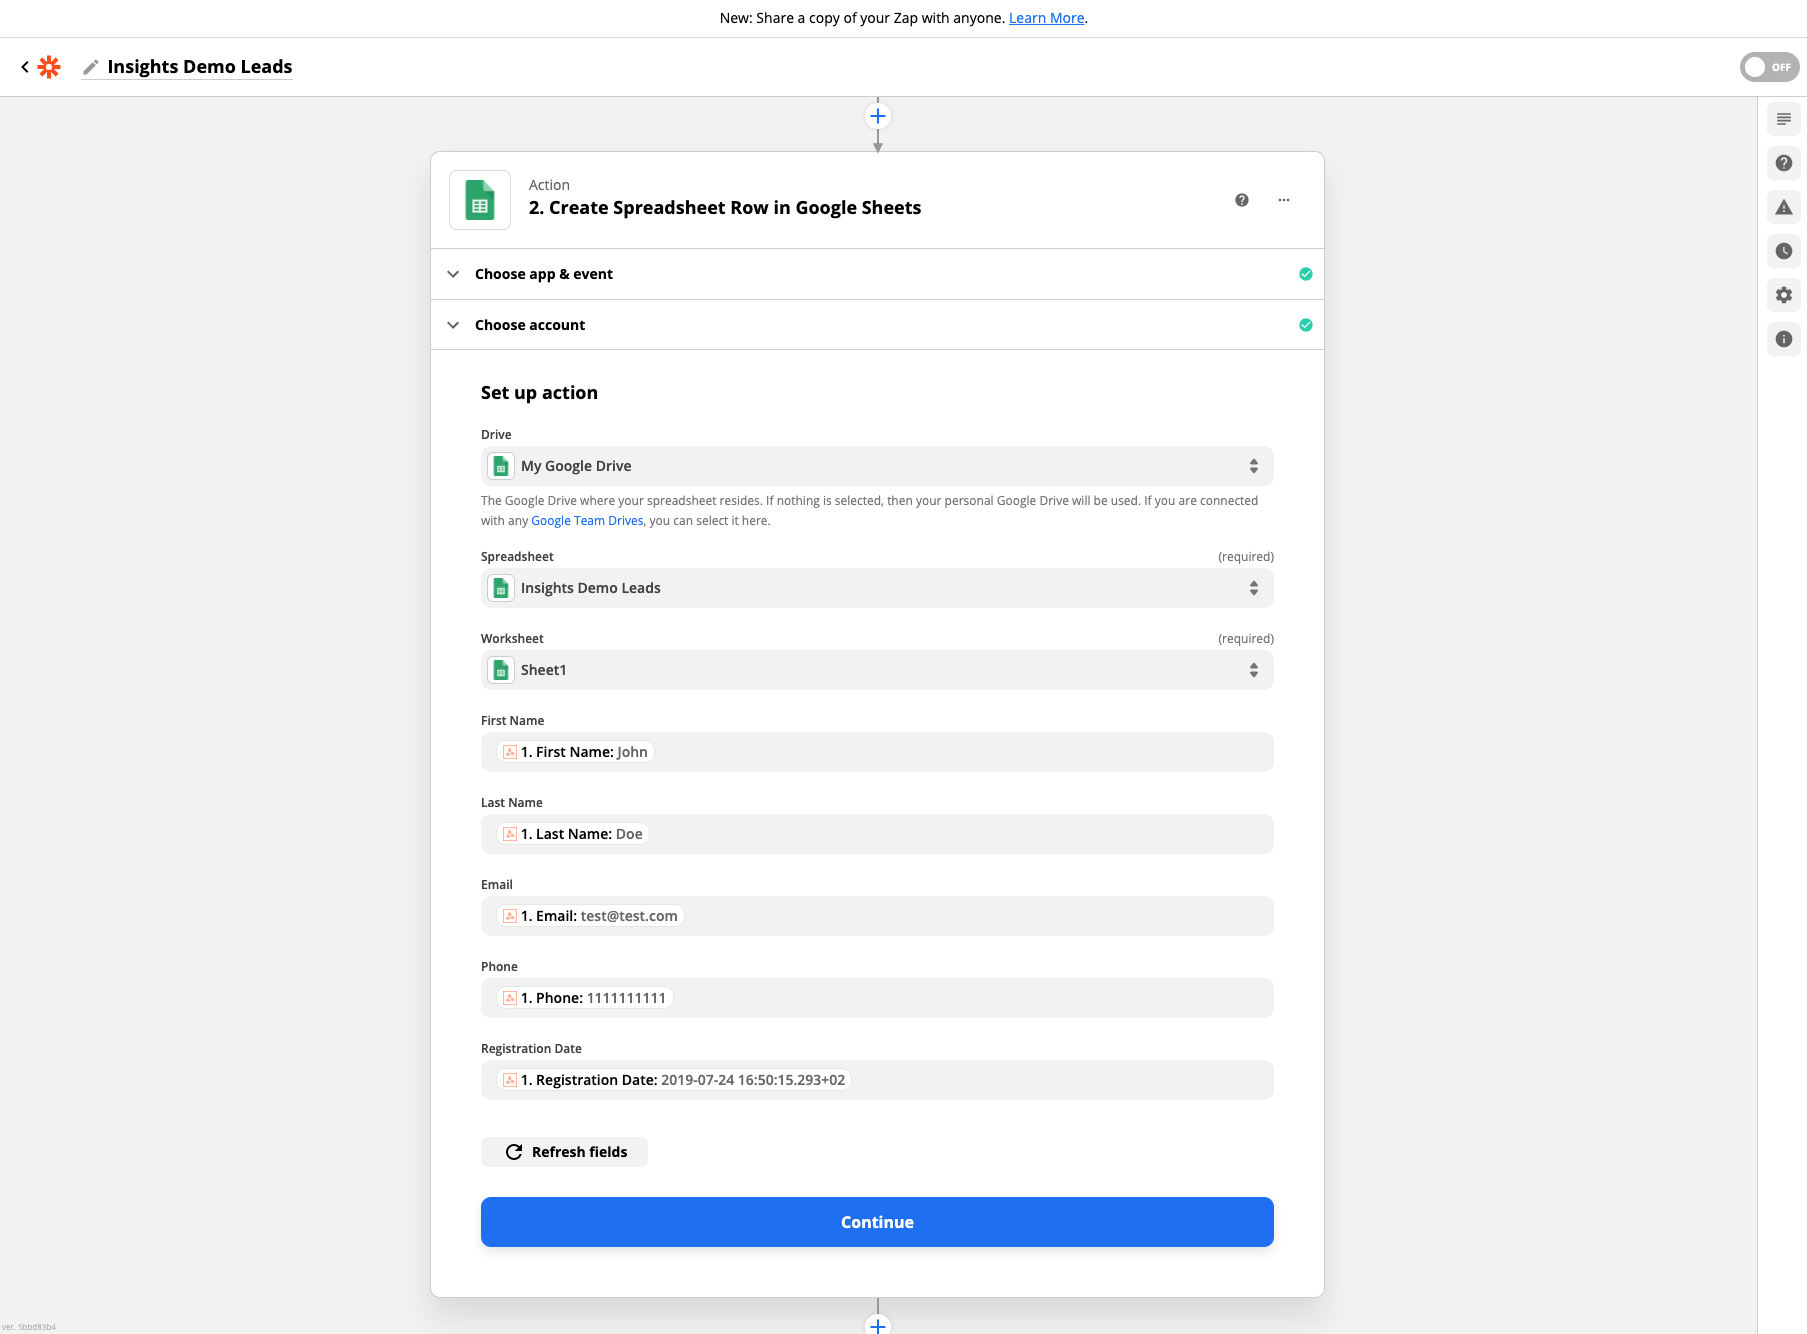
16. Once you get those correctly assigned & click “Continue”- then fill in the Zapier fields to match the data from the Webhook to your Google Sheet fields (i.e. First Name to First Name, Email to Email, etc.) – click “Continue”
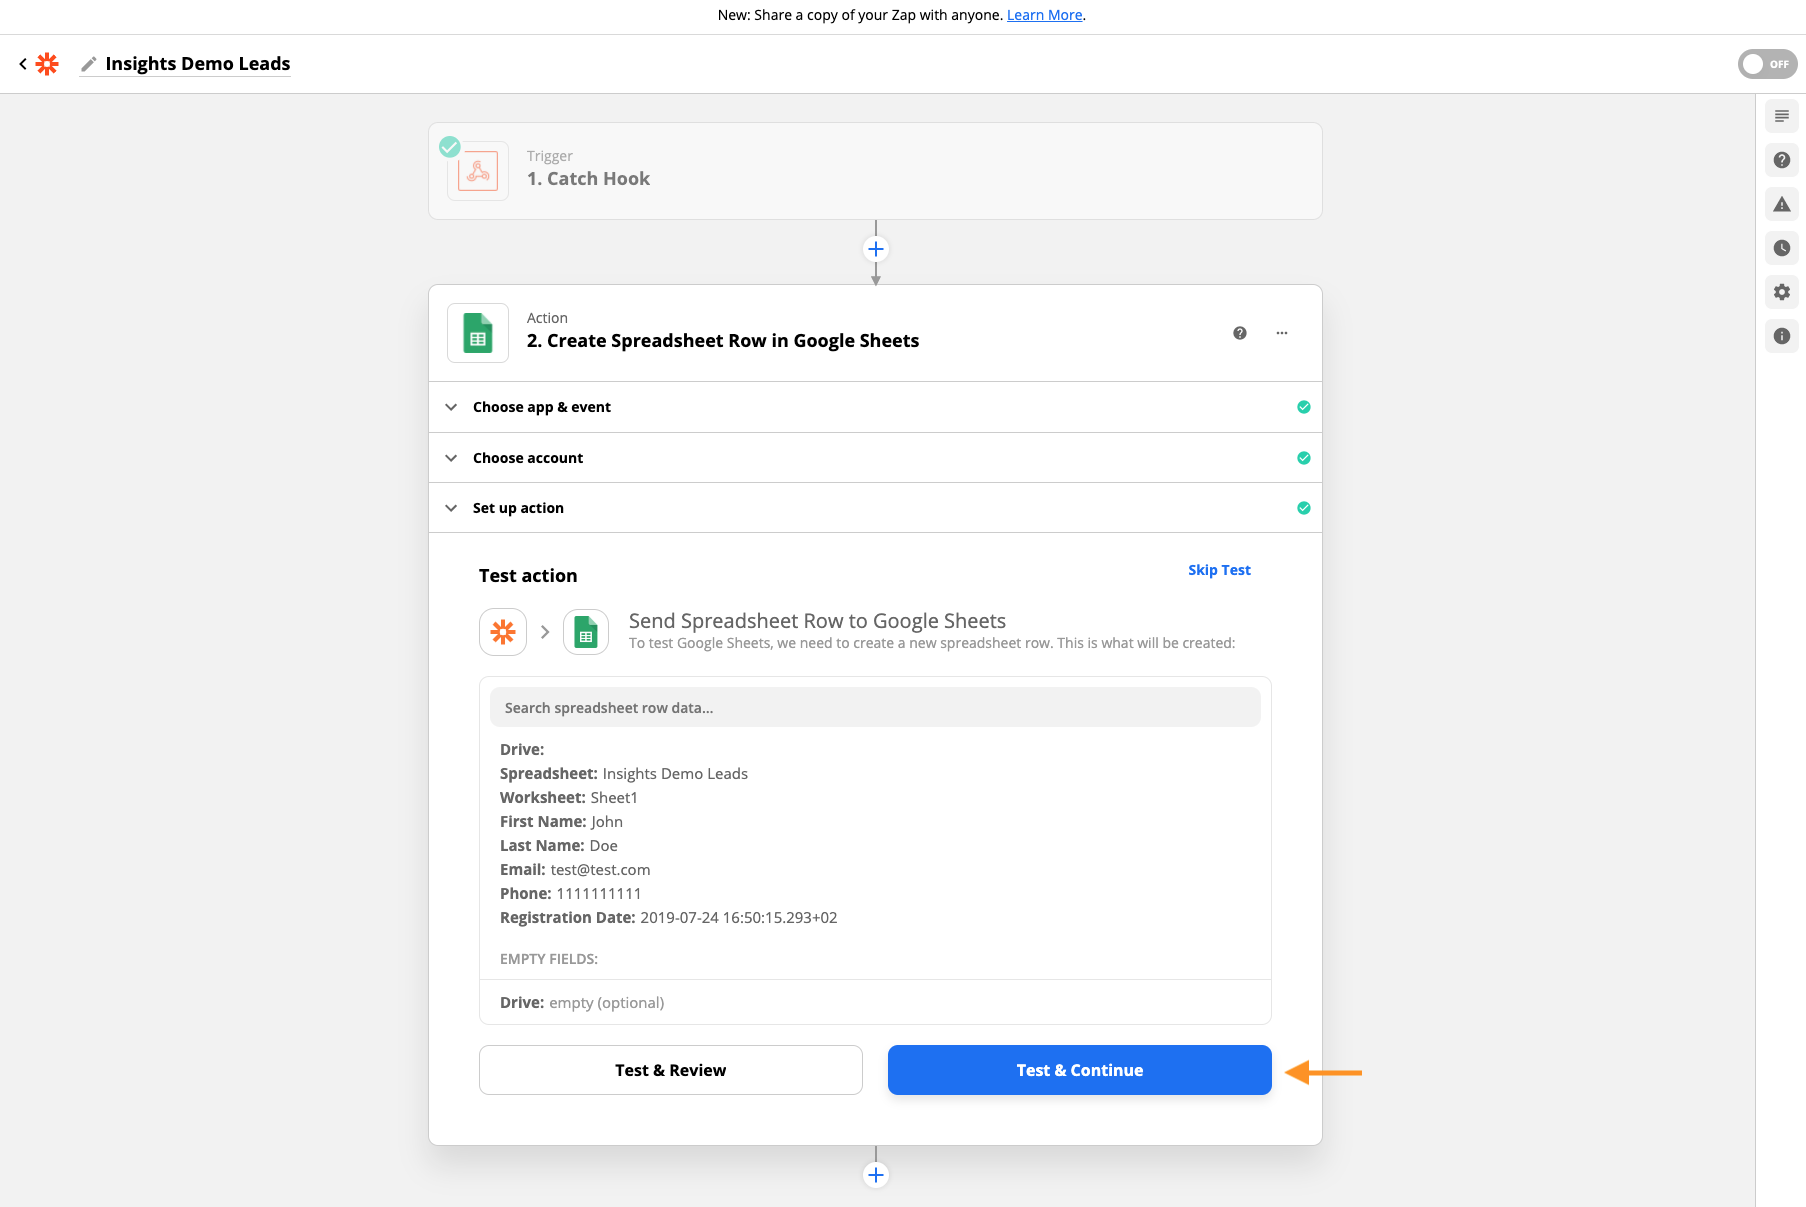
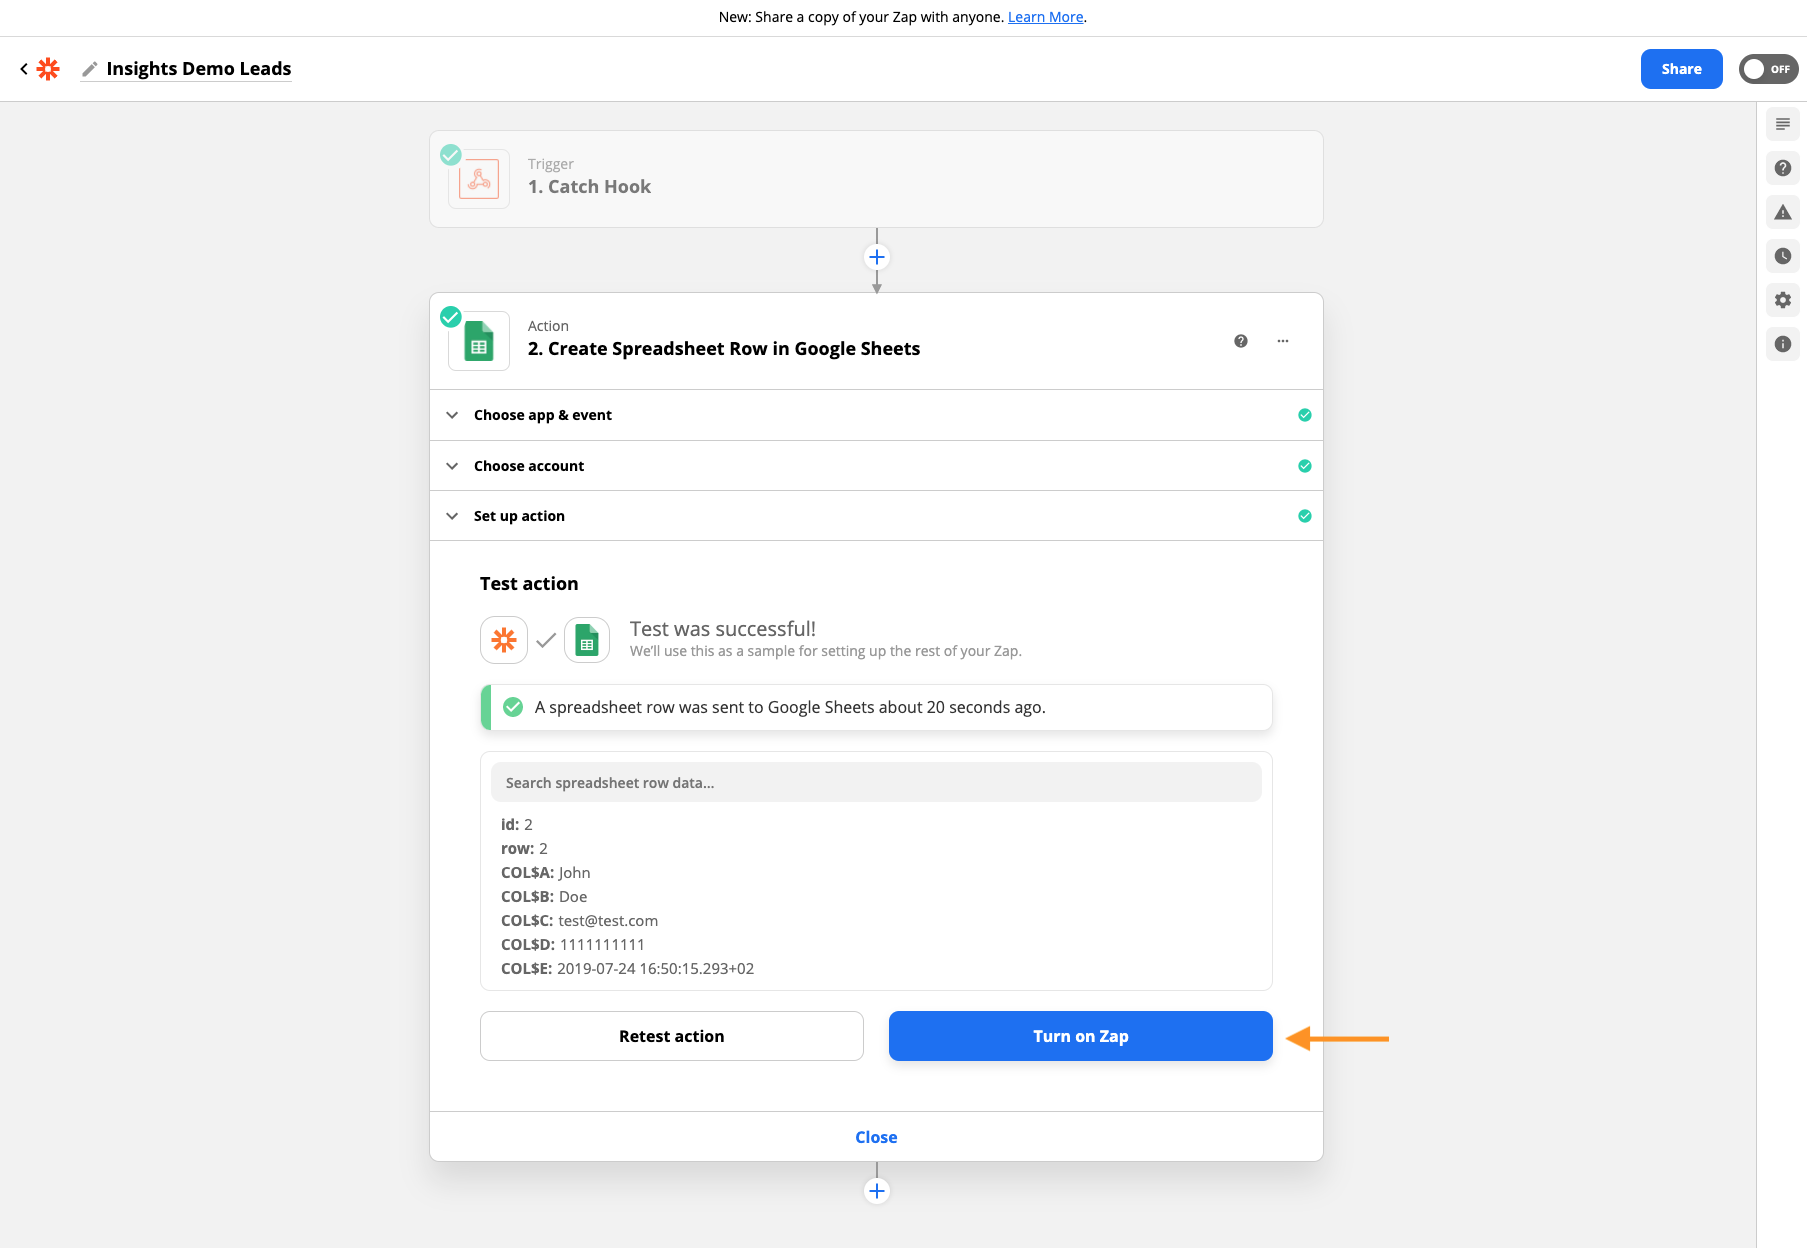
17. The next section confirms that everything is connected. Click “Test & Continue”
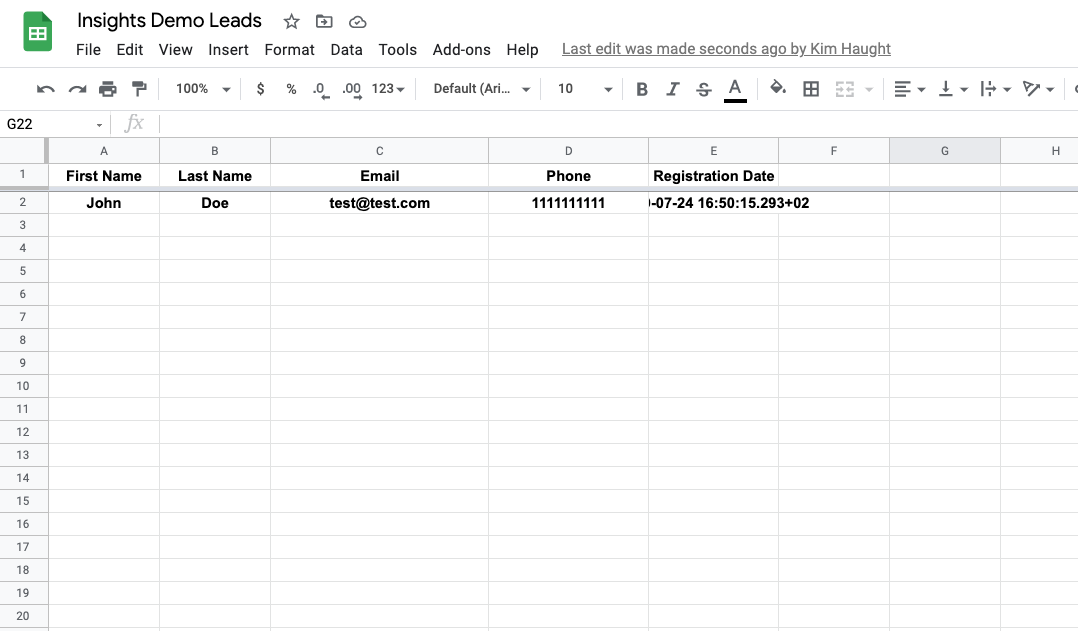
18. Check your Google Sheet – the data should be there…
19. If everything has worked – then your Webhook has been successfully set up! Click “Turn on Zap” to activate the Webhook.
Subscription Behavior and Lead Data Details
The webhook you supplied will be notified once for each new lead that registers, when they register; multiple lead registrations will result in multiple notifications to the webhook. Each notification will have information about a single lead only.
The email field in the notification’s JSON data can be treated as a unique primary key.
Lead information will have this shape:
|
1 2 3 4 5 6 7 8 9 10 11 12 13 14 15 16 |
{ "firstName": "John", "lastName": "Doe", "registrationDate": "2019-07-24 16:50:15.293+02", "email": "test@test.com", "phone": "1111111111", "floorplanOfInterest": "Floorplan A", "communityOfInterest": "Community", "preferredContactMethods": [ "EMAIL", "PHONE", "TEXT", "VIDEO_CONFERENCE" ], "source": "My Home App" } |