
Step-By-Step Instructions
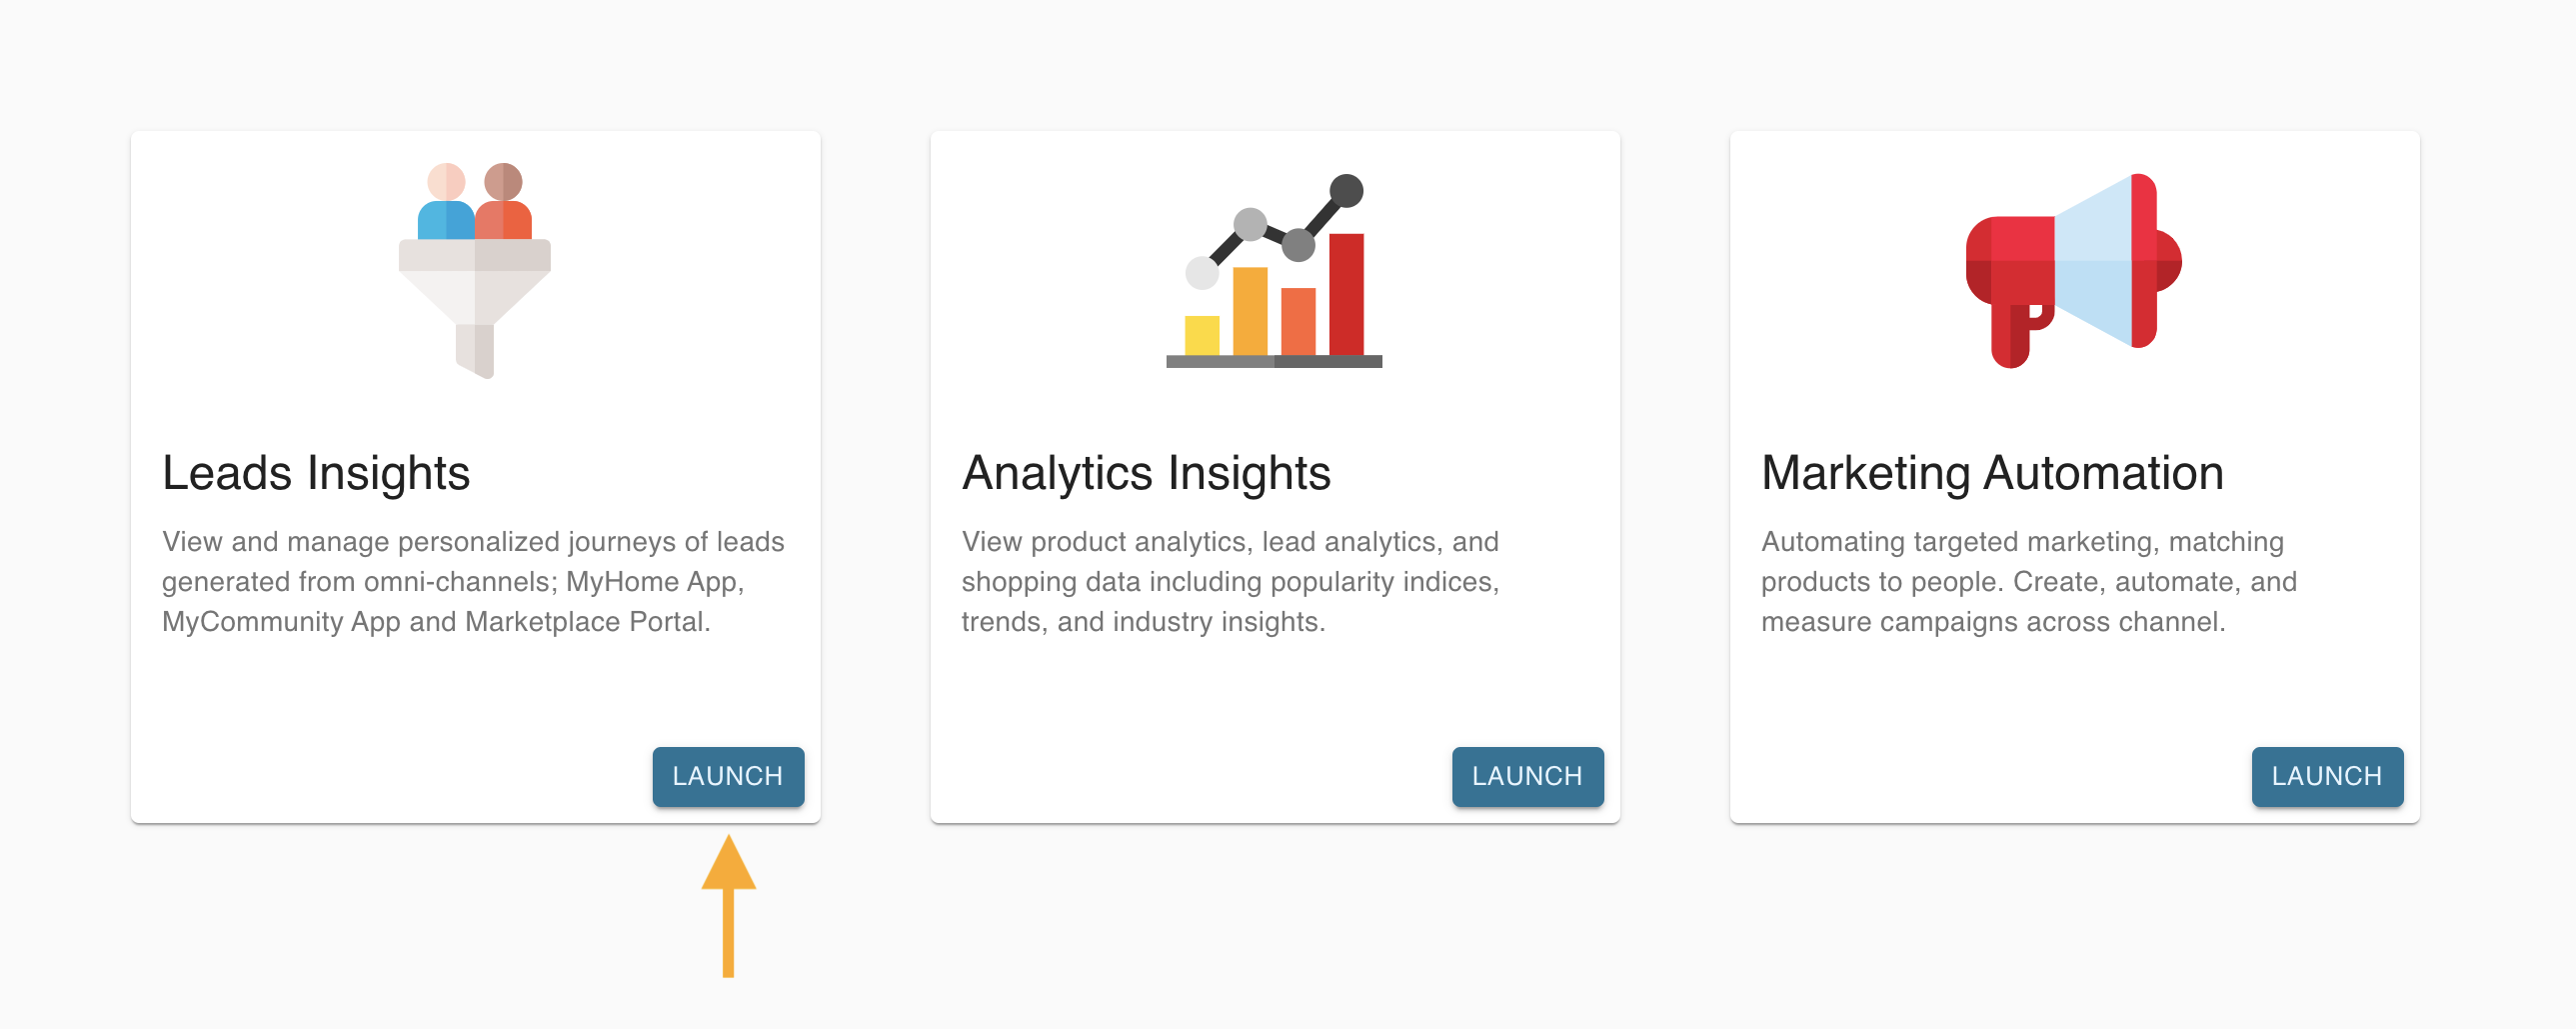
- Log into your Anewgo Insights Account. Click “Launch” on Leads Insights.
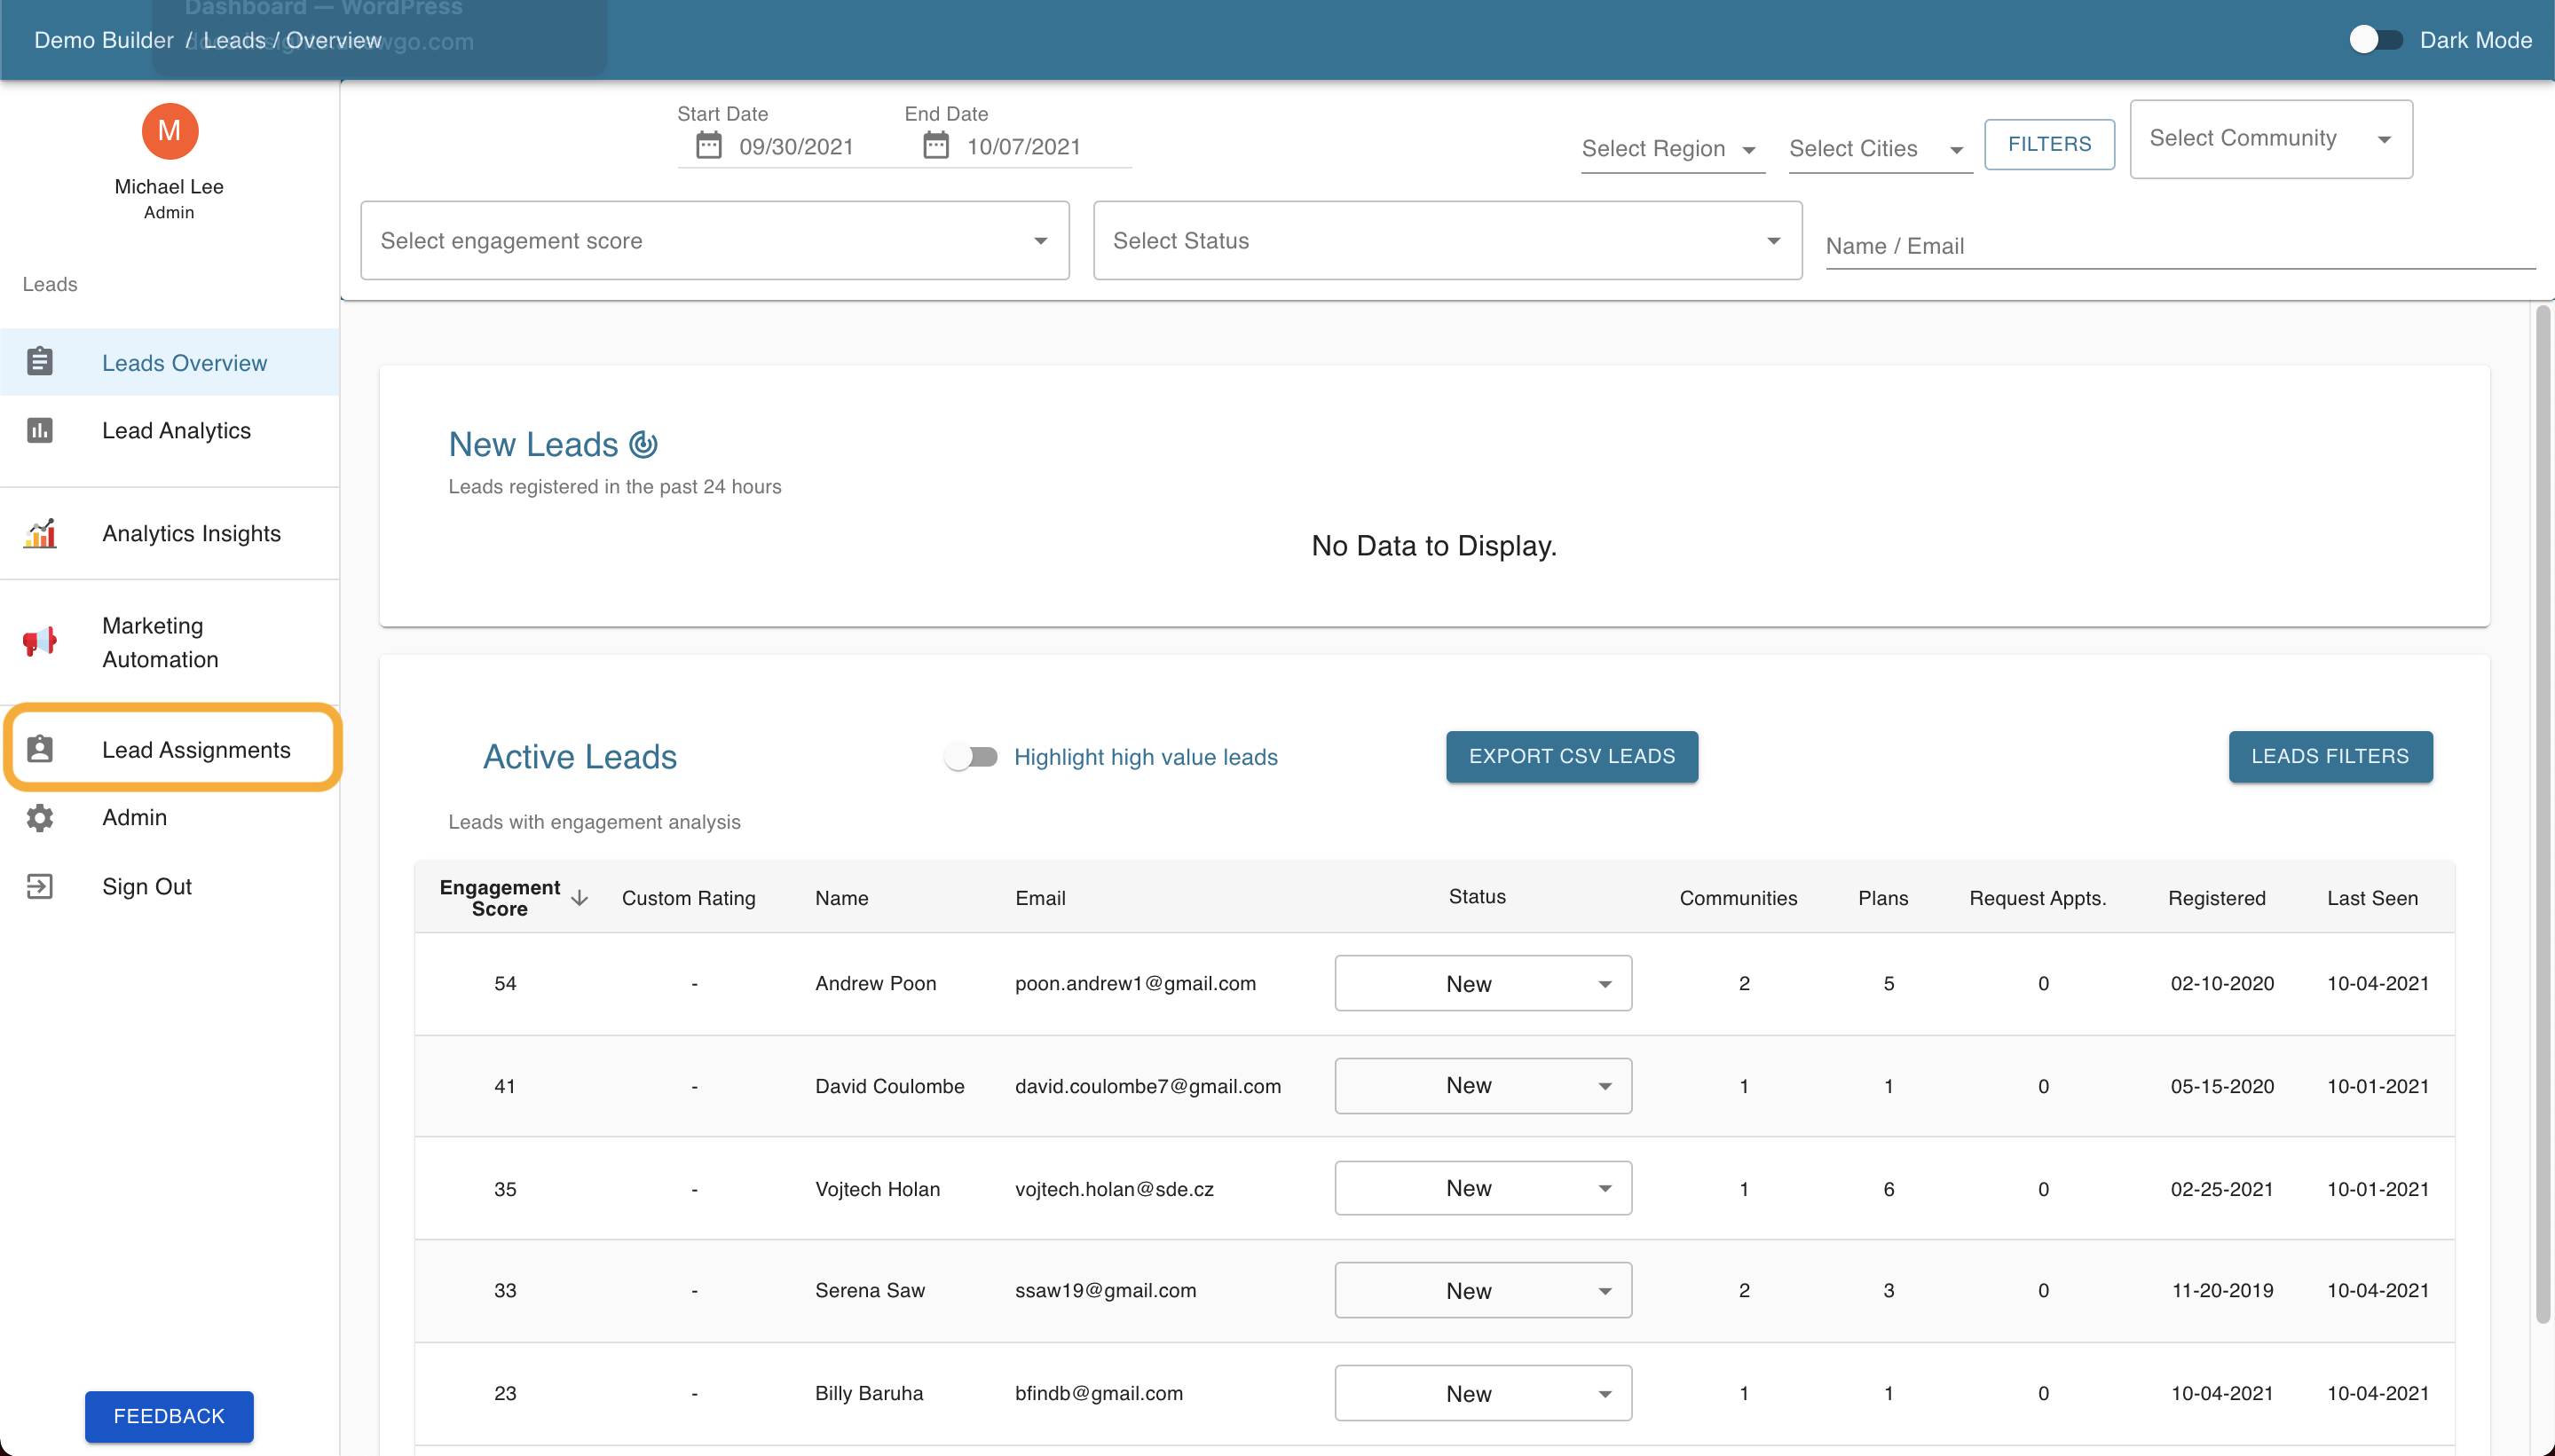
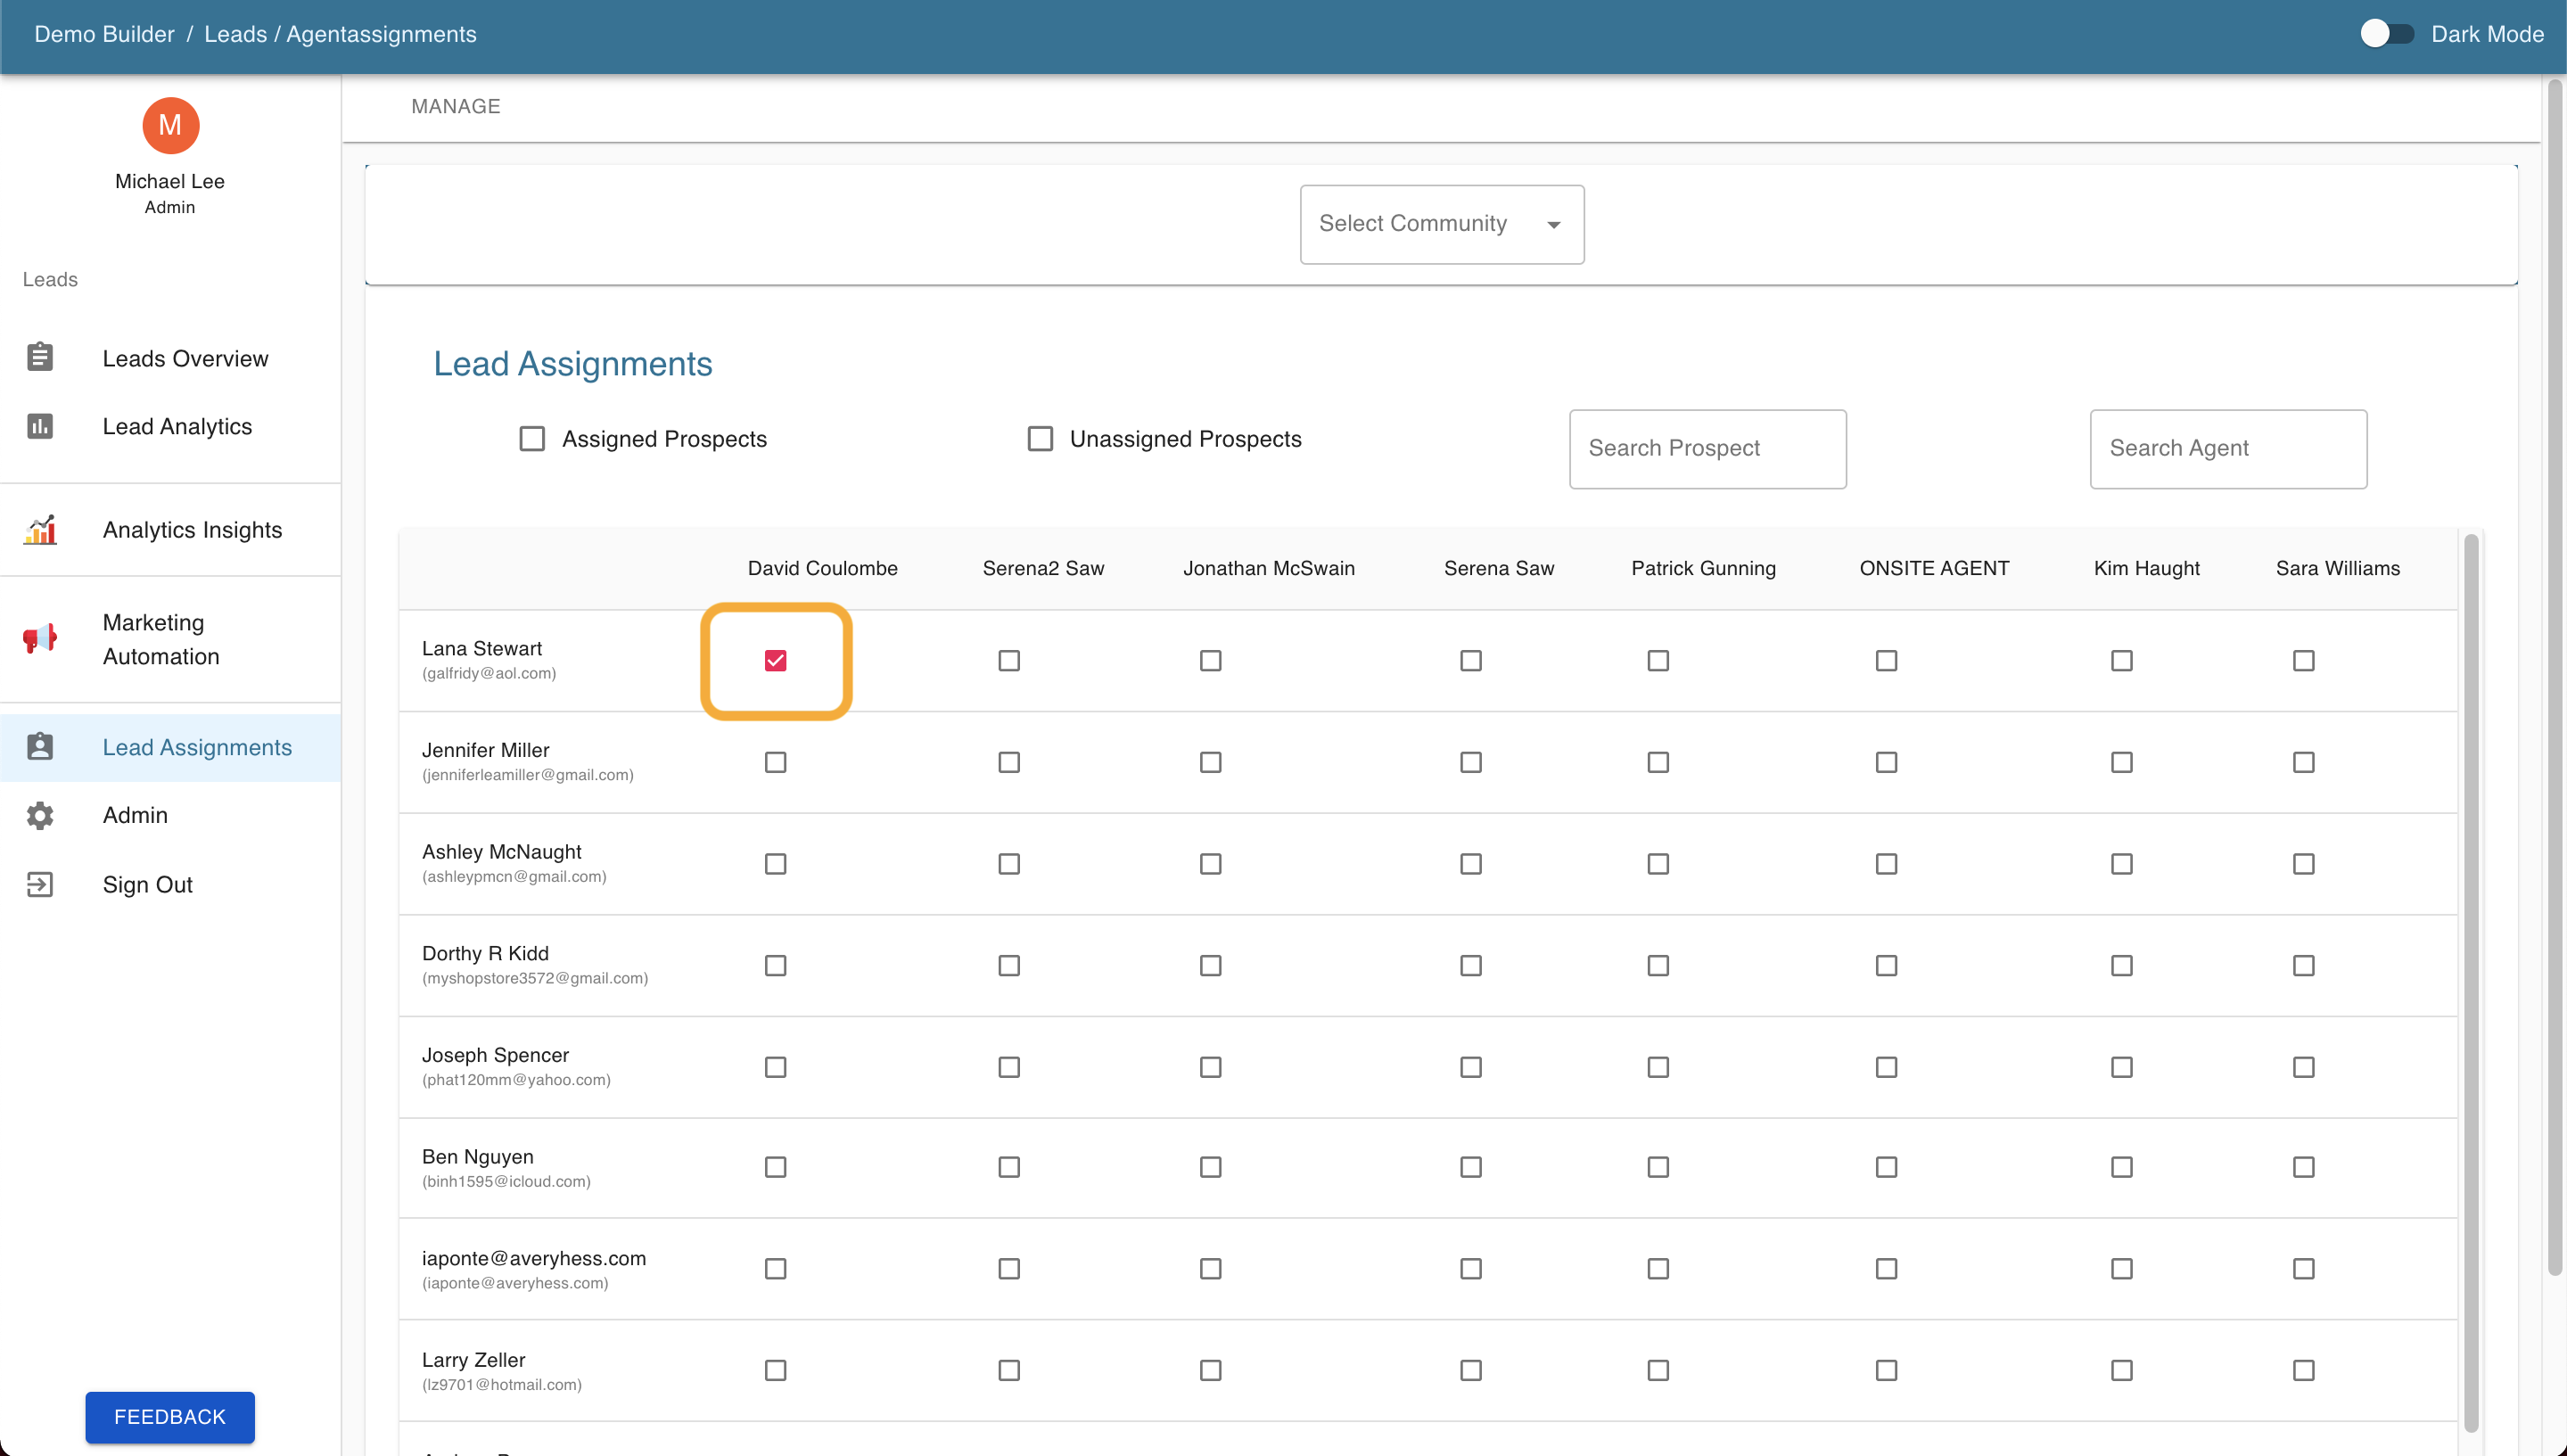
2. Find “Lead Assignments” on the left hand menu and click it.
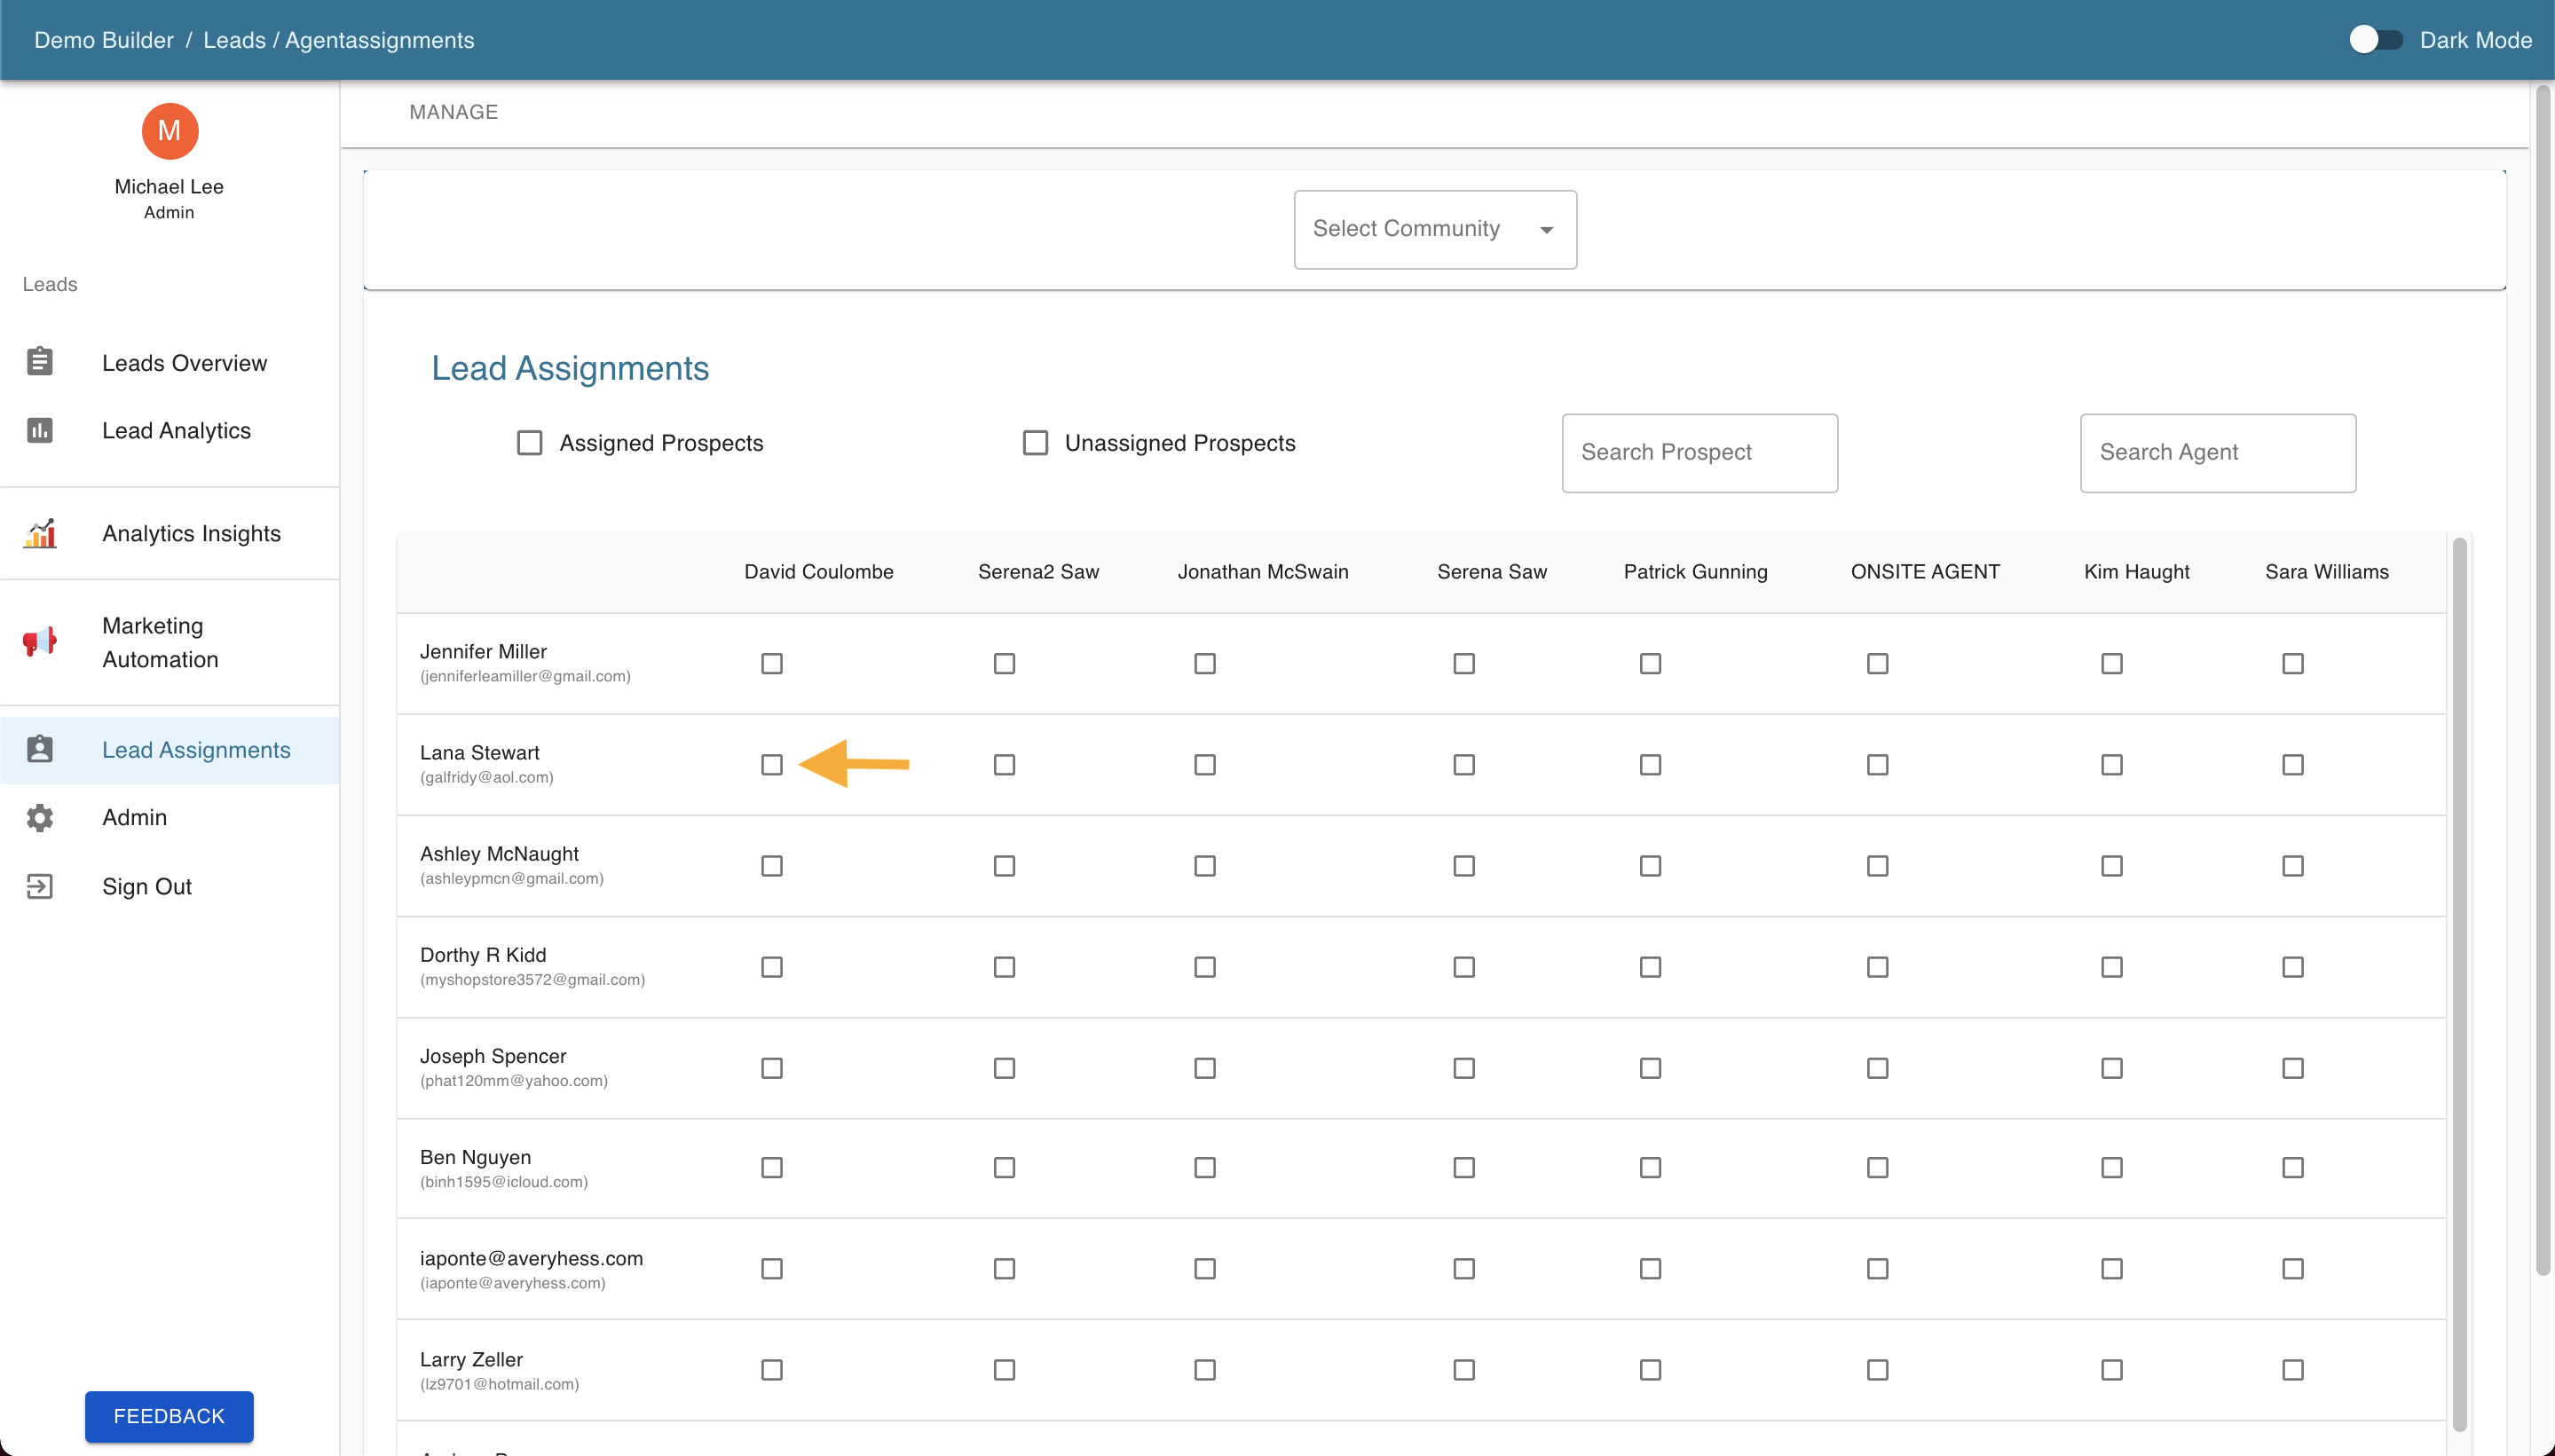
3. Here you will find all lead prospects in the first column with all the agents in the remaining columns. Click on the empty boxes to assign agents to a prospect.
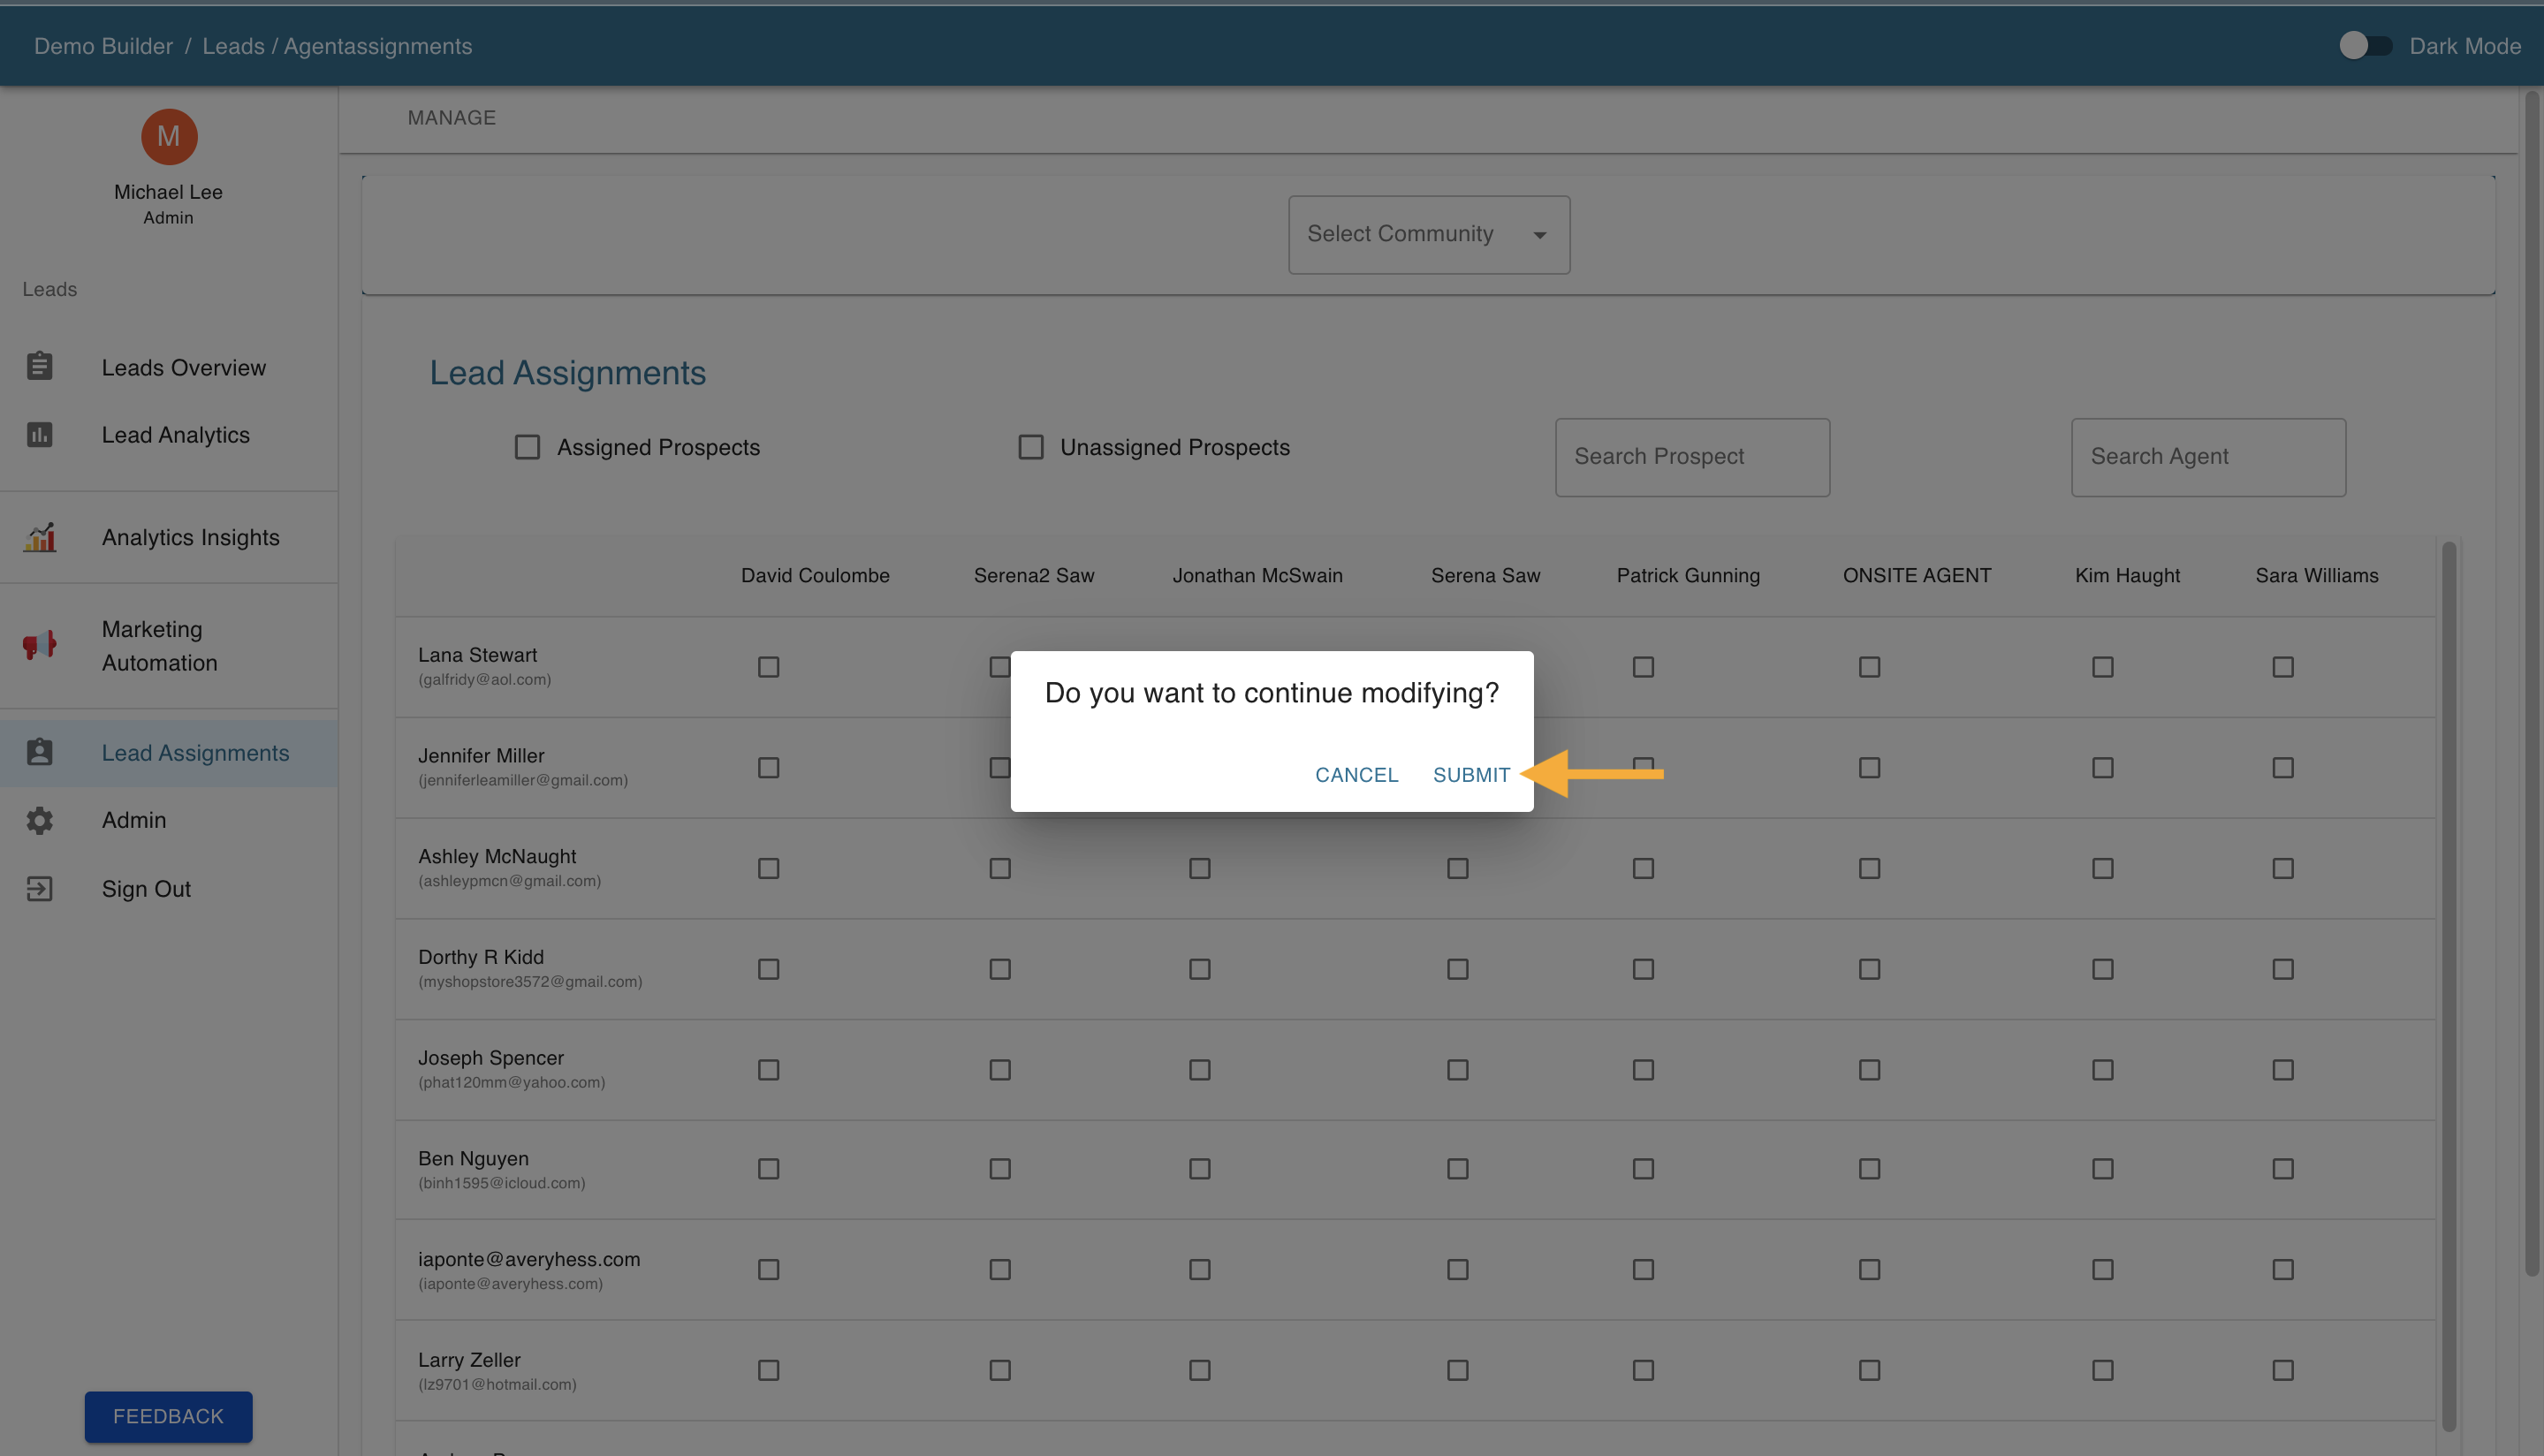
4. A pop up that asks if you want to continue modifying will pop up, hit “Submit”.
5. That agent is now assigned to the prospect.
Alternate way
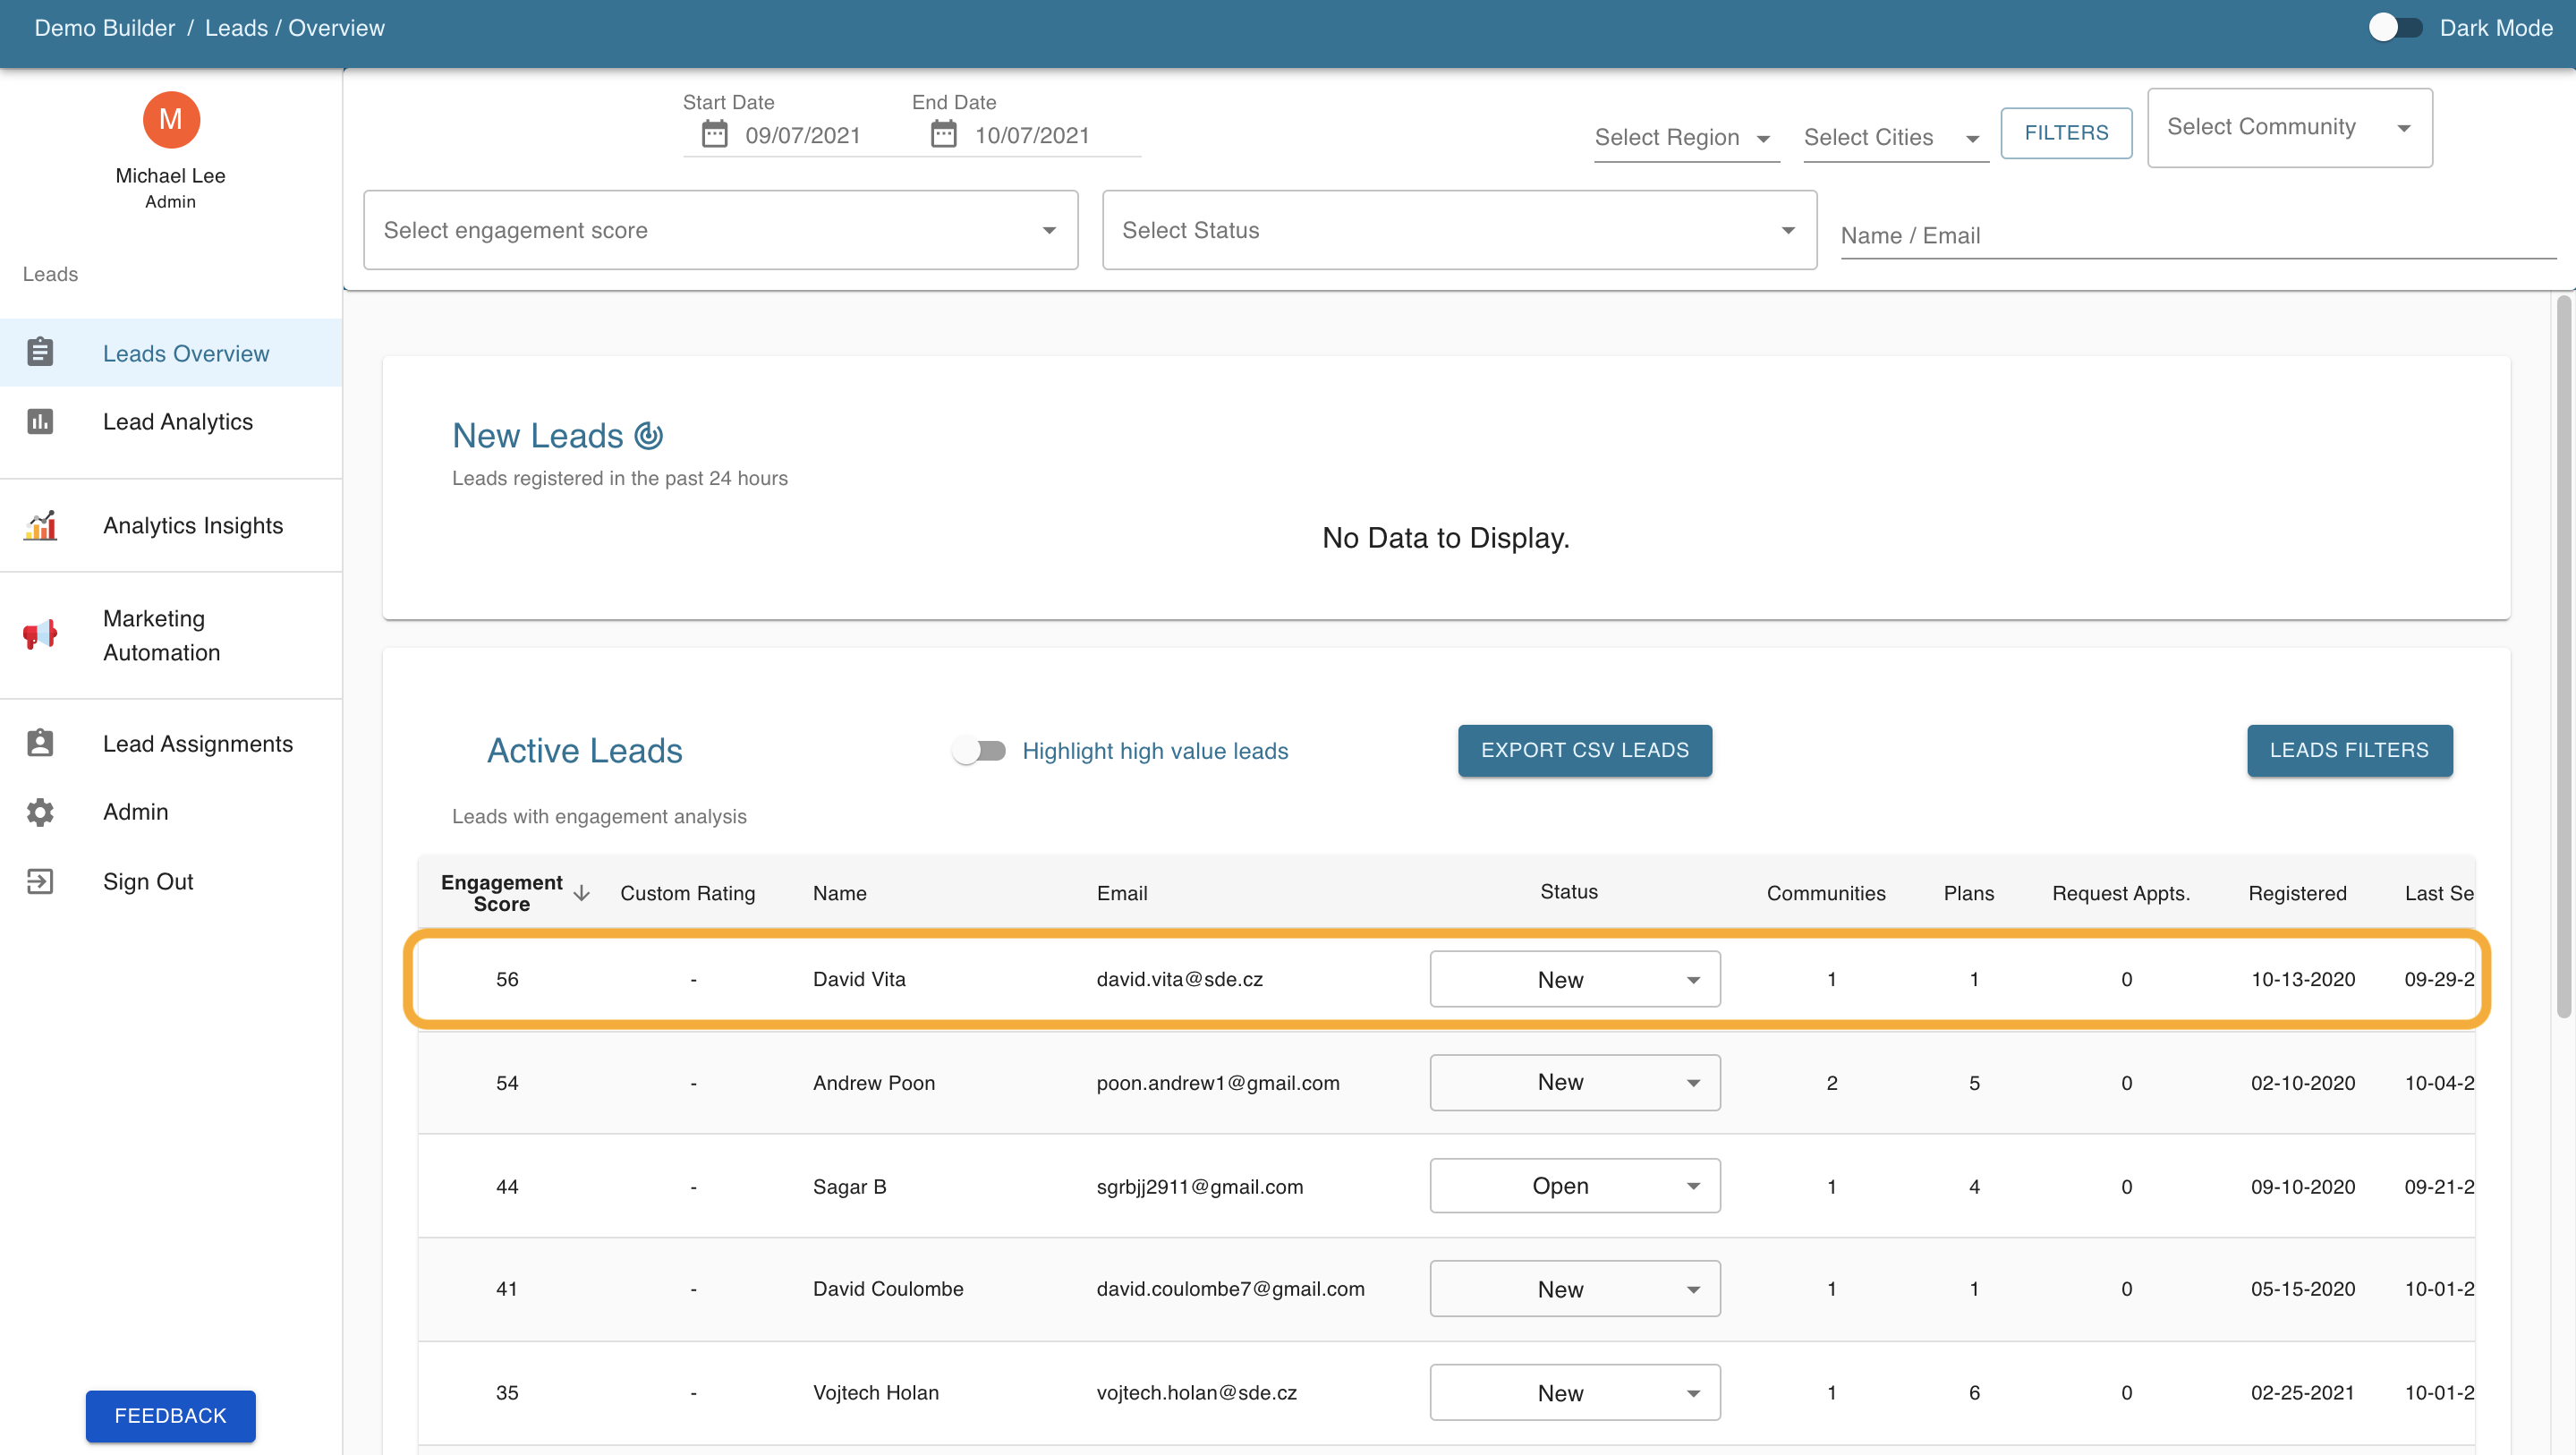
- Log into your Anewgo Insights Account. Click “Launch” on Leads Insights.
2. The Leads Overview page displays two tables: New Leads and Active Leads. At the top is a variety of filters that can be used to narrow leads based on specified criteria
3. Click on the row of the lead you want to assign an agent to
4. On the upper right of the quick report, click “Assign Agents”.
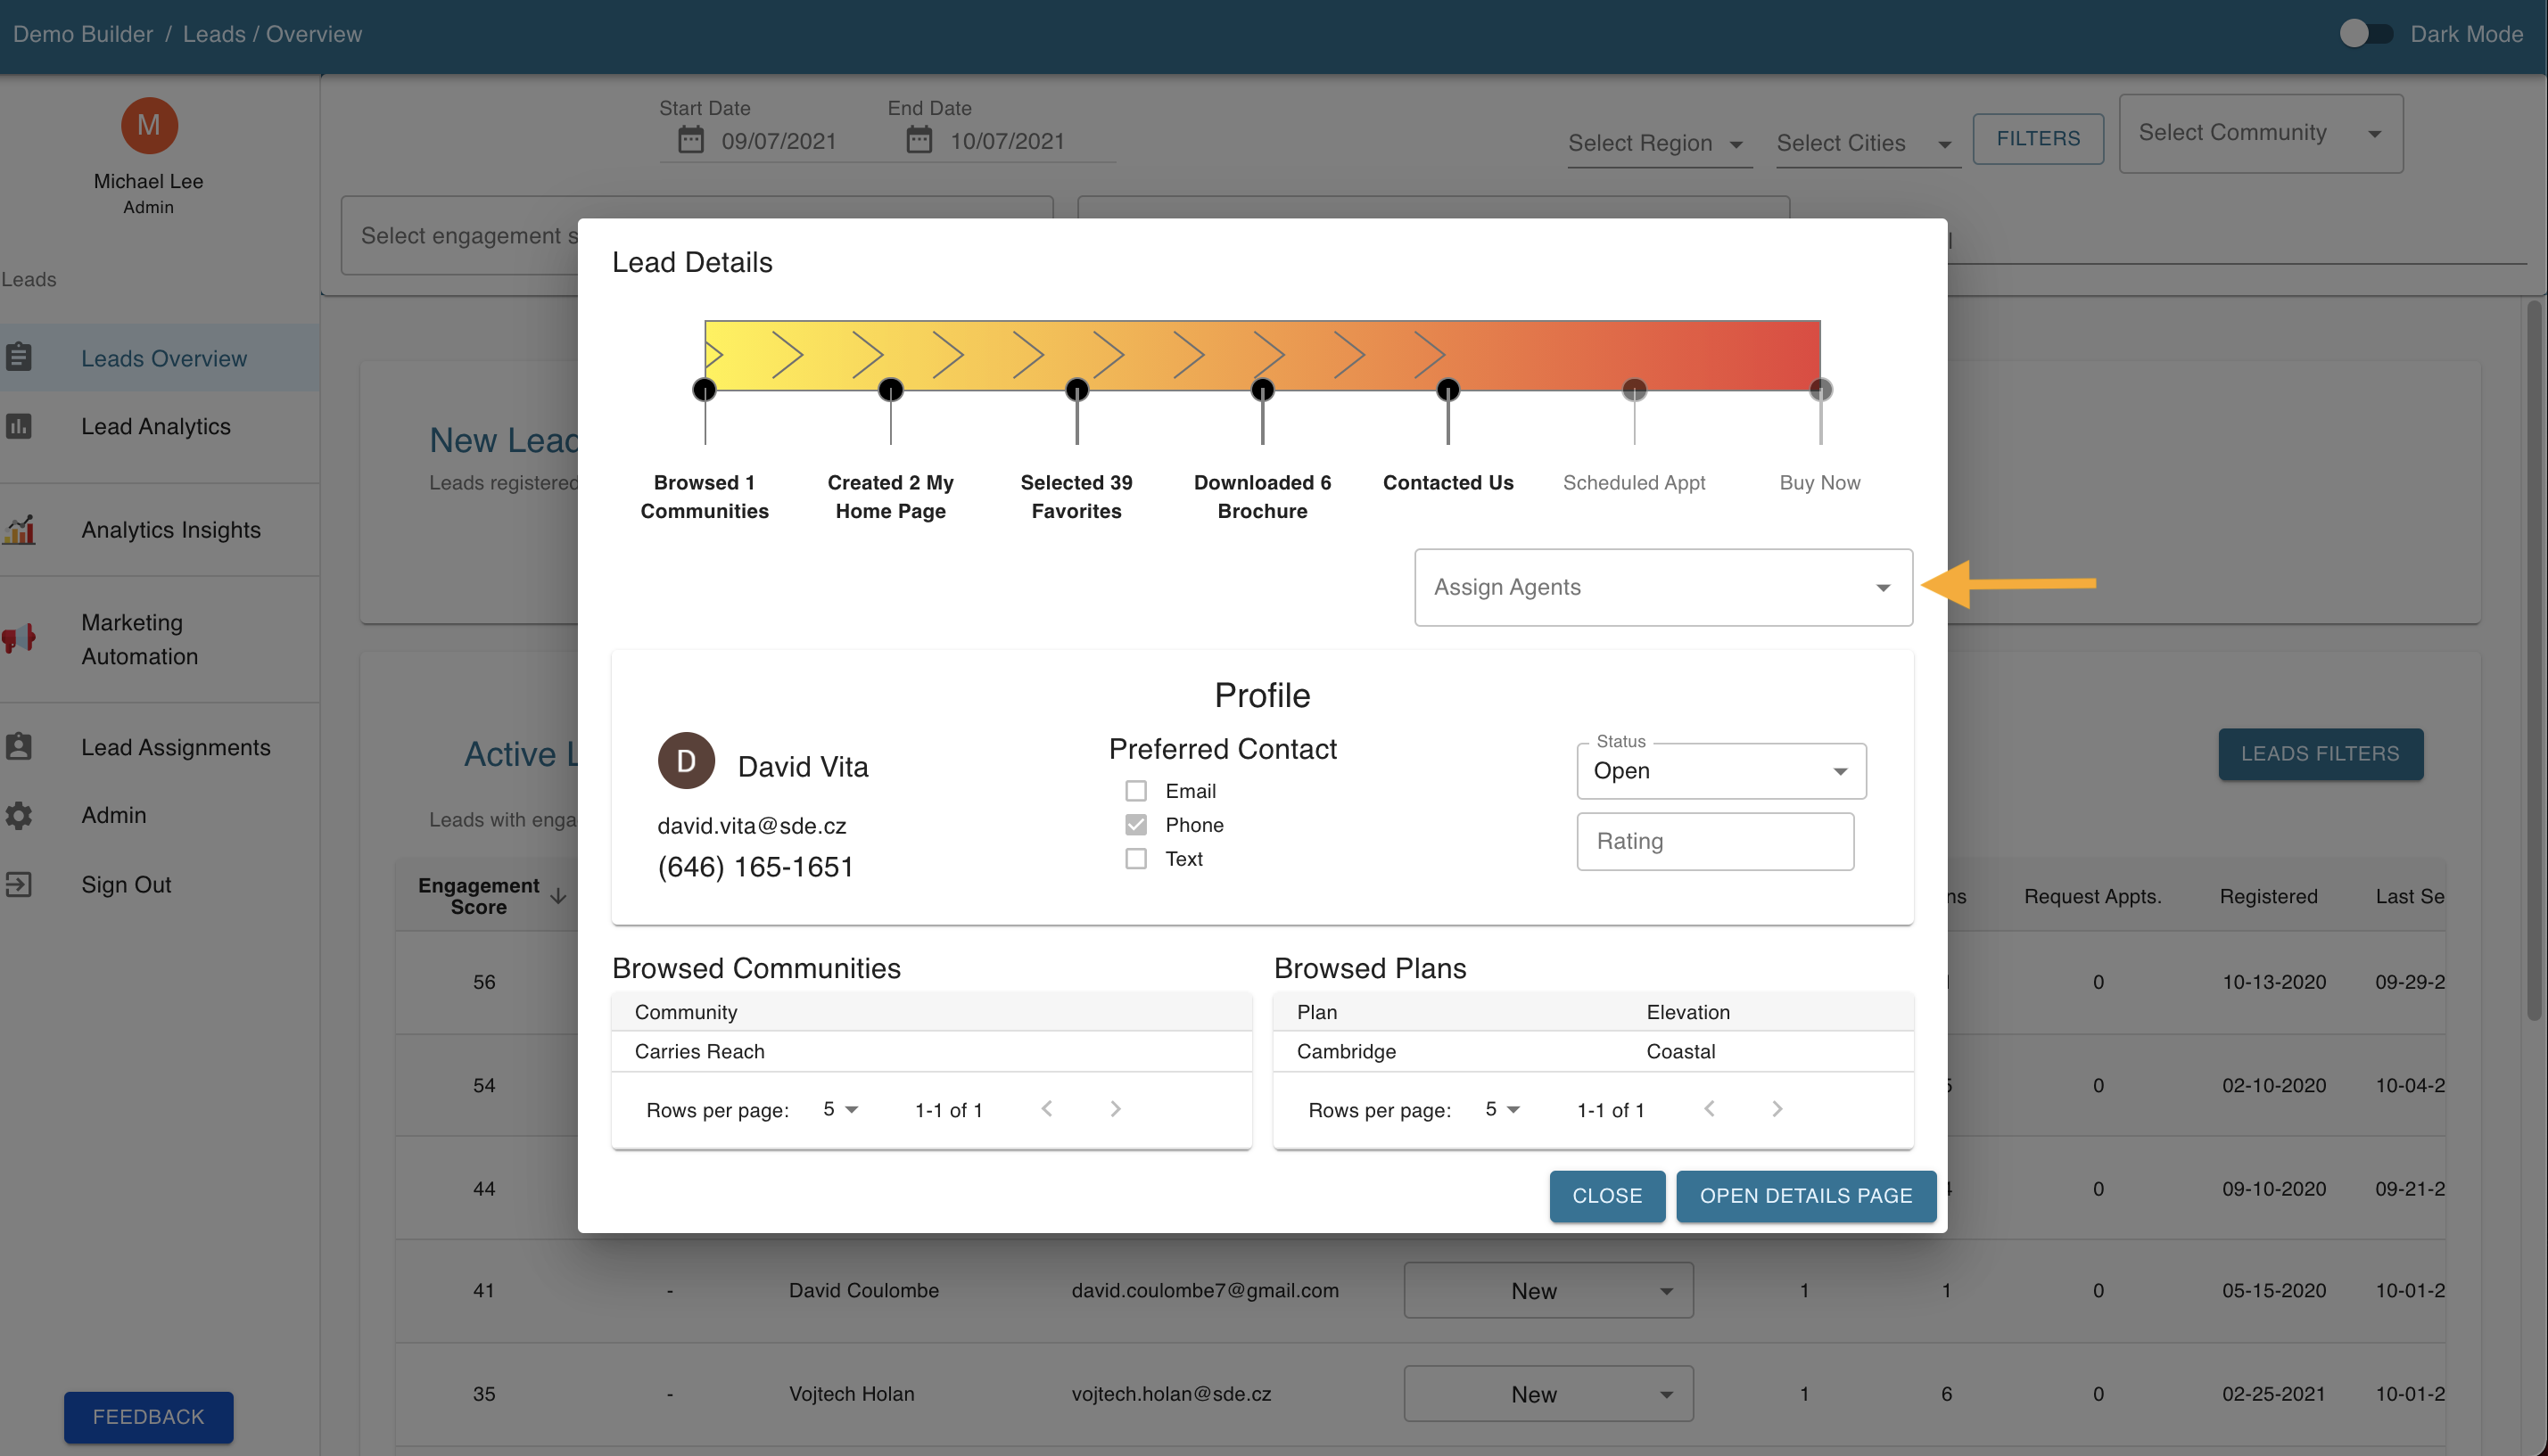
5. Select the agents that you want to be assigned to the prospect from the drop down menu.
