Step-By-Step Instructions
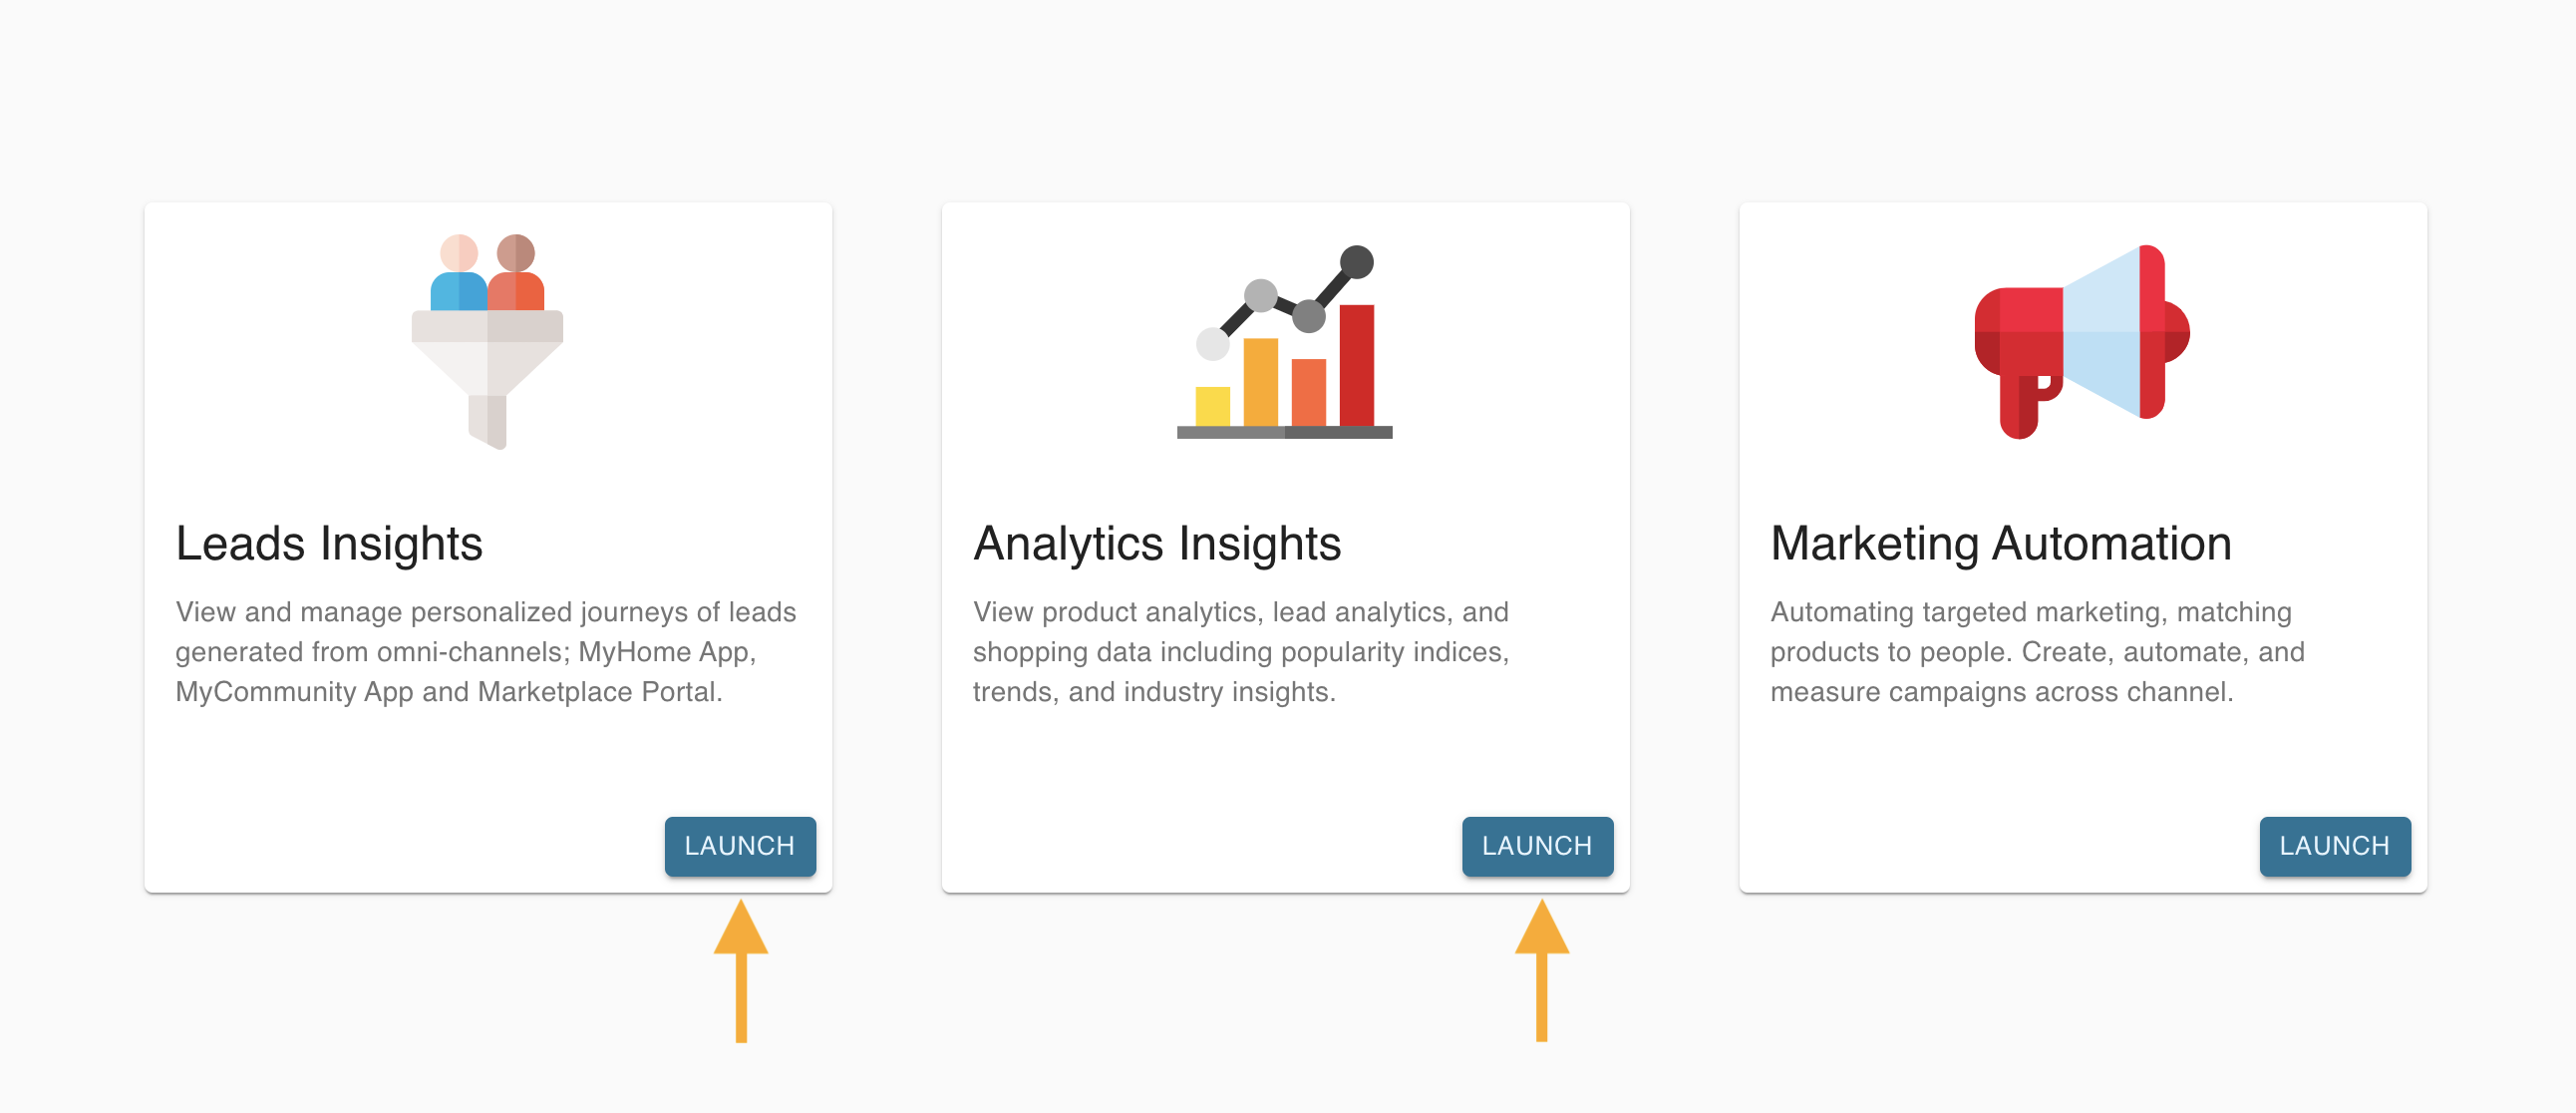
- Log into your Anewgo Insights Account. Click “Launch” on either Leads Insights or Analytics Insights (either one will take you where you need to go).
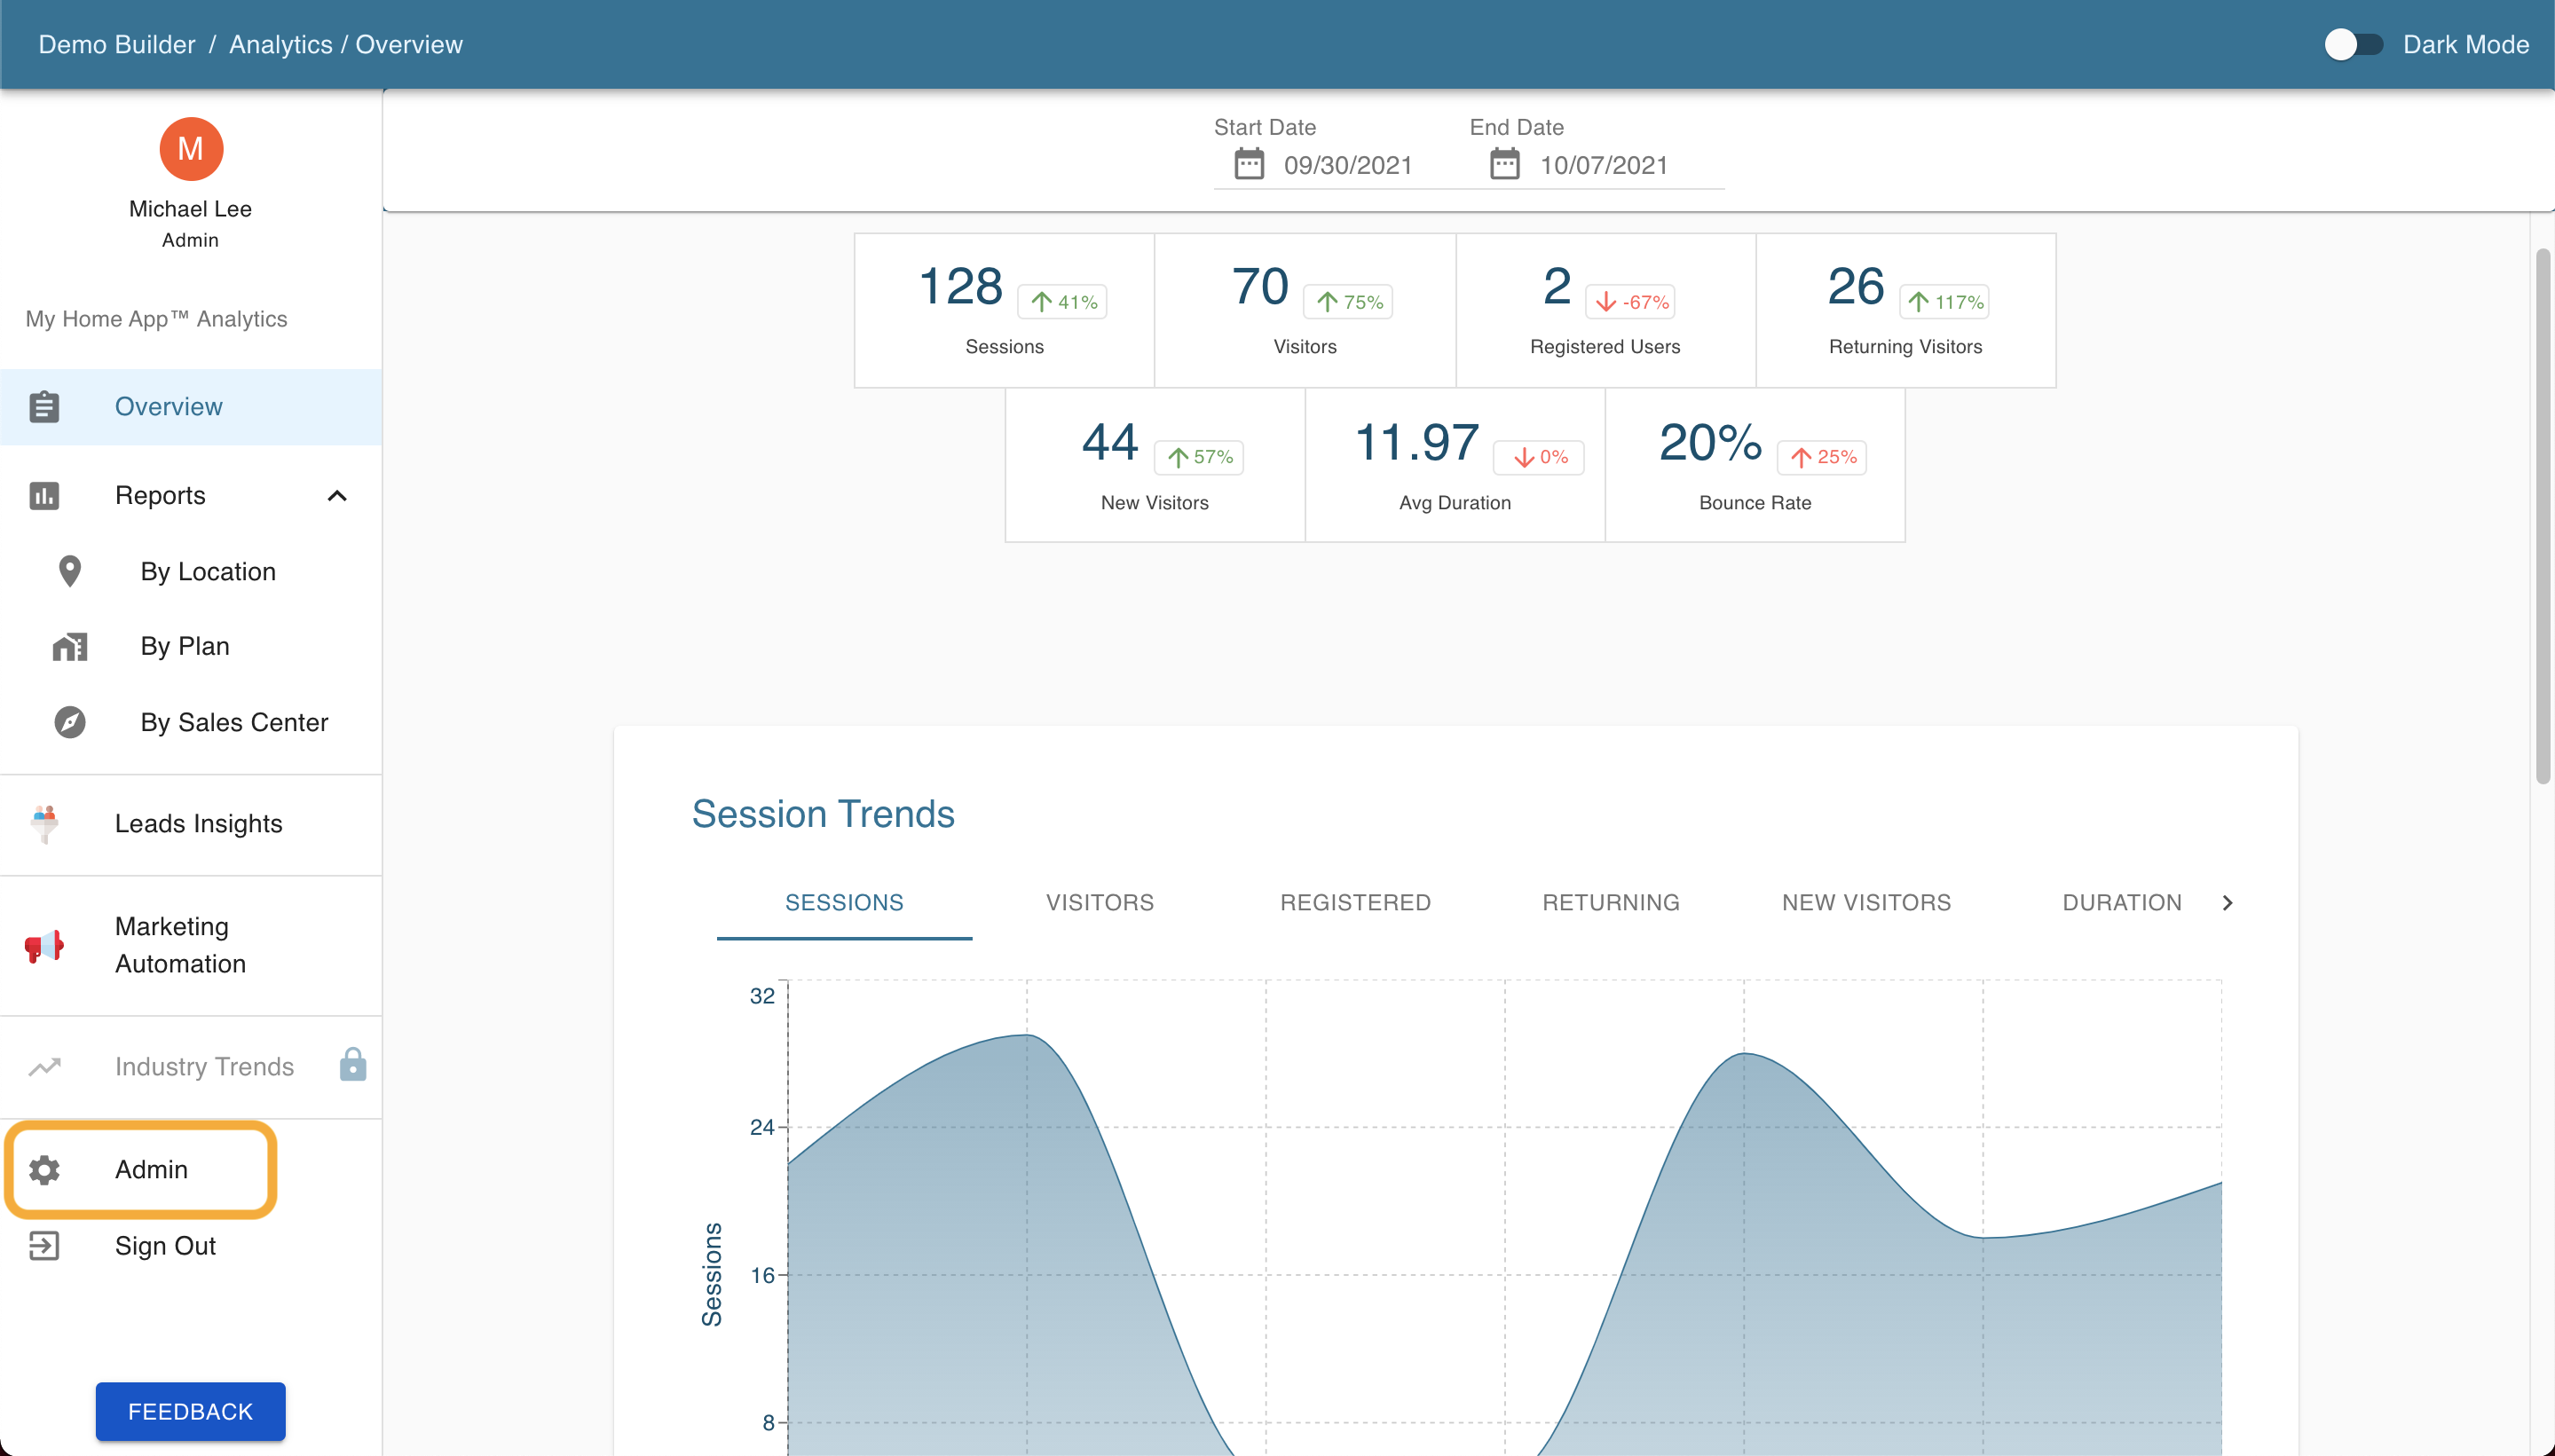
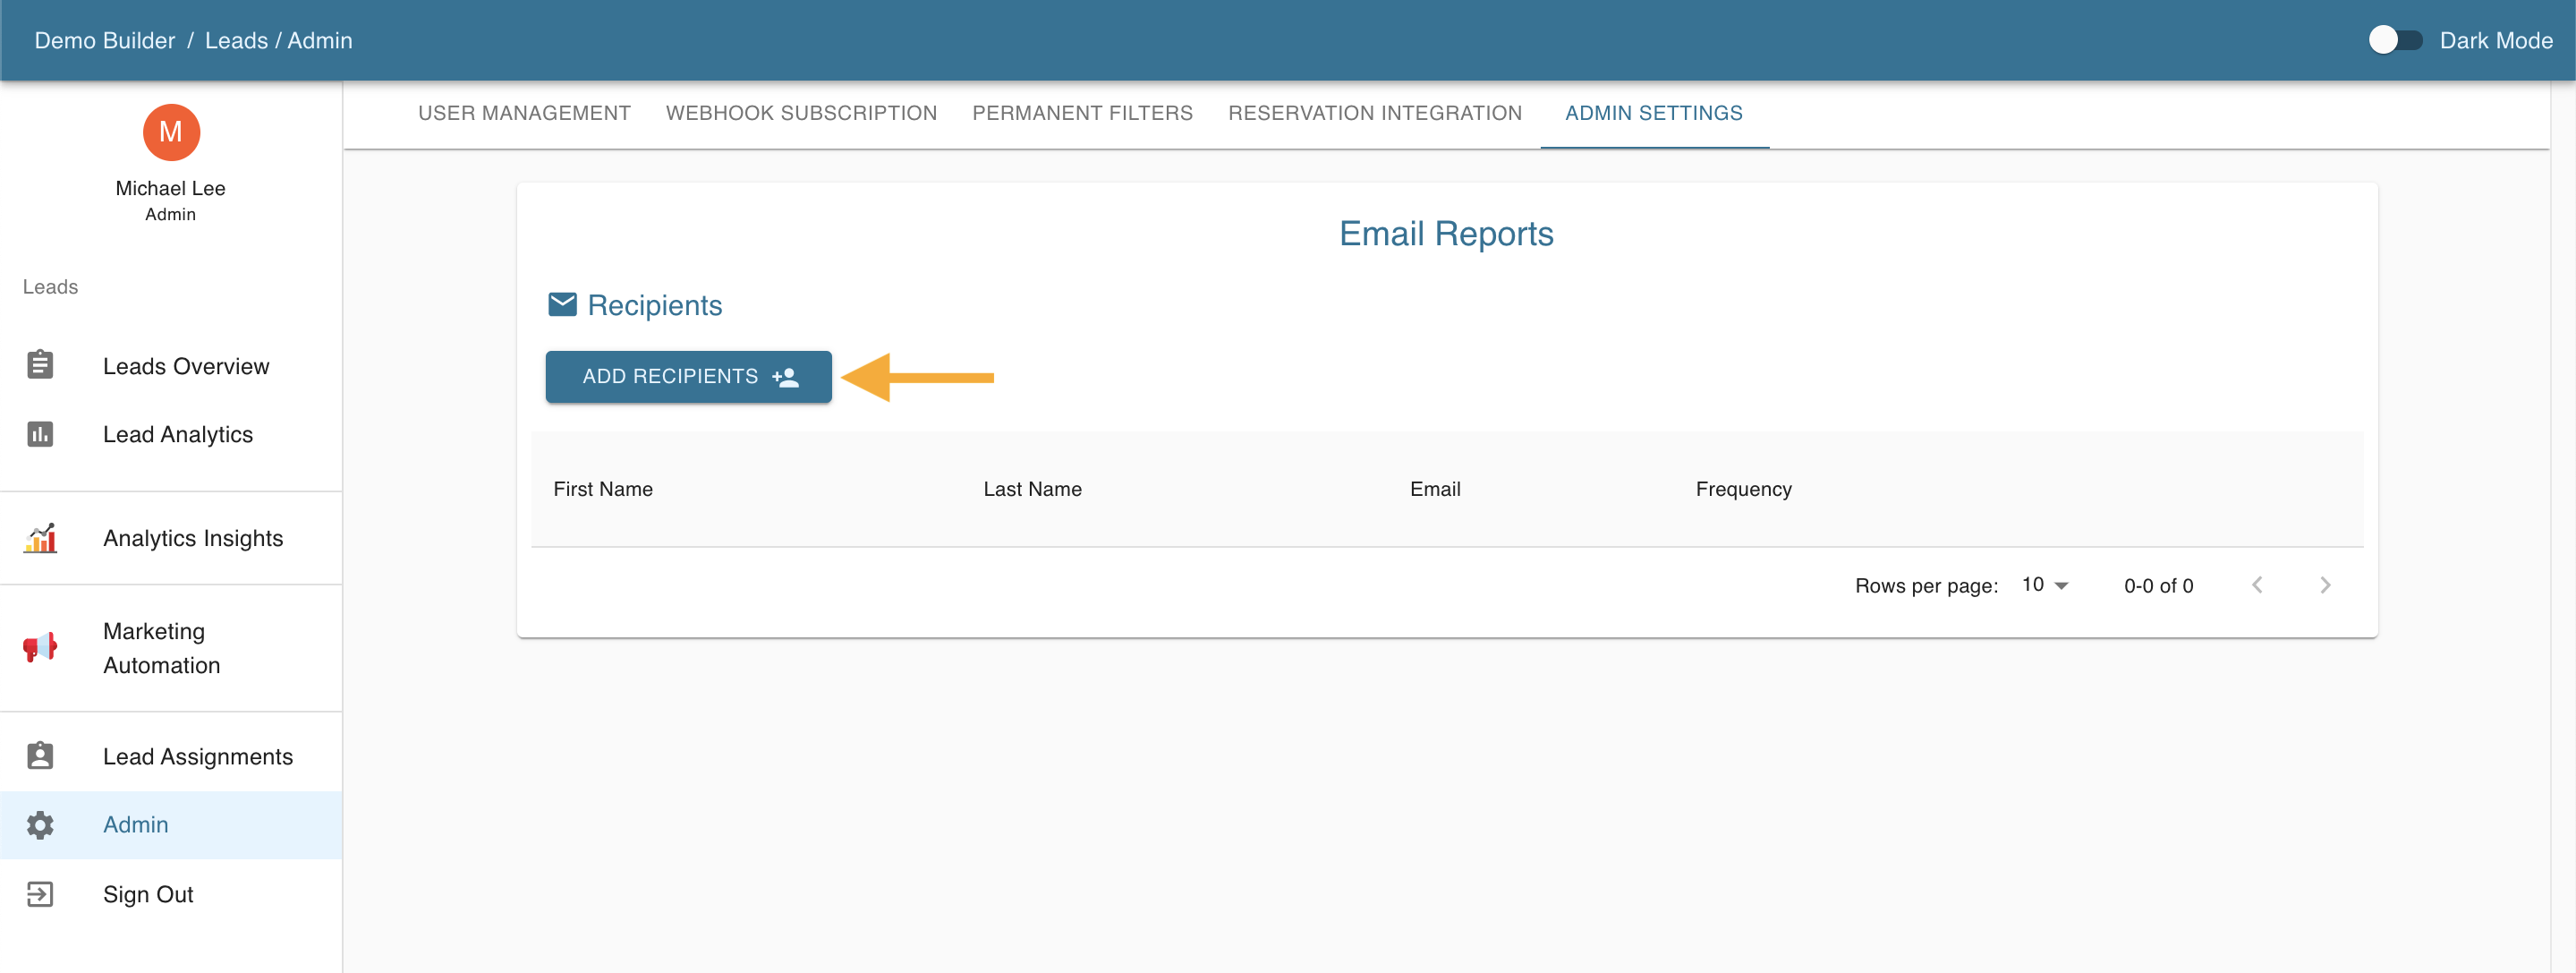
2. Find “Admin” on the left hand menu and click it.
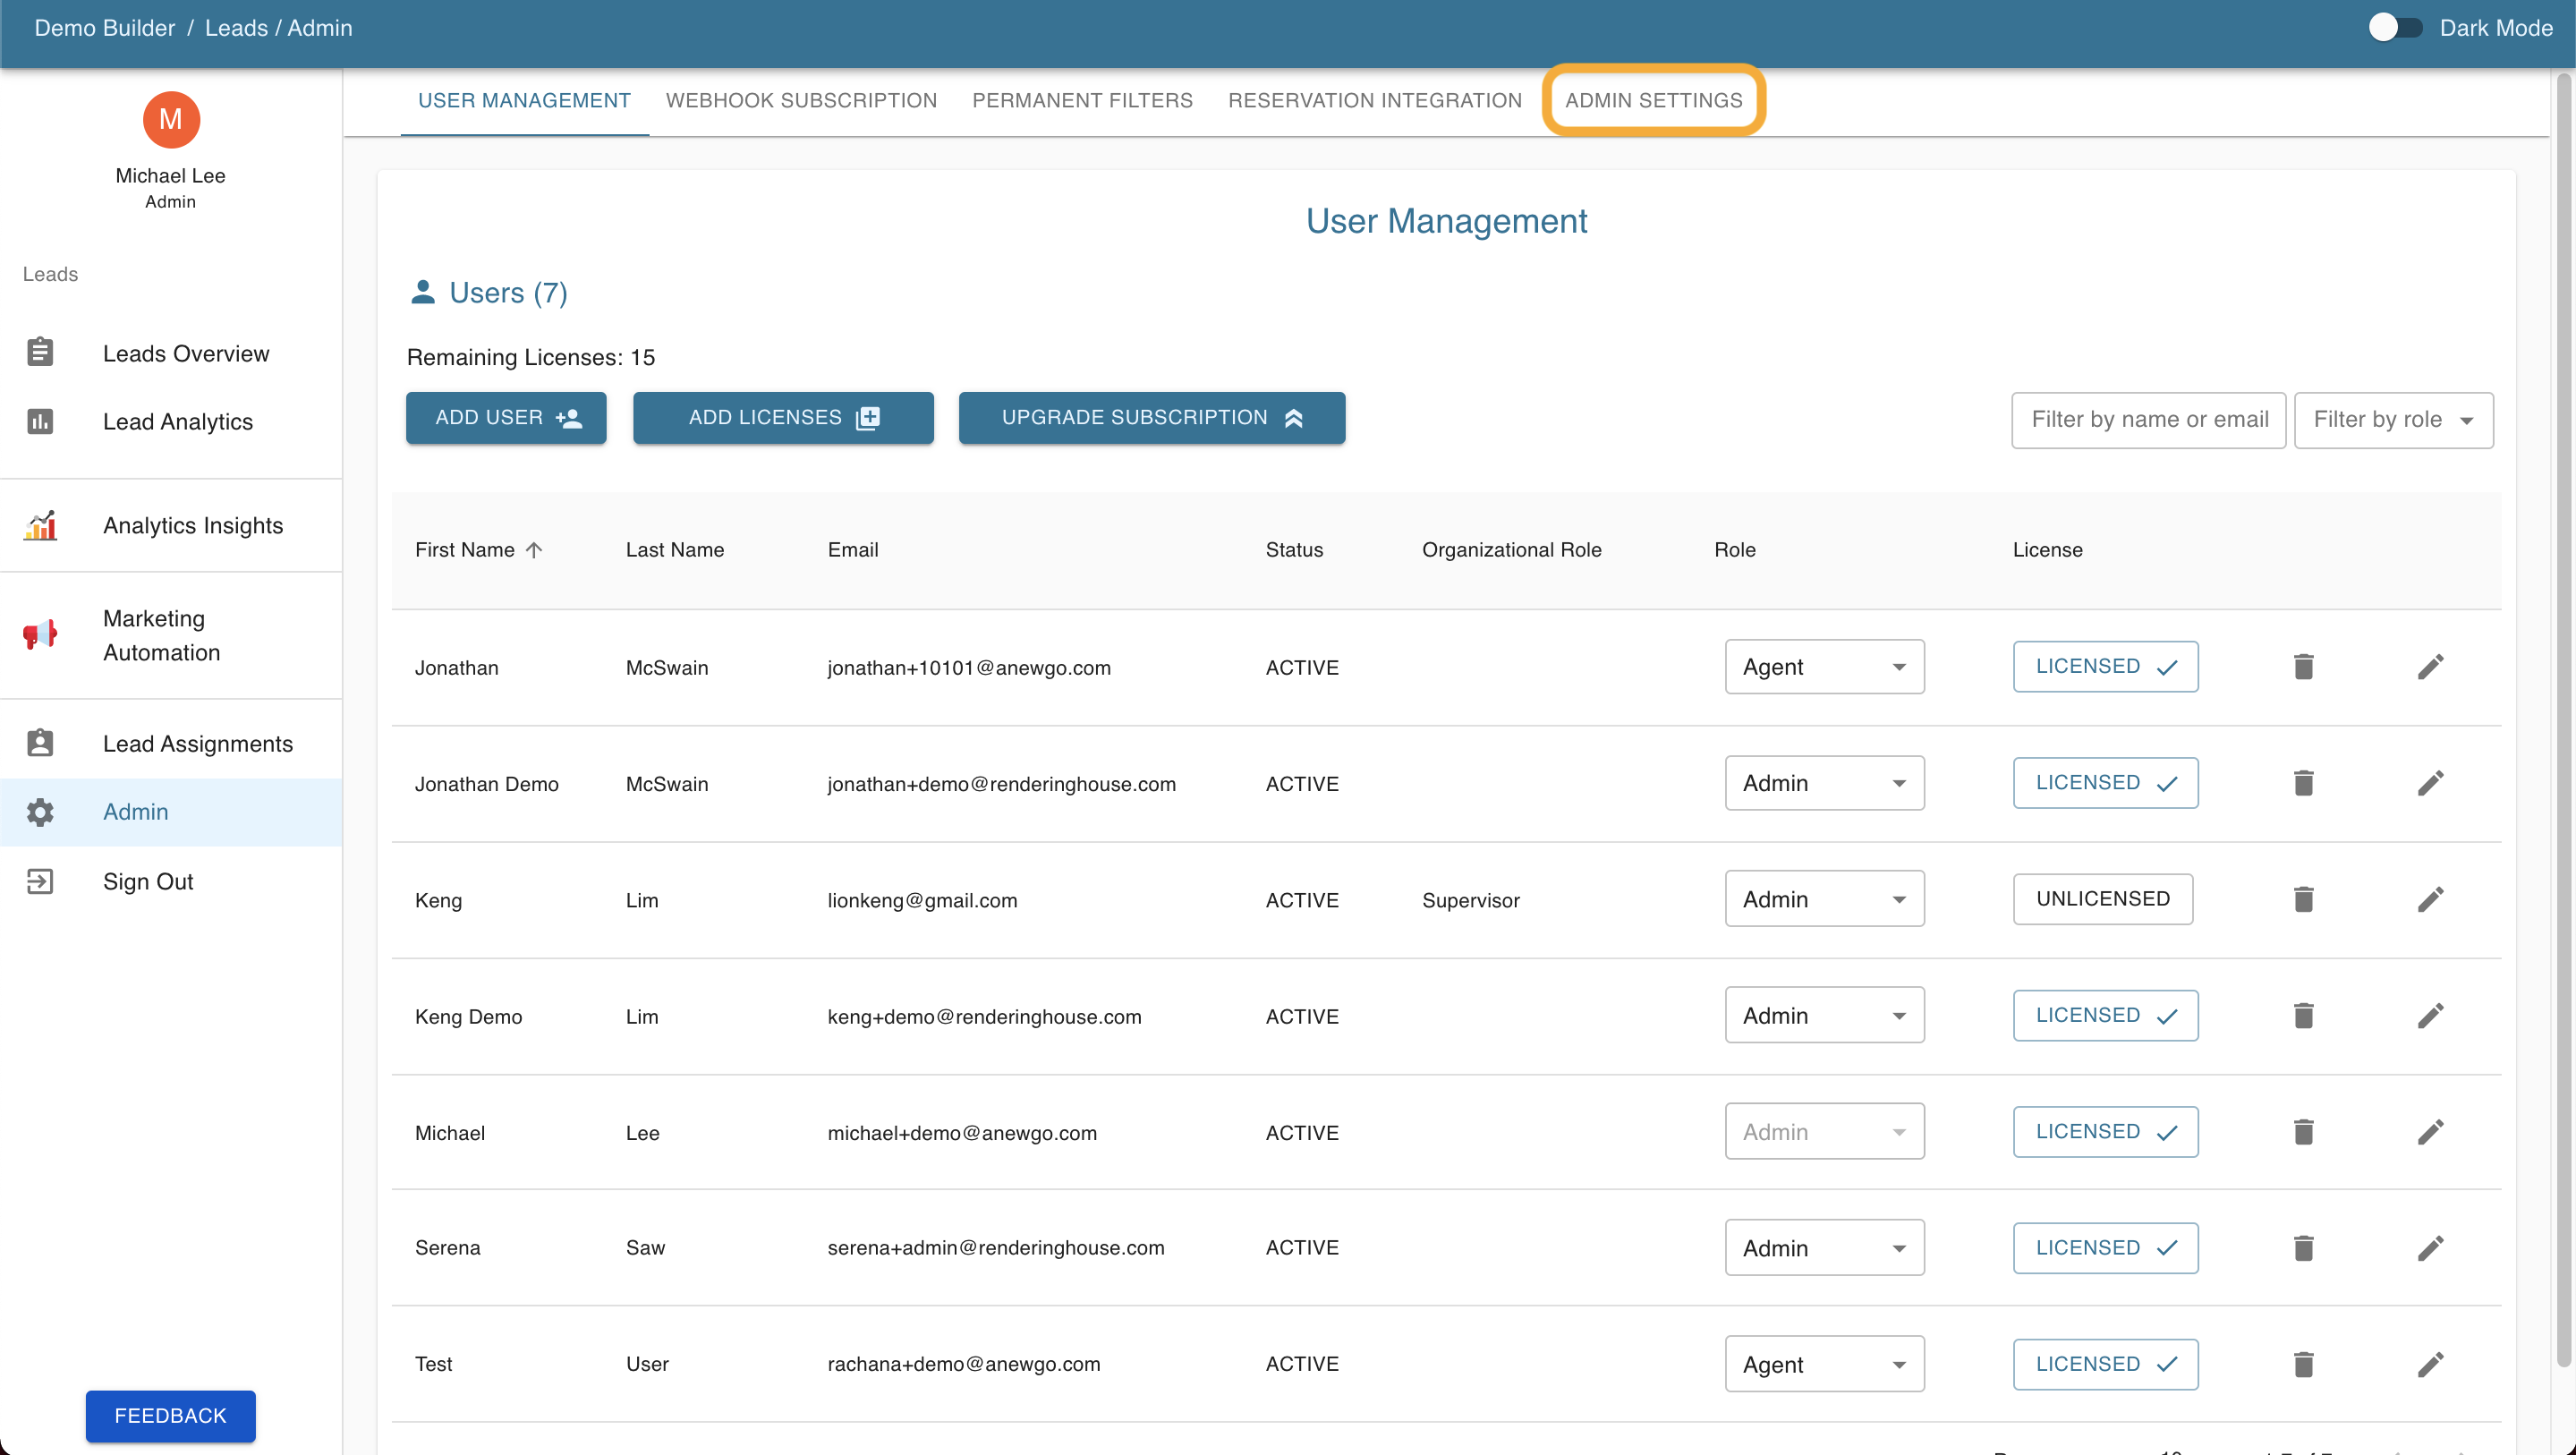
3. Then click on “Admin Settings”.
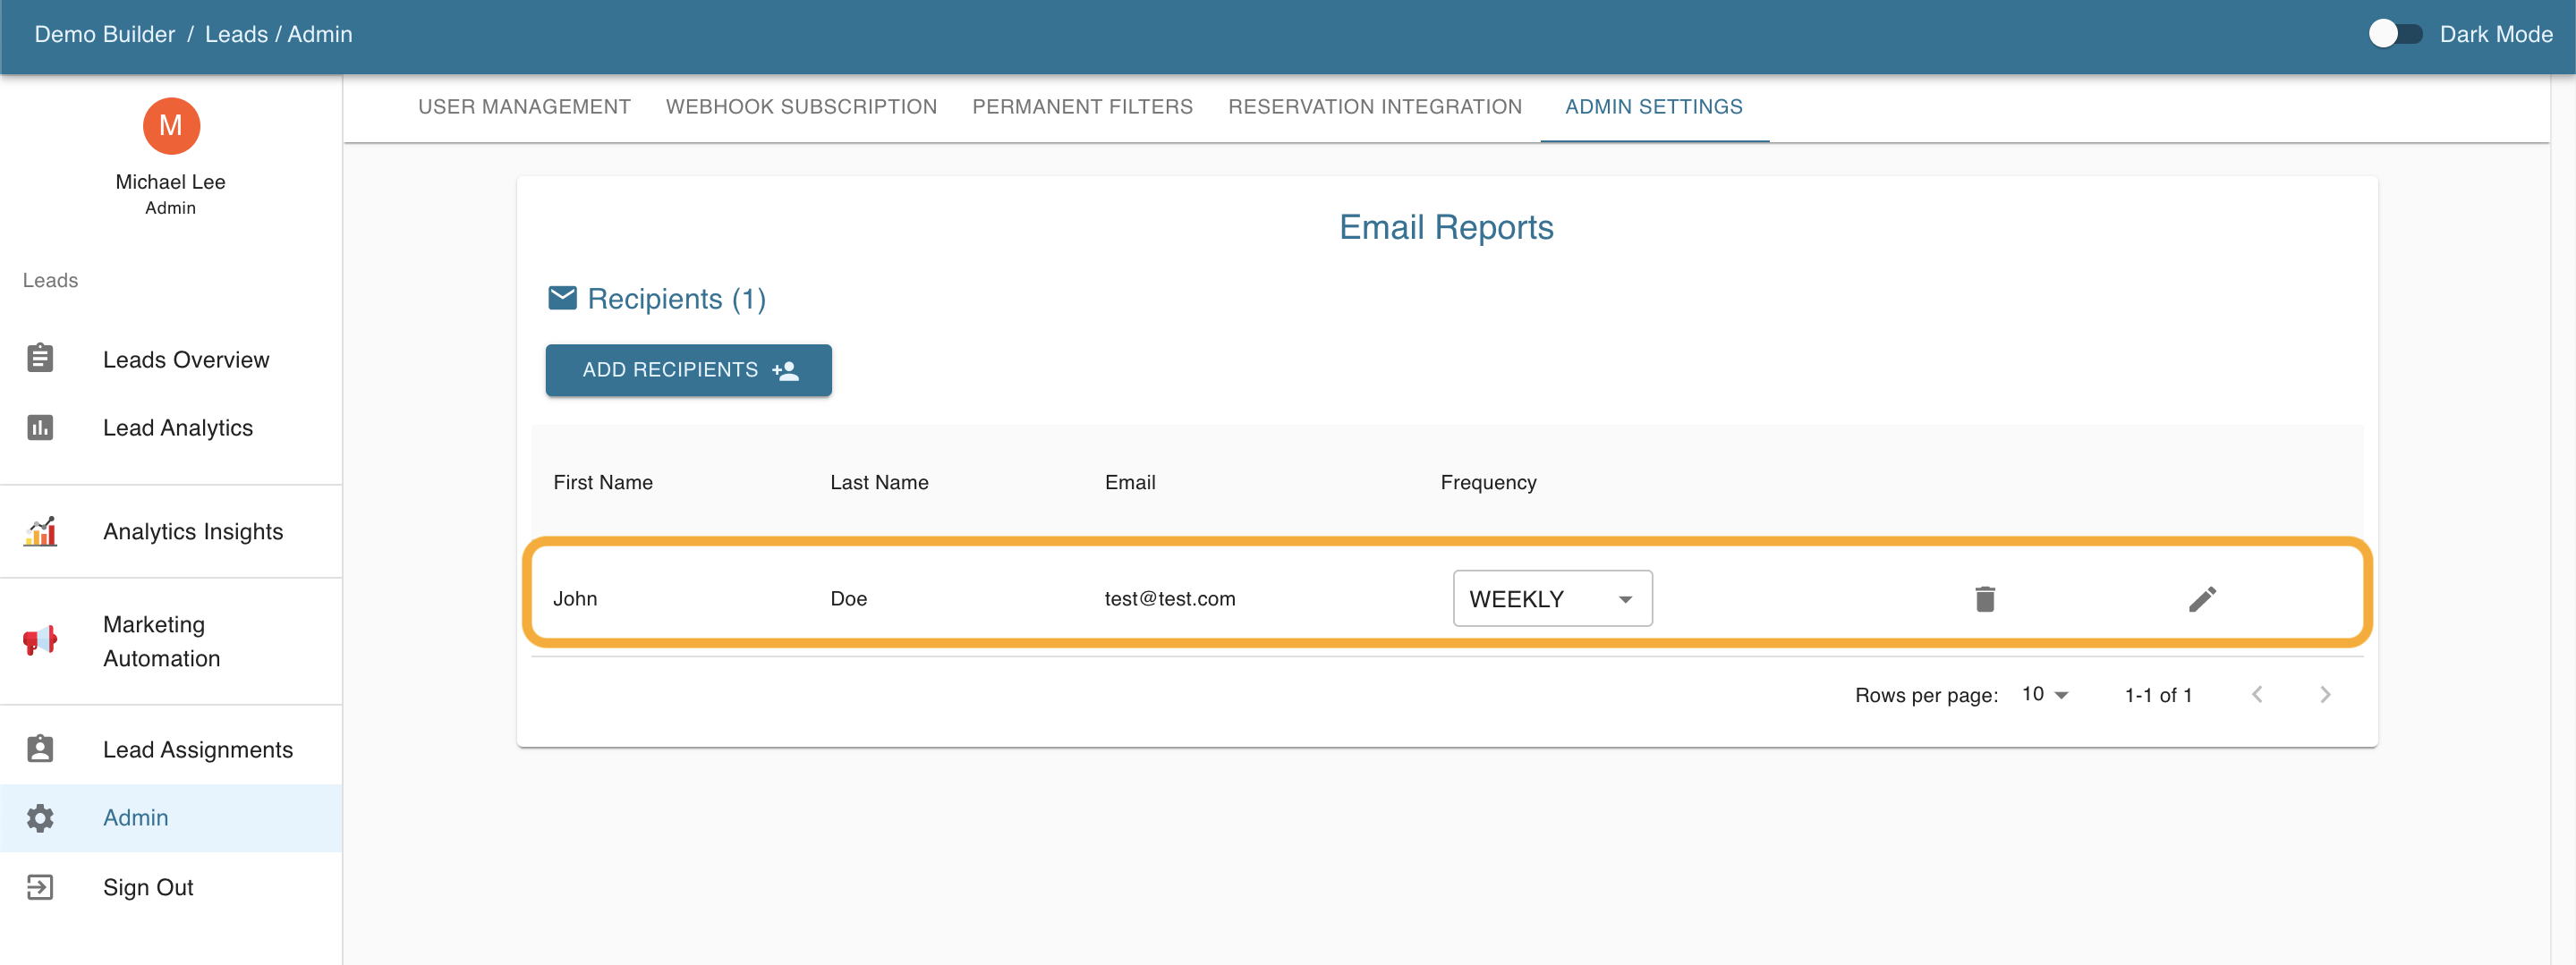
4. Click on “Add Recipients”
5. This is where you will fill out the name and email for the user you would like to email a report to. Then select the frequency that the recipients will receive the report. Click “Submit” once you have filled it out.
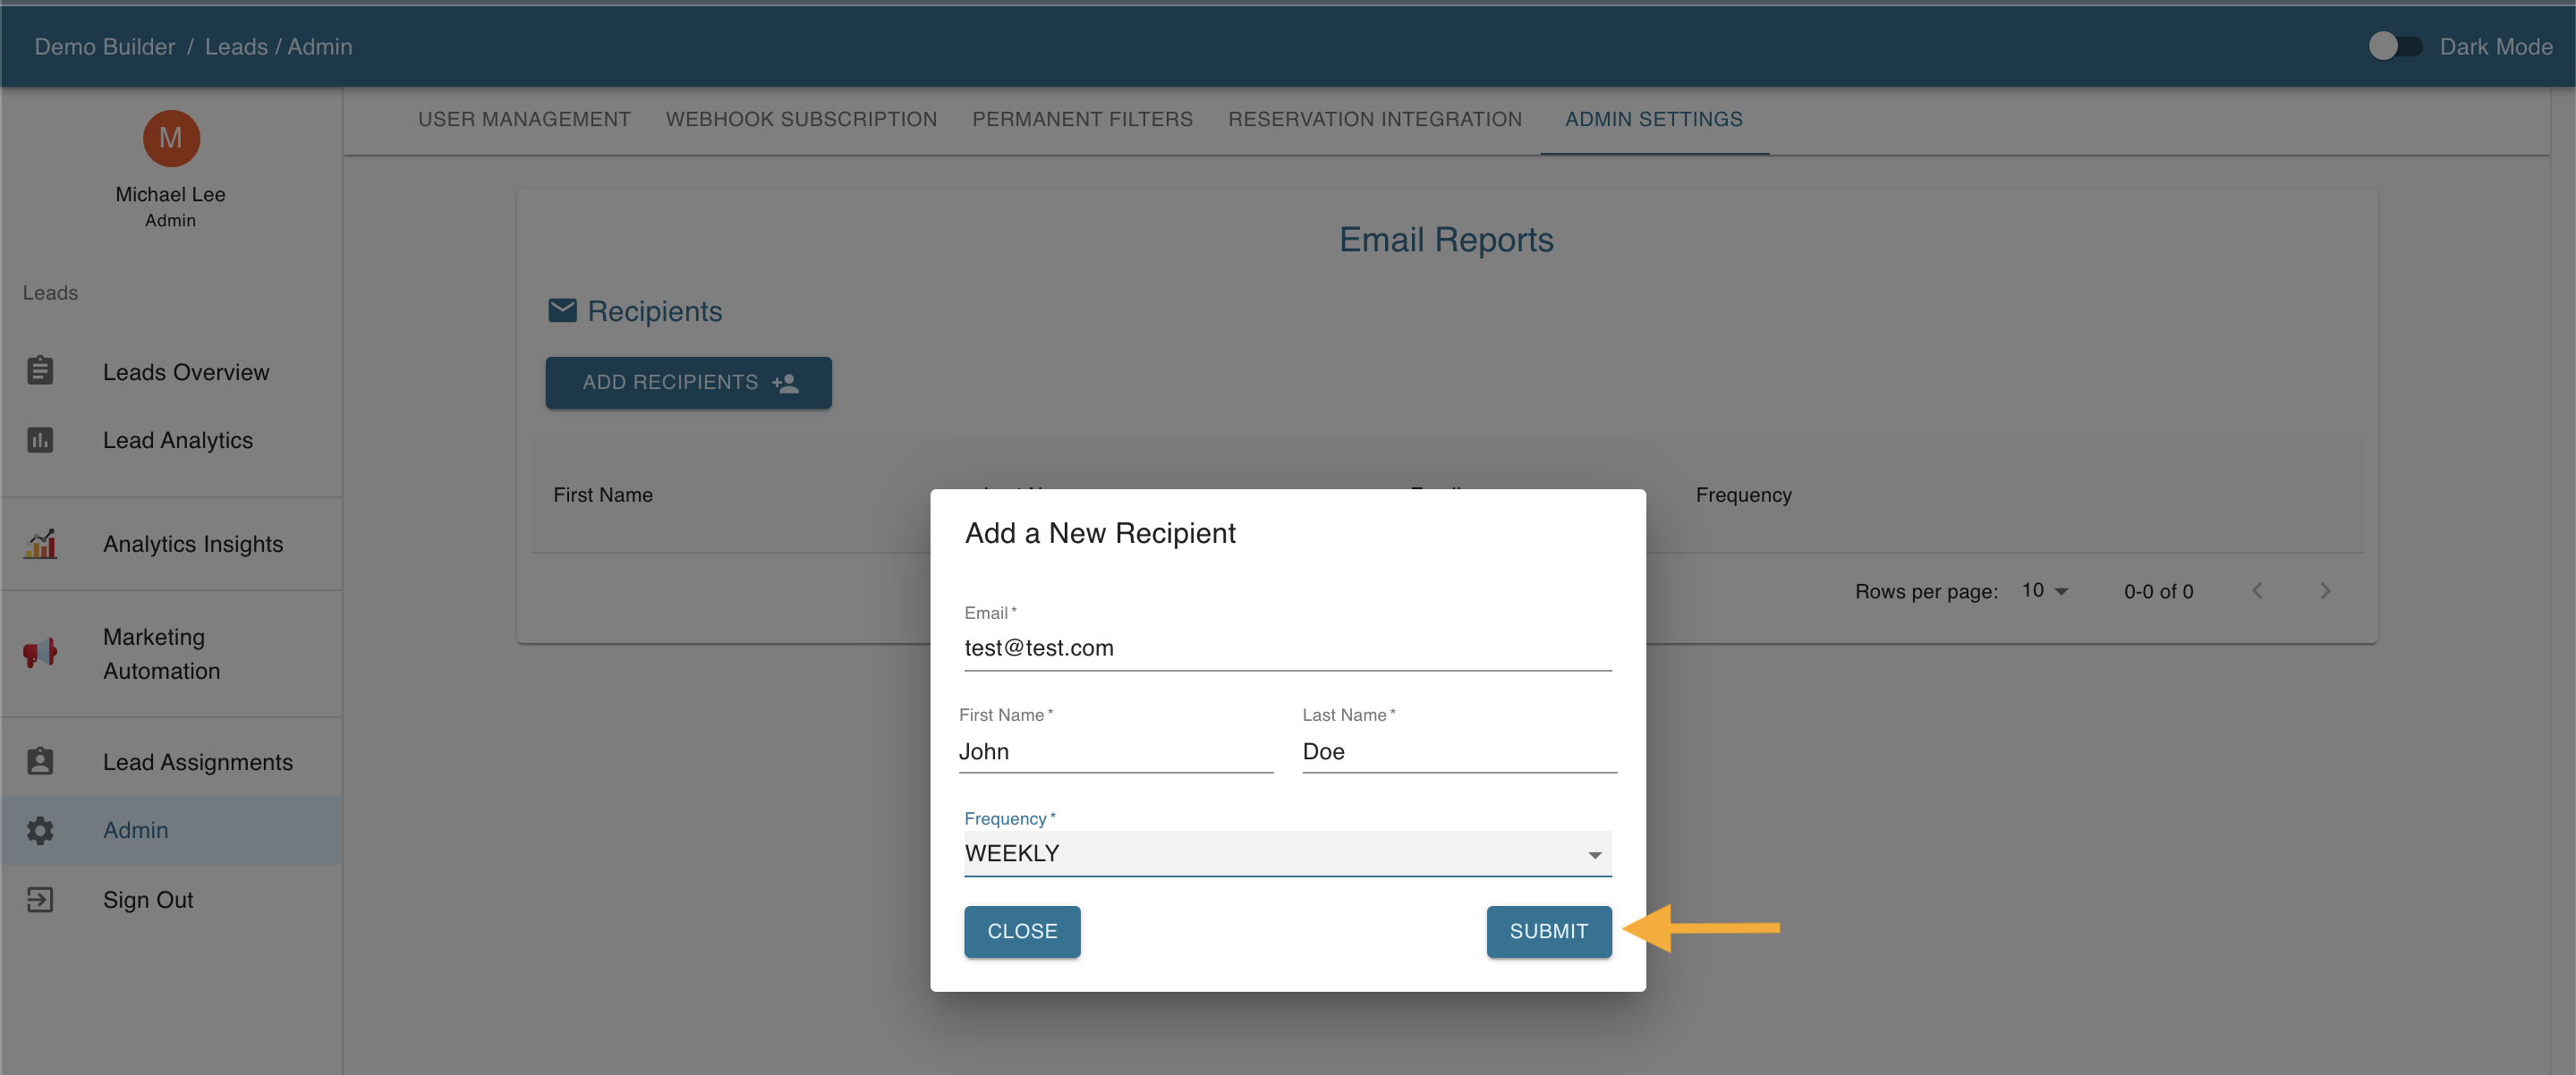
6. The recipient is now added to the email report list.